Picture this scenario: You’re running errands around town when you spot a bump in the road. You fail to navigate around it, and suddenly one side of your car is two inches higher than the other. This is a common enough occurrence that many drivers might never stop to think about what just happened. But in many ways, it’s nothing short of miraculous that you’ve still got both front wheels attached. You can thank the humble constant velocity (CV) joint for the fact you’re not pulled over in the breakdown lane.
These little-known components are responsible for transferring torque from the transmission to the wheels, despite the constant up-and-down motion of the vehicle’s suspension that would see a lesser design snap in no time. The CV joints are a vital part of a vehicle’s driveshaft assembly, but are poorly understood by many casual drivers.
So what exactly is a CV joint? How does it differ from a CV boot, and what are some common signs of a failing CV joint? I’ll answer all these questions and more as we take a deep dive into all things CV joint-related.
What Is a CV Joint?
Constant velocity or “CV” joints get their name from their ability to maintain—you guessed it, a constant velocity while being rotated at different angles. CV joints are nothing new. In fact, the original concept for a component that transmits power between two angled shafts can be traced back to the 16th century. Early front-wheel drive cars used what were known as universal joints, which served much the same function as the modern CV joints. Although, they failed to maintain a constant velocity and became difficult to turn when operated at too extreme of an angle.
As front-wheel drive vehicles became more popular, engineers got to work perfecting the CV joint with the popular Rzeppa and Tracta joints hitting the market in the late 1920s. Today’s vehicles use either ball- or tripod-type CV joints—refinements of the original design that are sturdier, more reliable, and cheaper to produce.
A front-wheel drive vehicle typically features four CV joints: two inner CV joints that connect the transmission to the CV axle (also called a driveshaft or half-shaft) and two outer CV joints that connect the other end of the CV axle to the front wheel. These joints work at a variety of angles, allowing for the seamless transmission of power from the engine to the wheels, regardless of how bumpy the road might be. All front-wheel drive vehicles use CV joints, as well as many all-wheel drive vehicles and a steadily increasing number of rear-wheel drive vehicles.
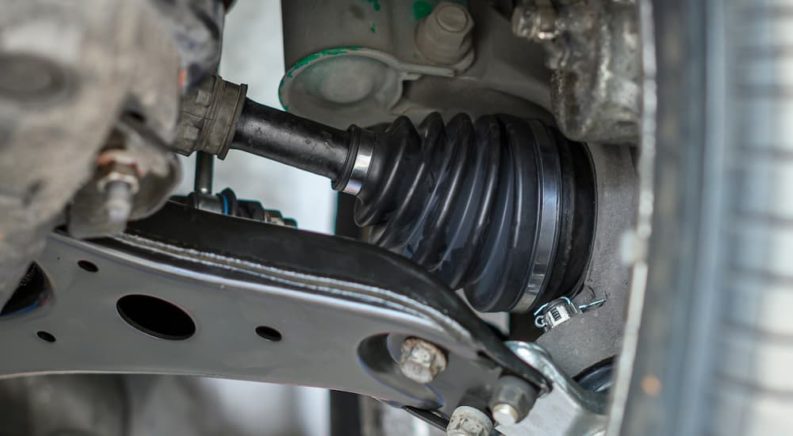
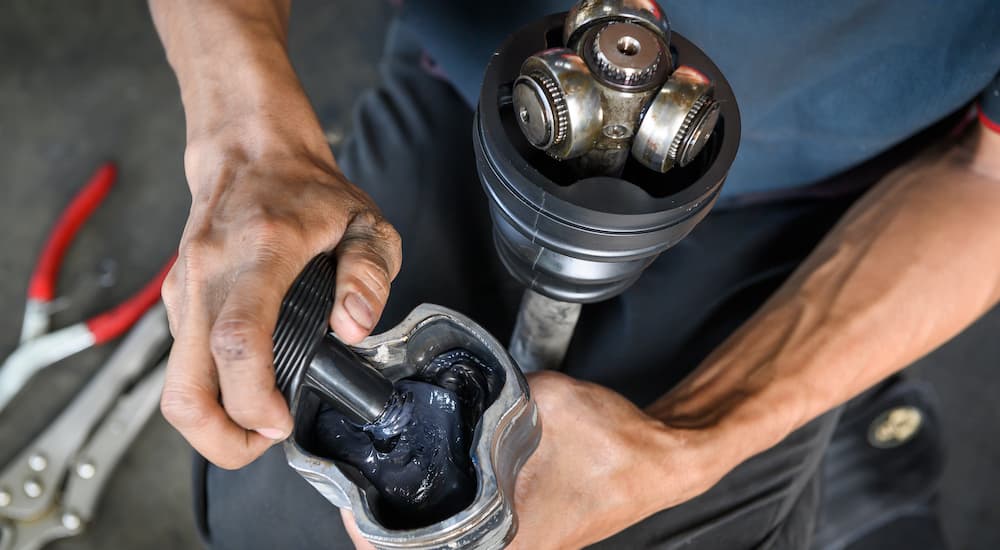
Given the fact that CV joints are located underneath the vehicle, they’re typically exposed to their fair share of dirt, water, grime, and other contaminants that you don’t want gunking up the component. This is where CV boots come in. These rubber boots, also sometimes referred to as CV gaiters, are flexible, ribbed spheres that effectively cover the CV joint, protecting its sensitive inner workings from whatever the road can throw at them. CV boots are usually filled with a specialized compound such as molybdenum disulfide grease, which can stand up to high temperatures and friction without thinning out and escaping from the boot.
With apologies to Nancy Sinatra: These boots are made for keeping water and dirt away from your CV joint, and that’s just what they’ll do, but one of these days these boots could end up crapping out on you. When the rubber shell of the CV boot is worn, exposed to extreme temperatures, or struck by an object, it can crack or split. This typically occurs around the part of the outer CV boot located closest to the wheel—where road debris, rocks, and packed snow can take their toll on the relatively fragile rubber shell. Once the boot is punctured, the centrifugal force of the spinning driveshaft will allow the molybdenum grease to escape; contaminants can then work their way in. This leads to no shortage of problems for the CV joint itself, which can quickly wear down due to a lack of lubrication and excessive corrosion without the boot’s protection.
Signs of a Failing CV Joint or Boot
Aside from the odd catastrophic failure, CV joint issues can most often be tied to a failing CV boot, but what are some common signs that your CV joint needs a little TLC? I’ll break down some of the more common symptoms below, and discuss how to inspect your CV boots for wear and tear.
Grease
As mentioned previously, your CV joint is packed in a thick layer of molybdenum disulfide grease. When the CV boot cracks or fails, this grease can quickly escape, leaving your CV joint dangerously unlubricated and susceptible to contamination. As this grease works its way out of the CV boot, it gets flung every which way—including all over your tires, fender well, rim, and the interior of your wheel. If you find a trickle of dark grease in any of these locations, especially when paired with any of the symptoms listed below, you’re likely dealing with a faulty CV boot.
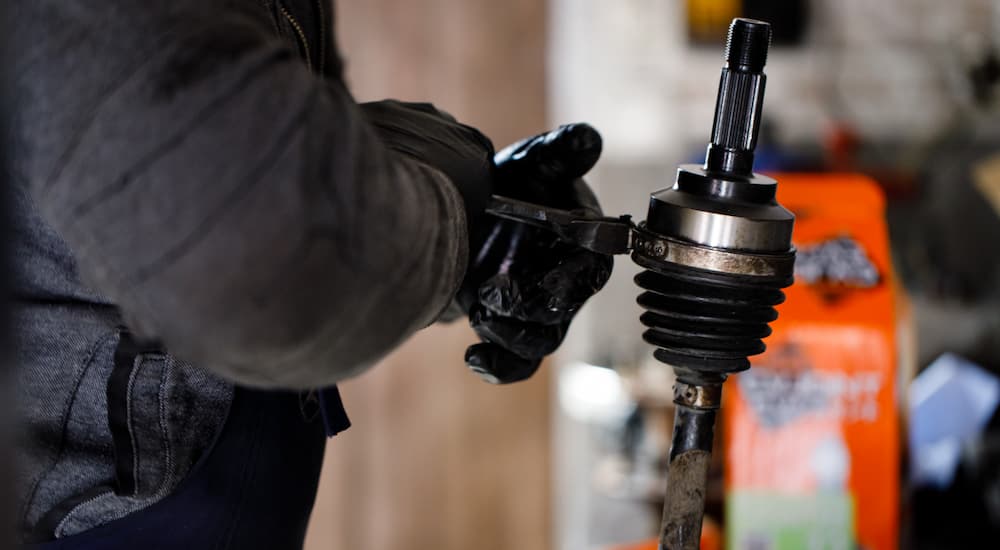
There might still be time to address the issue before the CV joint itself is compromised, so don’t delay when you suspect an issue. If you want to confirm that your issue is related to the CV boot, just get under the vehicle and perform a visual inspection. Look for any cracks, tears, or loose clamps. If you catch the issue early enough, you could get away with rmieplacing just the CV boot—but if it gets out of control, the entire assembly might need an overhaul.
Loud Noise When Turning
If you notice a distinct clicking or popping noise emanating from the vehicle when you go to turn, it could well be tied to an issue with the CV joint. There’s a simple test for diagnosing this issue: Simply shift the vehicle into reverse, turn the wheel all the way to one side, and step on the gas. As you reverse in a circle, listen for that popping/clicking sound. If it gets louder than it was when operating the vehicle normally, you’re probably looking at either a faulty CV joint that’s on its last legs or an issue somewhere else in the driveshaft assembly. Either way, it’s not safe to drive on, so get to a trusted mechanic as soon as possible for confirmation.
Bouncing or Vibrations
If your CV joint or CV axle is damaged, it can throw the entire assembly out of balance. This will often manifest in the form of bouncing or vibrations, which will lead to a rougher ride than normal. Vibration is one of the most common symptoms of an ailing vehicle, so it’s not always the most useful diagnostic tool—but when it comes to the CV joint and axle, the issue will typically become more pronounced as you accelerate. This makes it a little easier to distinguish from some other type of malfunction-related vibration. As the vibrations increase, drivers might have difficulty controlling the vehicle, leading to a dangerous ride for everyone involved. If the vibrations reach the point where your control over the vehicle is compromised, it’s well past time to take it in for a look.
Knocking Sounds
If you notice a knocking sound from the inner CV joint on a front-wheel drive vehicle or the inner or outer CV joint on a rear-wheel drive rig, you might be dealing with a worn CV joint. You can perform a similar test to the one described above, alternating between forward and reverse and accelerating and decelerating while listening for any change in the noise. If the sound is more noticeable when you’re in reverse, the CV joint or axle may be to blame. Unfortunately, these sort of phantom knocking sounds are a very common symptom of a wide variety of automotive issues, so it can be tough to narrow it down to the driveshaft assembly in many cases.
Repair
The CV joint has a certain shelf life and once it’s been compromised, no amount of repair work is going to match the safety and performance of a replacement part. You might be able to save some money with a reconditioned part, but usually, this is a situation where a wholesale replacement is in order. The CV boot offers a little more leeway: if you catch a small rip or crack in time—that is, before the molybdenum grease has worked its way out and the dirt and water work their way in—you might be able to get away with just replacing the boot. However, in many cases, by the time you’ve tracked the issue to a CV boot, the damage is already done. It’s never a bad idea to replace the entire drivetrain assembly (or at least one side of it) all at the same time, as having components at different levels of wear can cause bigger issues down the road.
A CV joint, boot, or axle replacement is not on the easier side of the car repair spectrum. The process of replacement involves several specialized tools that you’re not going to find in the typical home garage, putting the task out of reach for many DIY-ers. It’s not totally out of reach—but in most cases, it’s a job best left to the professionals. Given the pivotal role the drivetrain assembly plays in the operation and safety of your vehicle, any CV joint, axle or boot replacement should be followed by a thorough once-over of the vehicle.
A CV joint repair can run you anywhere from $200 to $800; parts cost around $50 to $150 and the labor adds anywhere from $100 and $700. This estimate only covers one side of the vehicle, so if you want both the left and right CV joints replaced, the figure could balloon up to $300-plus for parts and $1,000 for labor. The newer and more common a vehicle is, the lower the average cost—but no matter how you cut it, a CV joint replacement can be an expensive job.
The news is a little better when it comes to the CV boot, as long as you catch it before the problem spreads to the CV joint itself. The problem is that in many cases, replacing the CV boot also involves replacing the CV axle, which can add to the cost significantly. Expect to pay anywhere between $400 and $600 for a replacement CV boot and axle. The boot itself is a bargain—with an average replacement cost of $175 to $250—but the axle is another story altogether, costing anywhere between $200 and $600. While it might be tempting to skimp out on a full replacement and save a little cash, your vehicle’s drivetrain is one area where you don’t want to cut any corners.
Caring for Your CVs
You might have never heard of a CV joint or boot before reading this article, but hopefully, you’ve gained a little appreciation for the role these hard-working components play in allowing you to safely navigate the road. While random, catastrophic failure of these parts isn’t common, it can happen, so it’s important to know the warning signs associated with a compromised CV joint or boot. More often than not, the issue can be traced to a faulty CV boot, which, if not dealt with promptly, can compromise the CV joint beyond repair.
There are a few good habits to get into if you want to make your CV boots last for as long as possible, such as taking it easy in off-road environments and not parking on uneven terrain like rocks or packed snow. CV joint and boot replacements can get expensive in a hurry, so if you want to save a little money, keep an eye on your driving and parking habits. And remember: If you suspect your CV joints, axle, or any part of your drivetrain is seriously compromised, get to your trusted local mechanic as soon as possible.