There’s nothing worse than a headliner that fails to live up to expectations. We’re not talking about a lackluster performance from a pop star or a disappointing set from your favorite band at a summer music festival, but rather the fabric that lines the roof of your vehicle. While they’re designed to last for a car’s entire service life, exposure to extreme temperatures, moisture, and other factors can easily cause the headliner to fail well before its time. These conditions can cause the headliner to sag, discolor, or lose its noise- and temperature-regulating properties, creating a less comfortable ride and impacting a vehicle’s aesthetic appeal and resale value. What’s a driver to do when their headliner starts to succumb to the ravages of time? How can this be prevented? What steps should one take when they start to notice the telltale signs of a compromised headliner? We’ll cover all that and more as we learn just how easy it can be to maintain and repair this pivotal part of your interior.
What is a Headliner?
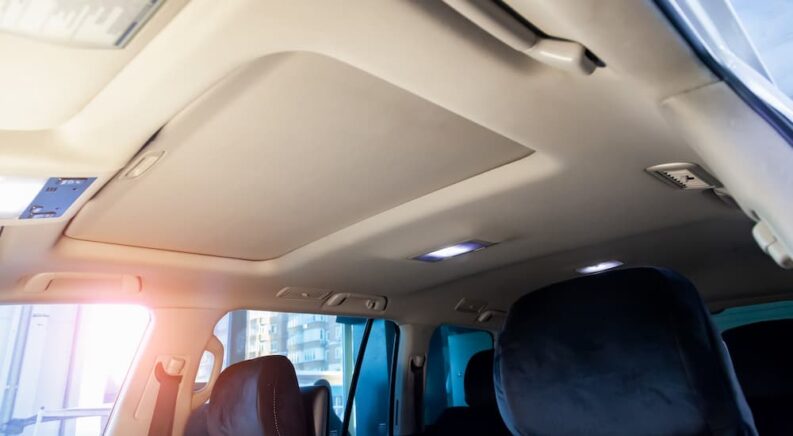
A headliner does just what it says on the box. It lines the roof of the vehicle to absorb noise, maintain temperature, and give your ride a more finished look. It consists of three main parts: the fabric that lines the ceiling, polyurethane foam designed to provide cushioning and support, and a backing material that gives the whole thing some structure. While many mass-market vehicles feature simple fabric headliners, many high-end models employ suede or leather to up the luxury factor and complement the other premium materials used throughout the cabin.
You might not think that something as simple as a headliner would noticeably affect the daily driving experience. However, try cruising at highway speed in a vehicle without one, and the wind noise alone would be more than enough to drive most people a little crazy. Also, any heat or AC provided by the vehicle’s climate control system would escape right out of the roof. If you want a comfortable ride free of dangerous distractions or simply want to ensure the best possible listening experience from your stereo system, headliner maintenance and repair should never be treated as an afterthought.
Why Do Headliners Fail?
Sagging and discoloration are the two main issues that can befall a vehicle’s headliner. As the layers of the headliner begin to separate, the fabric tends to detach from the backing, which can result in some low sagging spots and create an unsightly interior. It can also provide the perfect breeding ground for mold and mildew, which can cause some unpleasant odors and even endanger your health due to the impact on air quality. Discoloration is another symptom to keep an eye out for when assessing your headliner. Water damage can easily lead to faded colors or dark spots on the interior, which can seriously hurt a vehicle’s resale value.
What factors contribute to a sagging headliner? Moisture is one of the main culprits, but it doesn’t take a full-on hole in the ceiling or leaking sunroof to see some of the worst effects. A little above-average humidity could easily cause a sagging headliner or discoloration as the adhesive starts to lose its stickiness, though this sort of weather can be hard to avoid if you live in a particularly moist climate.
Heat and direct sunlight can also contribute to some headliner issues. High temperatures can melt glue, causing the layers to separate and sag. To avoid these worst-case scenarios, you can try keeping the windows closed whenever possible and storing your vehicle in a cool, dry area away from direct sunlight.
While an intense downpour, leak, or high humidity can accelerate damage to the headliner, it’s also prone to damage through normal wear and tear. Whether it be an unexpected scratch caused by a pile of lumber, curious kids, or any of the other hazards that come with the daily driving experience, this sort of wear and tear can take years off a headliner.
Some headliners are even doomed from the start due to poor installation. A lack of adequate waterproofing, appropriate amounts of glue, or other installation-related errors can cause premature sagging, so it’s important to always take the time to give the area a thorough inspection before signing on the dotted line when you set out to buy your next car, truck, or SUV. If you’re considering headliner replacement, be sure to go with a reputable shop or do plenty of research if you decide on the DIY approach.

How to Fix the Headliner
Fixing a worn-out headliner can breathe new life into a vehicle, allowing drivers to freshen up the interior and get the vehicle looking almost as good as new. Total replacement is always an option, though drivers should be aware of the associated costs before settling on this route. Professional replacement costs usually range between $500 and $1,000, but it all depends on your particular make and model. Some popular vehicles with more modest interiors might trend towards the lower end of the price spectrum, but if you have a larger vehicle or a high-end luxury model that employs premium materials, you could end up spending anywhere between $1,000 and $3,000. That’s a pretty penny no matter how you look at it, which is why so many drivers decide to take matters into their own hands.
Temporary Fixes
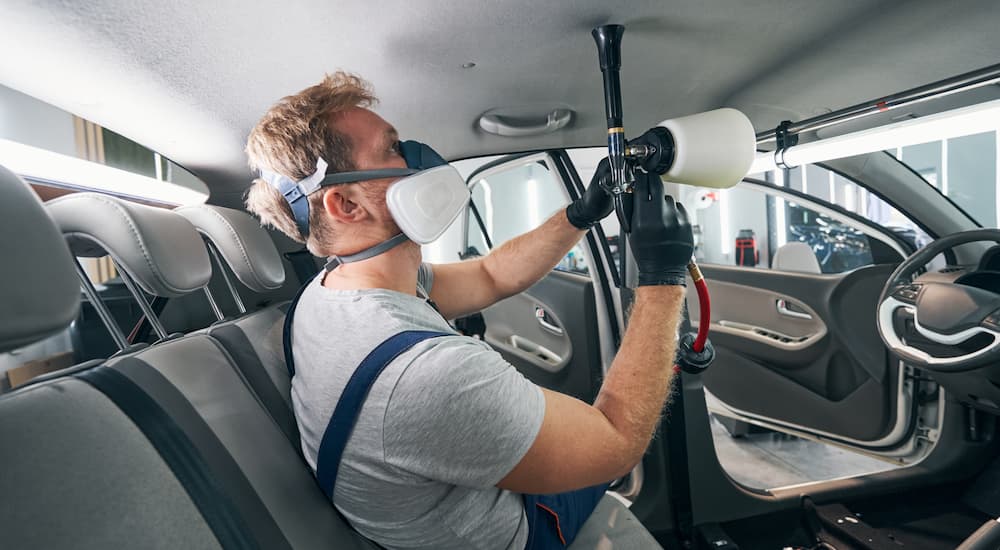
If your headliner is starting to show signs of wear but you’re not ready for a full replacement, a little adhesive spray can go a long way. While it’s not a permanent solution and won’t help to address a seriously damaged headliner, adhesive spray can help to breathe new life into the headliner and keep it from causing any serious distractions when you’re behind the wheel. Simply remove the headliner, thoroughly clean the area where the spray will be applied, give it a healthy dose of adhesive, and then follow the directions on the can regarding drying time. It might not be a long-term fix, but it will help you buy some time to determine a more permanent solution.
As simple as it might sound, a good set of thumbtacks can also be used to fix a sagging headliner in a pinch. Sure, it’ll look a little messy, but if it means the difference between a potential accident and a near-miss, it’s certainly worth a try.
Permanent Solutions
Spray adhesive might be a good temporary fix, but it’s no substitute for a dedicated headliner adhesive. This adhesive is great for repairing severe damage and can open the door to some fun customization potential, but there are a few downsides. First, drivers must carefully prepare their materials and ensure they’re choosing the right adhesive for the job. Attention to detail is also important, as an ill-fitting replacement headliner can ultimately cause more harm than good. Take accurate measurements to follow the all-important “measure twice, cut once” rule. Experts recommend using a paint roller to apply the glue as it’ll provide a nice, even coat. If you take your time and don’t rush the job, a well-fitting replacement headliner should be well within reach for most drivers.
Maybe you’re only experiencing minor sagging around the edges, or don’t want to mess with sticky glue. A roll of double-sided tape could come in handy. Just find a product designed specifically for automotive applications, as normal double-sided tape probably won’t last in the long run.
Thumbtacks might work in a pinch, but if you don’t want the roof of your car to look like an office supply store, there’s a purpose-built alternative that works even better while providing long-lasting protection against potential sagging. Clear twist pins offer a lot more longevity than your average thumbtack, screwing through the fabric and into the foam and backing material thanks to their coiled, screw-like design. Just be aware that they will leave some noticeable marks in your headliner, so they might not always be the right option if you’re looking for a pristine interior.
A steam cleaner can be useful for removing stubborn stains from a wide variety of fabrics, but it’s also a good approach if you’re trying to fix a sagging headliner. Instead of buying new adhesive for the headliner, you can simply melt and rehydrate the existing glue, then touch up any sagging spots by applying a little pressure. Using a paint roller will help to iron out any wrinkles or creases, but caution is advised when using the steam cleaner approach. It won’t work if the glue is too dried out, and if you use too much pressure or steam, things can quickly go awry. Try practicing on a small, less noticeable part of the headliner before moving on to the rest of the ceiling. The steam cleaner can also prove useful if you’re trying to address discoloration, but just be aware that the problem will likely persist unless the root cause is dealt with.
Fixing a sagging or discolored headliner isn’t nearly as difficult as some other common automotive tasks. While other endeavors might require a full toolbox, plenty of elbow grease, and a working knowledge of the internal combustion process, a little patience and a few supplies should see you through any headliner-related project. Best of all, no matter how badly you might screw it up on the first go, it won’t keep your car off of the road or impact the safety of you or your passengers. Those seeking that like-new look might want to consider investing in a specialist, but we’d suggest giving it a try before calling in the pros. If the project doesn’t come out like you envisioned, you can always schedule an appointment at your local repair shop or dealership. However, the headliner is truly one of the least complicated projects any driver could hope to encounter.