Cars, trucks, and SUVs are staying on the road longer than ever. The Bureau of Transportation Statistics reports that in 2023, the average lifespan of a light vehicle in the US was 12.5 years. Whether it’s a classic muscle car you drive for pleasure or a ruggedly-built daily driver that’s tiding you over until you can afford a new ride, this reliability has been a huge boon.
While the vehicle may still be safe and up to date, the same can’t necessarily be said for the infotainment system. Since the first touchscreen infotainment system debuted on the 1986 Buick Riviera, they have become increasingly popular to the point of practically being a standard automotive feature. The ability to customize the screen, integrate your smartphone, easily navigate functions, see full song information, view videos, and other features make touchscreens a must-have for today’s drivers.
If you own an older vehicle without a touchscreen, don’t fret. Adding a touchscreen system is usually quite possible, letting you enjoy modern entertainment and information at your fingertips. This guide looks at how to add a touchscreen infotainment system to a vehicle and what you should consider for this upgrade.
Examining Your Current Infotainment System
The first thing to do is look at the current infotainment system setup, as this will determine what options you have for new equipment. Figure out whether your existing head unit is a single-DIN or double-DIN chassis. Both are seven inches wide, but a single-DIN is two inches high, and a double-DIN is four inches high. On older vehicles, this is usually easy to figure out as the head unit face is the same size as the chassis. Sometimes, though, the chassis opening may be hidden behind other equipment, which means you’ll need to consult the owner’s manual or use an online tool.
You should also look at the features your stereo system currently has. Which ones do you like and want in your new system? What features can you do without? Are there any new functions besides the touchscreen capabilities that you want to add? Are there steering wheel controls that may or may not work with a new touchscreen system? Know the answers to these questions before you start shopping.
OE or Aftermarket Systems?
Although many older vehicles are limited to aftermarket touchscreens, there may be some original equipment manufacturer (OEM) systems available. Factory touchscreen systems are more likely to be compatible with the existing electronics and controls, have a higher overall build quality, and will fit in your dash panel without modifications. However, they tend to be more limited in terms of features. Aftermarket touchscreen systems are less expensive overall, have more potential features, and have a wider range of available systems and price points. The downside is that they frequently require adapters and modifications, making installation more challenging.
Selecting a New Infotainment System
Beyond OEM vs. aftermarket, there are many potential factors in choosing a touchscreen infotainment system for your vehicle. The larger the touchscreen, the more visibility and customizable controls you have, as long as it fits in the dashboard opening. If the chassis opening is all you have to work with, your best bet may be a “floating” touchscreen that mounts in front of the chassis. Just be sure not to block vents and other controls.
Decide what sort of connectivity and smartphone support you want. Common options include Apple CarPlay, Android Auto, Bluetooth wireless, and USB ports. Figure out what other apps and listening capabilities you want, such as internet streaming, HD Radio, and satellite radio. You can still find touchscreens with CD and DVD players if you want to keep your older media in rotation. High-end audio features may be available, such as pre-amps to boost the audio signal or separate subwoofer adjustability. However, you may need new speakers as well to take advantage of these add-ons.
Another thing to consider is whether you want built-in GPS navigation. This will cost more and require regular map updates but can be an advantage if you frequently drive in low-cell-signal areas or have a limited phone data plan that you don’t want to drain by using Android Auto/Apple CarPlay.
Finally, many touchscreens have inputs for connecting one or more cameras for rear views, side views, and other monitoring. You should prioritize this only if your vehicle already has cameras or you plan to add them.
Installing the New Audio System
Once you’ve decided on the perfect touchscreen infotainment system, you need to decide whether you want to install it yourself or hire a professional. The benefits of DIY stereo system installation are that you save money, can do it at a convenient time, and become more familiar with the inner workings of your vehicle. On the other hand, a certified technician will complete the installation faster, is less likely to make mistakes, and will know how to address any potential compatibility or fitment issues. Many installers also offer a warranty with their services.
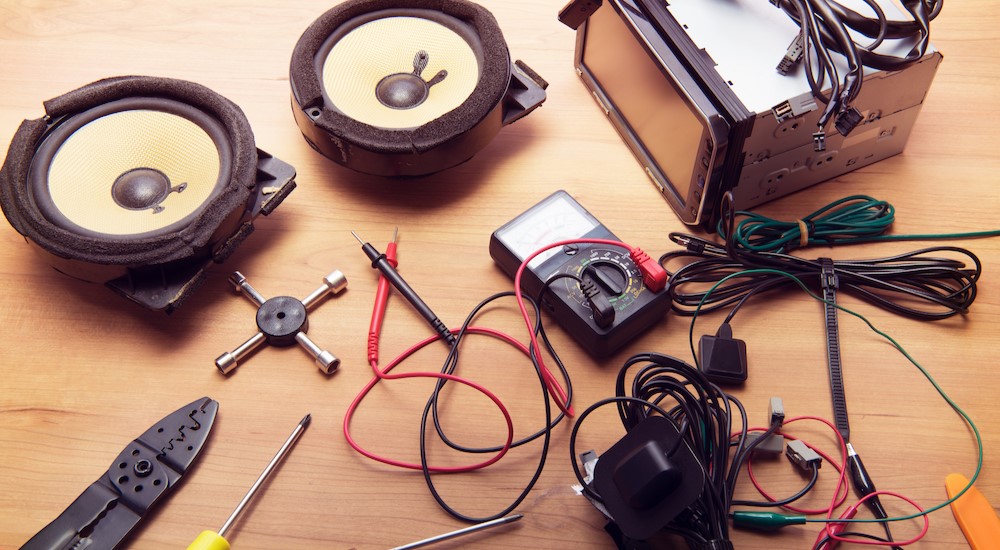
If you want to do it yourself, here are the tools and accessories you will need to install a new touchscreen infotainment system.
- Phillips and/or flat-blade screwdrivers
- Dash panel/auto trim removal tool kit
- A wiring harness adapter for connecting the new system without any cutting or rewiring
- An antenna adapter if the new head unit has a different connection type
- A dashboard mounting kit for retrofitting an aftermarket system to your dash panel
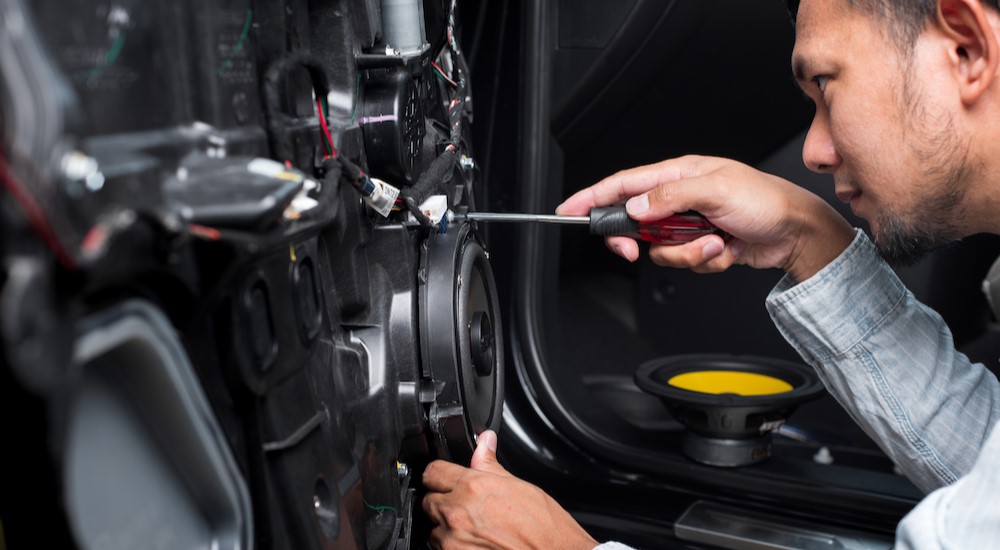
Removing the Old Infotainment System
Before putting the new infotainment unit in, you need to take the old system out. Follow these basic steps while being prepared to adapt based on a vehicle’s unique characteristics.
- Disconnect the car’s battery so no electrical current is flowing for safety reasons.
- Use your panel tools to remove any dash panels that are restricting access to the head unit. Be careful. If the connecting clips break, you can’t reassemble them and may have to replace them.
- Use your screwdriver(s) to unscrew the stereo and remove it from the dashboard.
- Disconnect the antenna cable and wiring harness from the head unit.
- Store the factory head unit and hardware in a safe place in case you need them later.
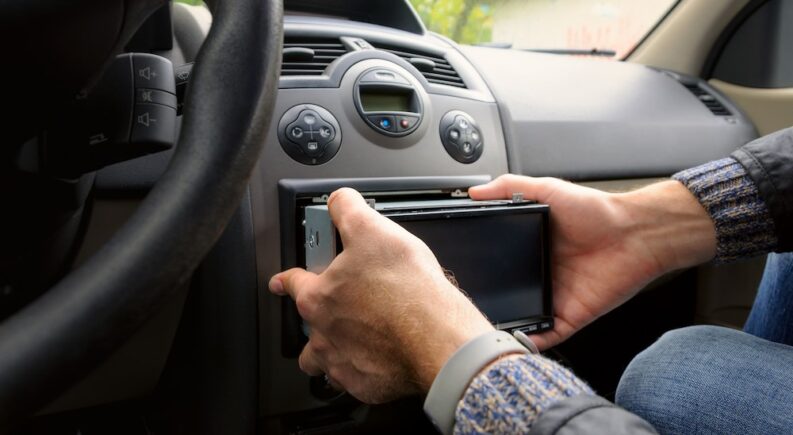
Adding the New Touchscreen System
You’re finally ready to get your new touchscreen up and running. Here’s what you need to do:
- Connect your new wiring harness to the vehicle wiring harness and then to the new infotainment system. If needed, do the same for the antenna adapter.
- Slide the new system into the DIN slot and use your dash mounting kit to secure it in place. Ensure the infotainment system is aligned with the dash panel openings and does not rattle around.
- Reconnect the battery.
- Test all the features of your infotainment system, including touchscreen function, connectivity, and audio quality. You want to address any potential issues now instead of running into them while you’re on the road.
- Finally, reattach the dashboard panels to give it that factory look once again.
Modern Infotainment in Vintage Vehicles
I got my first vehicle with a touchscreen a little over a year ago, and I can attest to how much it has added to the driving experience. You don’t need to be like me and buy a new vehicle just to get a touchscreen, though. Many options are out there for adding a touchscreen system to a vehicle, letting you experience the latest audio formats, connectivity, and navigation. Whatever the reasons you’re planning to keep an older vehicle in service, you can still say goodbye to that outdated head unit and get one that offers all the convenience you’re looking for.