Changing the engine air filter is usually one of the first maintenance tasks any driver will undertake. While swapping out an old, clogged engine air filter can have a noticeable effect on performance and fuel economy, few realize that it’s actually just one of four filters found in most modern vehicles. The oil filter will usually be replaced as part of your regularly scheduled oil change, and a fuel filter can last up to two years, but what about the cabin air filter?
Responsible for removing contaminants from the air before it’s pumped into your vehicle’s interior, cabin air filters are your first line of defense against common airborne pollution and allergens. Replacing your cabin air filter won’t result in any benefits as far as automotive performance is concerned, but it can go a long way toward ensuring the long-term health and safety of one of the vehicle’s most important components: the driver. If you’re looking for tips on car air filter replacement, you’ve come to the right place.
Read on as we take you step-by-step through the cabin air filter replacement process, look at some common signs of a failing filter, and compare some of the most common types of cabin air filters.
How to Change a Cabin Air Filter
As we said, this is a relatively simple task that shouldn’t require much in the way of tools or mechanical know-how, but a little preparation goes a long way. Grab a set of gloves and lay some sort of protection down on the floor below the glove compartment. An old, used air filter can create a real mess when it’s being replaced, so this step is important if you want to avoid breaking out the vacuum cleaner.
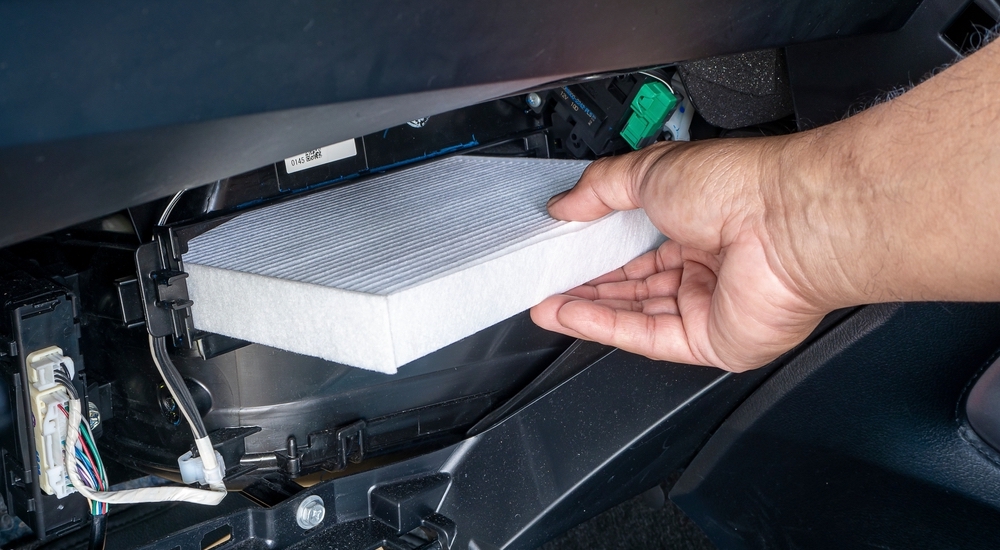
Before you start ripping things apart, start by consulting your owner’s manual for the recommended procedure. While most cabin air filters are accessed by removing the glove compartment, some are actually located under the hood.
Next, determine what tools you’ll need to complete the project. Some vehicles will require a screwdriver or socket set to remove the glove compartment, but many are just built with tabs that can be pushed in by hand. No matter what you do, don’t force it. When done properly, the glove compartment should be easy to remove, so if you’re encountering significant resistance, double-check the owner’s manual to make sure you’re following the correct procedure.
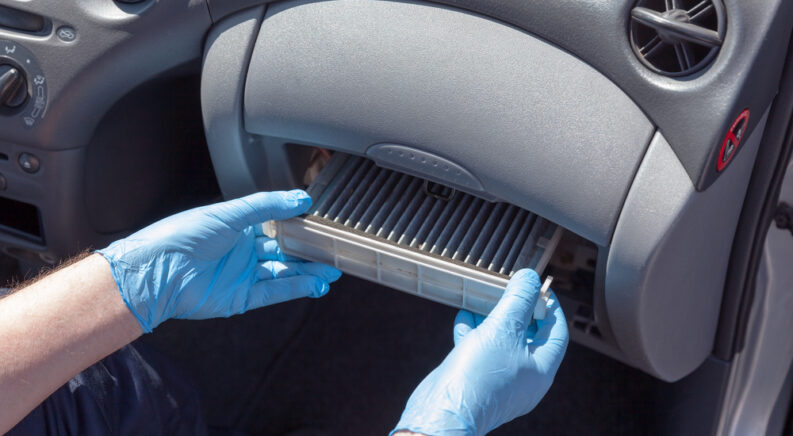
Once the glove compartment has been removed, locate the cabin air filter housing. This will usually be a slender, rectangular box with tabs on either end. Once the filter cover is removed, make sure to take note of how the filter is placed within the housing. Most filters and housings will have an arrow indicating the direction in which the filter should be installed, but this isn’t always the case.
Carefully remove the air filter, taking care to not jostle it around and kick up too much dust. Once the air filter has been removed, hit the housing with a quick pass from the vacuum cleaner to deal with any dirt or debris that might have shaken loose.
Once the filter is securely placed in the housing, simply reattach the cover, verify that the orientation is correct, reinstall the glove box, and you’re done.
How Often Should It Be Replaced?
Most experts recommend replacing your vehicle’s cabin air filter every 15,000 to 30,000 miles. For the average driver, this typically works out to once every year or two, but the true number depends on several factors. Different makes and models have different requirements for cabin air filter replacement; in fact, some older vehicles have no cabin air filter at all, as they were considered a relative luxury up until the early 1990s.
Replacing the cabin air filter every 30,000 miles should be adequate for most vehicles, but as always, consult the owner’s manual for the recommended schedule. If you’re often driving in an area that experiences higher-than-average air pollution or you’re dealing with a particularly pollen-rich spring season, you might want to consider accelerating the schedule beyond the manufacturer’s recommendations.
You really can’t do any damage by replacing a cabin air filter too early, and they’re a relatively cheap way to improve your everyday driving experience with an average retail price of $10 to $15.
So, how do you know when it’s time to replace your vehicle’s cabin air filter? There’s no handy dashboard light letting you know that a cabin air filter is past its prime, meaning it’s up to drivers to keep an eye (and nose) out for the signs and symptoms.
If you notice unpleasant odors that don’t dissipate over time, don’t be surprised to find a gunked-up cabin air filter hiding behind your glovebox. A lack of airflow from the AC vents is another clear indication of an air filter that’s past its prime, as is an increased amount of dust coating interior surfaces. Lastly, drivers should always replace the cabin air filter (and engine air filter) when purchasing a pre-owned vehicle, as there’s often no way to tell when that job was last performed.
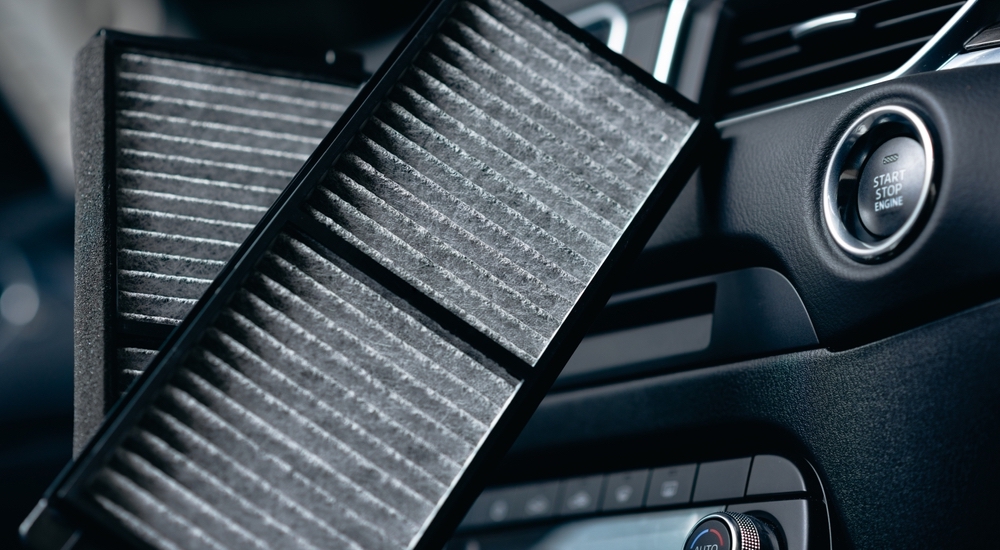
Types of Cabin Air Filters
Particulate Filter
Particulate filters represent the most basic level of cabin air filtration. Composed of fibrous, porous material, particulate filters are great at trapping small particles like mold spores, soot, pollen, tire, and brake dust. That said, particulate filters aren’t really designed to handle some of the finer particles that a vehicle might encounter.
Particulate filters are 95% effective on contaminates down to three microns, but that doesn’t cover some common culprits like exhaust gas particles and cigarette smoke. Particulate filters are often the cheapest option at your local auto parts store, so if you’re looking to save a little cash, they’re certainly better than nothing.
Activated Charcoal Filter
If you’re looking to add a little odor protection to the mix, consider investing in an activated charcoal cabin air filter. In addition to ridding the air of fine particles like dust and soot, activated charcoal filters can also absorb noxious gasses like nitrogen dioxide and carbon monoxide, not to mention odor-causing contaminants like fuel vapors and ozone.
Activated charcoal employs two different strategies to fight odor, making it 98% effective against the most common contaminants. These filters are treated with chemicals or heat to make them exceptionally porous, allowing them to better trap contaminants that might carry an unpleasant odor. Many even come with an added level of odor-fighting power in the form of baking soda or an anti-microbial coating, resulting in a one-two punch that few contaminants can withstand.
Electrostatic Filter
For those seeking the best cabin air filtration, look no further than the electrostatic cabin air filter. These might look similar to the entry-level particulate air filters, but they’re packing one upgrade that makes all the difference when it comes to fighting against pollutants and odors: they’re designed with an electrostatically charged layer that’s very effective at trapping the finest particulates, including diesel carbon and cigarette smoke.
While other filters essentially just trap contaminants within their fibrous layers, electrostatic filters leverage physics in a bid to increase effectiveness. This electrostatically charged layer—along with the filter’s dense, fibrous material—can remove as much as 99% of common contaminants from the air, making for a comfortable and safe driving experience. Electrostatic cabin air filters are also offered with an anti-microbial coating, which prevents mold and bacteria from growing on the filter itself.
Performing a Cabin Air Filter Replacement
A cabin air filter replacement is one of the easiest tasks on any vehicle maintenance schedule, which leaves little excuse for letting the project fall by the wayside. A cabin air filter might not be the first component that comes to mind when you think about vehicle maintenance, but it can have a big impact on the overall driving experience, especially when it comes to health and comfort for both the driver and their passengers.
It’s easy to become accustomed to foul smells and musty odors over time, which is why sticking to the recommended cabin air filter replacement schedule is so important. Even if you don’t notice it, others might, and there’s nothing quite as horrifying as hearing a passenger ask, “What’s that smell?” as soon as they settle into their seats.
If it’s been a while since you thought about your cabin air filter, it never hurts to check and see what sort of condition it’s in. It’s a fast, simple job, and after you replace your cabin air filter, you can breathe easy knowing that you’ll enjoy a safer, contaminate-free ride for the next 15,000 to 30,000 miles.