Taking on a DIY project can be daunting. Sure, you want to save money and take pride in your ownership, but the last thing you want to do is take apart something you can’t reassemble or cause bigger problems than the one you’re trying to fix. That’s what we’re here for! You’ll save hundreds of dollars on brake service by doing it yourself, and changing brake pads is a straightforward task as long as you have the right tools. Just set aside a few hours to do it – better to leave a whole Saturday open if you’re doing it for the first time – and take your time to follow the instructions below.
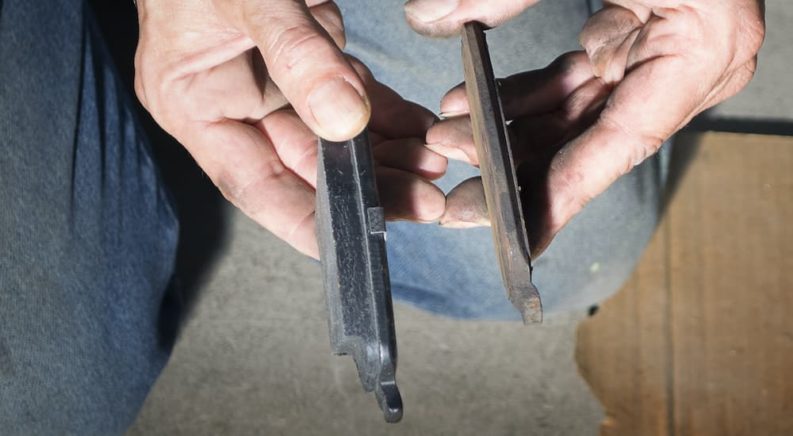
The brake pads don’t need to be changed as often as oil. While the wear rate depends on the pads and your driving style, it’s a safe bet that you’ll get at least 25,000 miles but no more than 75,000 miles from your pads. However, you should inspect your brake pads every 10,000 to 15,000 miles to stay on top of it (during a tire rotation is a great time to do it); if they ever get under 1/8,” it’s time to get new pads ASAP. So what’ll you need to do this yourself?
The Tools
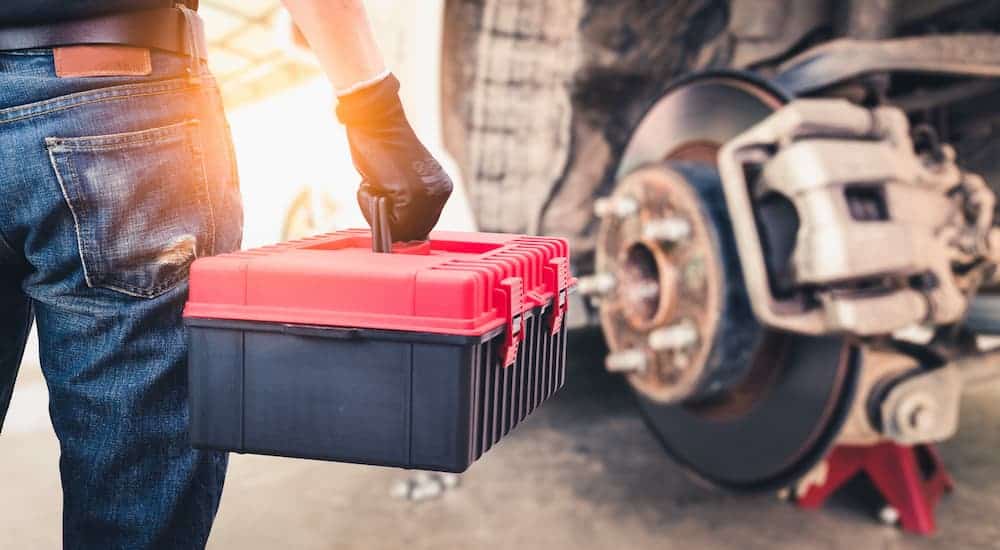
If you hope to change your own brake pads more than once – and you might as well! – then investing a couple of hundred bucks in the tools is well worth it. Before you get started, make sure you have the following items on-hand:
- New brake pads – can’t replace the old ones without ’em!
- Fresh brake fluid – just in case you need to top up.
- Disposable gloves – keep your hands safe and clean.
- Zip tie, string, or bungee cord – for supporting the weight of the disassembled caliper.
- Turkey baster (one you don’t plan on re-using for food) – for removing excess brake fluid.
- Floor jack – better than a spare tire jack for lifting the car.
- Jack stands – never support a car with a jack alone.
- Lug wrench – for loosening/tightening the wheel’s lug nuts.
- Wrench – for disassembling the caliper.
- Brake tool / C-clamp / wood – for compressing the brake caliper pistons.
Got all that? Good! Then let’s get started!
Exposing the Old Pads
Whether you’re changing the pads or just inspecting them, you’ll need to get your wheels and calipers out of the way to access them. Turn the steering wheel in the direction of the side that you want to change first, which makes the caliper on that side easier to access. Once you’re ready to start, with your vehicle on a flat, dry surface, use your lug wrench to loosen each of the nuts on the tires you’ll be removing. You won’t be able to loosen them once the tire is in the air!
Then you can get your jack in a safe position to lift the car. We advise investing in a floor jack rated for at least the weight of your heaviest vehicle. The jack is generally only lifting half of the weight, but it never hurts to have a bit of overkill. Refer to your owner’s manual for guidance on where to place the jack so that the car is lifted safely and where you can place jack stands to support the weight (jack stands are not optional no matter how strong your jack is). Once the car is high enough, slide the jack stand(s) into place and slowly lower the jack until the weight transfers to the stand(s). You should use a matched pair of jack stands with the same weight rating as your floor jack for safety.
Finish removing the lug nuts from the lifted wheels, and carefully remove the wheels. Keep everything together so the nuts don’t get lost. Now the brake caliper should be easily accessible – see the long slider bolts or pins at the top and bottom, holding the caliper together? Use a wrench to loosen at least the bottom slider bolt until it can be pulled free. Then the middle part of the caliper can pivot upwards and away from the brake rotor, exposing the pads.
A couple of notes here: first and foremost, DO NOT damage or remove the brake fluid line. If you feel like you need to disconnect the line, something is wrong, and you should contact a professional technician for assistance. This is where the zip tie, string, or bungee cord can come in handy. Whether needed to keep the pivoted assembly elevated or if you removed both slider bolts and have the top part of the caliper hanging free, use this to hang the caliper up so that the brake line isn’t supporting its weight.
Replacing the Pads
Now you should be able to access the brake pads! The pads should slide out of the open caliper fairly easily. Better to do this one pad at a time, as the orientation matters. Taking care not to damage the rotor or the old clips that the pad is sitting in, slide it up and out of the caliper. Set it aside, keeping the orientation for reference when you’re lining up the new one.
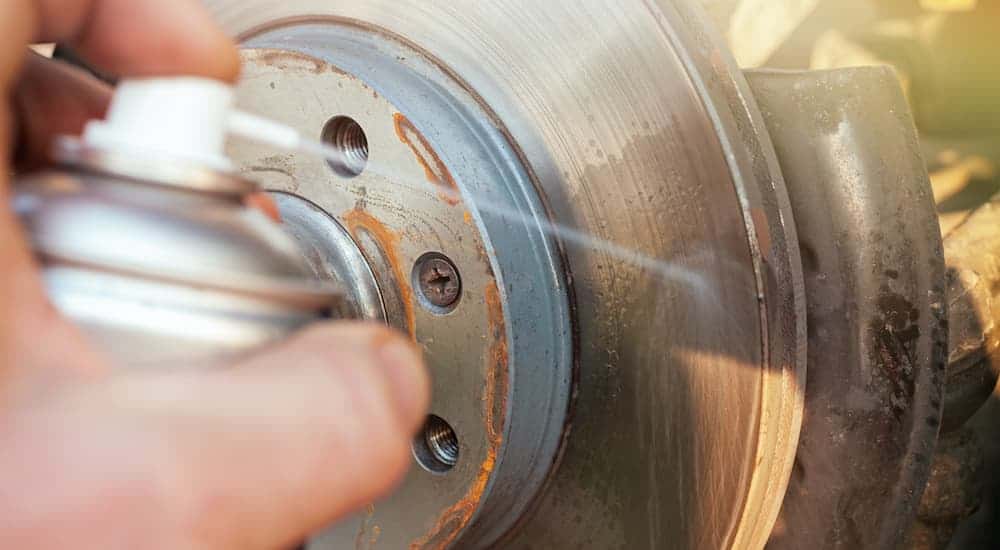
The new brake pads should come with some grease and new clips – if so, remove one of the old clips and replace it with the corresponding new one (there should be left and right clips, so it’s easier to do it one at a time) which should snap into place. Apply a bit of grease to the slide points on the clips and about a dime-sized amount of grease to the shim plate on the back of the new brake pad. Take special care to avoid getting grease onto the front of the brake pad or onto the rotor, as this will seriously reduce your brakes’ stopping power. Also, apply a bit of grease to the “ears” (the tabs on either side) of the brake pad and slide it into place; it may be tighter in the new clips than the old pad was.
Putting it Back Together
Once you’ve replaced both pads, you can start reassembling the caliper. However, the piston(s) will be too far out to close the caliper together– the last position was based on thin old pads, remember? To compress the piston(s), you can use a combination of long 2×4 and plywood sheets to press against them or even to use a C-clamp to squeeze them in, but we’d recommend buying a simple Brake Tool or Disc Brake Spreader Tool.
The tool is a long, threaded rod with a foot at one end and a brake pad-shaped fin on the thread. Take one of the old brake pads and place it against the piston(s); put the foot of the brake tool on the old pad, with the fin on the inside of the caliper housing, and turn the threaded rod to push against the brake pad. The piston(s) will be pushed closed.
Before you do this, take the cap off the brake fluid reservoir under the hood and monitor its level during the process. You’re pushing fluid back up the line, so there’s a risk of causing it to overflow – DO NOT allow this to happen as brake fluid is flammable and toxic. If it looks like the reservoir is about to overflow, you can use a turkey baster to siphon excess brake fluid out of the reservoir and deposit it in a sealed container for proper disposal. Keep in mind that the first brake might not cause the reservoir to overflow, but the risk increases with each subsequent wheel.
Once the pistons are retracted, you can remove the brake tool and reinstall the caliper housing over the new pads, though it might be a little snug compared to before. Reinstall the slider bolts without over tightening, reinstall the wheel, discard the old pads and clips, and you’re almost there!
Wrapping Up
Once you’ve done both wheels on one side, lower the vehicle and repeat for the other side. Keep an eye on the brake fluid reservoir every time you compress the pistons in a caliper! Tighten all lug nuts when you’re finished, then remove excess brake fluid or use your fresh brake fluid to refill the fluid reservoir so that it’s between the MIN and MAX lines. Hop into the driver’s seat and slowly compress the brake pedal until it’s firm – don’t slam it or over-press, as you can damage the system. Check the brake fluid reservoir one more time, filling it above the MIN line if it dipped below that point, and close the hood.
Now it’s time for a test drive. You want to take an easy drive under safe, controllable conditions to make sure your work is done right. A good test is to accelerate to 50 mph, slowly brake down to 30 mph, hold 30 mph for a few minutes to let the brakes cool, and repeat 4-5 times. However, some brake pads come with specific bed-in instructions. The best place for such a test would be a straight open road with low traffic. Curvy roads, stop signs, residential areas, and crowded streets all pose extra risks when testing your brakes.
Easy as D-I-Y
That’s it! That’s all it takes. Changing brake pads isn’t a complicated process – you just need to follow the steps and exercise caution when supporting your car, handling sensitive brake components, and dealing with fluids. Once you’ve gotten the hang of it, you should be able to bang it out in a couple of hours, which isn’t bad for a service you’re unlikely to need more than once every few years, and you’ll save hundreds or thousands in long-term service costs for your trouble. Go “brake” a leg!