
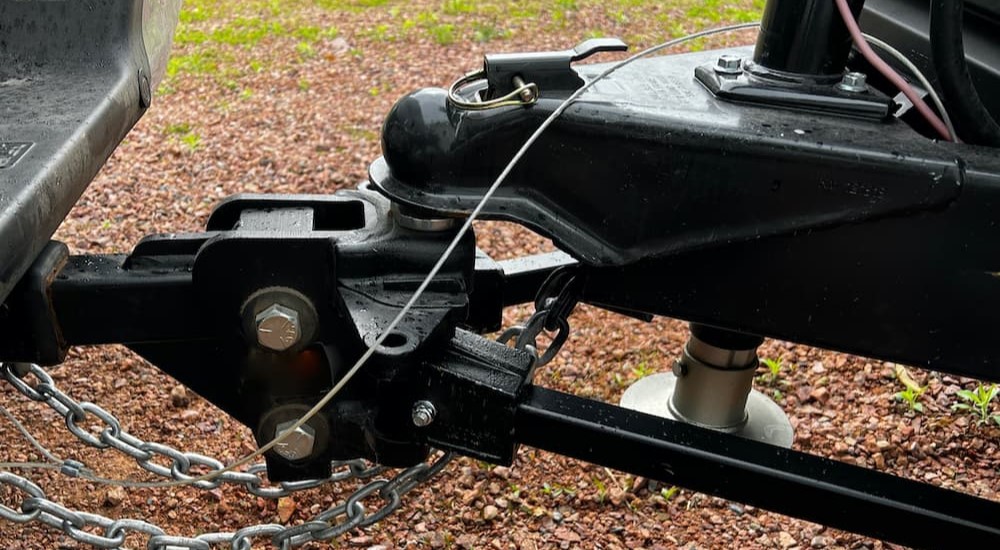
Sometimes, the cargo space offered by a car, truck, or SUV simply isn’t enough to get the job done. Whether you’re trying to enjoy a little off-the-grid excursion in an ATV or boat, load building supplies onto a utility trailer, or bring all the comforts of home along for the ride in the form of a camper, it all starts with a good trailer hitch.
Many of today’s trucks and SUVs are offered with factory-installed trailer hitches, but they’re often only available as an optional add-on. If you don’t want to spring for a costly tow package or pay up to $1,000 for professional installation, there’s always the DIY route. Installing a trailer hitch should be well within the purview of the average driver, as the project doesn’t involve any specialized tools or complex mechanical know-how. Unlike some other automotive projects that you might undertake, there’s really not much risk of doing any long-term damage when installing a trailer hitch. If you’re confident in your ability to change a tire, outfitting your vehicle with a trailer hitch should be well within your comfort zone.
Choosing A Hitch
The first step in installing a trailer hitch is finding the right fit. There are actually six distinct classes of trailer hitches, so it’s important to do a little research to ensure safety and compatibility. These trailer hitch classes are broken down by receiver size and towing capacity, ranging from 2,000 lbs for a Class 1 hitch all the way up to 20,000 lbs for a Class 5 hitch or 30,000 lbs for a fifth-wheel/gooseneck hitch. Remember that opting for a Class 5 trailer hitch doesn’t mean your vehicle will magically be able to tow 15 tons of cargo. Your vehicle’s size, construction, and power are the real limiting factors when installing a trailer hitch, which is why it’s important to always consult the owner’s manual to determine the maximum towing capacity for any specific make and model. While a trailer hitch can be attached to almost any vehicle, some smaller cars might not be up to the task. Trailer hitches are also designed to fit specific makes and models, so don’t just rush out to buy the first deal you find when browsing the internet, a dealership’s website, or your local auto parts store.
Class 1
Receiver size: 1-1/4-inch
Towing capacity: 2,000 lbs
Maximum tongue weight: 200 lbs
Compatible with: Compact and midsize cars
Designed for subcompact/compact cars, full-size sedans, and some crossover SUVs, Class 1 trailer hitches don’t offer much in the way of towing capacity, with a max rating of around 2,000 lbs. That’s typically not going to be enough capacity to tow much more than a small utility trailer or motorcycle, but these Class 1 towing hitches can be helpful in other ways. If you live an active outdoor lifestyle, a Class 1 hitch could provide the perfect mounting point for a hitch-mounted bike rack.
Class 2
Receiver size: 1-1/4-inch
Towing capacity: 3,500 lbs
Maximum tongue weight: 350 lbs
Compatible with: Midsize cars/SUVs, minivans
Commonly paired with mid- and full-size cars, crossovers, minivans, and some full-size trucks and SUVs, Class 2 trailer hitches can give your vehicle the ability to tow up to 3,500 lbs. Designed with 1.25-inch receiver tubes and bolted directly onto the frame of the vehicle with a frame hitch, Class 2 hitches offer a little more in the way of utility with the ability to tow a trailer loaded down with a 14-foot boat or an ATV.
Class 3
Receiver size: 2-inch
Towing capacity: 10,000 lbs
Maximum tongue weight: 1,000 lbs
Compatible with: Midsize SUVs, full-size pickups, vans, and SUVs
Class 3 trailer hitches start to introduce some real towing ability into the mix, with a maximum capacity that can reach as high as 10,000 lbs. While these robust trailer hitches are usually found on 1/4- and 1/2-ton trucks and SUVs, as well as 3/4- and 1-ton trucks, they can also be fitted to some crossover SUVs and minivans. Up to 10,000 lbs of maximum towing capacity should fit the needs of the average driver, allowing a reliable daily driver to double as a fully capable towing rig when the need arises.
Class 4
Receiver size: 2-inch
Towing capacity: 15,000 lbs
Maximum tongue weight: 1,500 lbs
Compatible with: Full-size pickups, vans and SUVs
With the ability to tow boats up to 24 feet in length and even auto transport trailers weighed down with smaller cars, a Class 4 trailer hitch is a must-have for any driver who plans to take full advantage of their vehicle’s maximum towing capacity. Offering 15,000 lbs of pulling power, Class 4 hitches can typically only be affixed to 1/2-ton trucks and SUVs as well as 3/4- and 1-ton trucks.
Class 5
Receiver size: 2-inch, 2-1/2-inch
Towing capacity: 16,000 to 20,000 lbs
Maximum tongue weight: 1,600 to 2,000 lbs
Compatible with: Full-size pickups, heavy-duty chassis, and dually cab trucks
If you’re looking to hit the open road in a full-size camper or tow your large boat up to the lake for a weekend full of aquatic adventure, look no further than a Class 5 hitch. These heavy-duty hitches can accommodate up to 20,000 lbs and are fitted with a robust 2- or 2-1/2-inch receiver that can take all the abuse that comes with that sort of weight.
Fifth-Wheel/Gooseneck
Receiver size: n/a
Towing capacity: 30,000 lbs
Maximum tongue weight: n/a
Compatible with: Heavy-duty pickups
A fifth-wheel camper can turn your vehicle into a home away from home, allowing drivers to enjoy the perks of domestic life while exploring the further reaches of the country. Before you answer the call of the open road, you’ll need to invest in a fifth-wheel or gooseneck hitch. Unlike the typical trailer hitch that’s located below the rear bumper, fifth-wheel/gooseneck hitches are bolted directly into a truck’s cargo bed, directly above the rear axle. These hitches offer the best possible towing capacity, as well as increased maneuverability and towing stability, but they do come with their downsides. Fifth-wheel/gooseneck trailer hitches are expensive and can cost upwards of $1,700 when you factor in potential installation costs. Fifth-wheel hitches are designed for recreational towing and can only haul fifth-wheel trailers. In contrast, gooseneck trailers are more affordable, generally reserved for agricultural use, and can accommodate a wider range of trailers.
Installation Overview
The physical process of installing a trailer hitch varies from one vehicle to another. However, here is a general overview of what is involved with installing a trailer hitch on most vehicles.
Review the Procedure
They say proper planning prevents poor performance, and that’s certainly true when it comes to installing a trailer hitch. A little time spent reviewing the step-by-step instructions that came with your trailer hitch and ensuring you have all the correct tools on hand can save you a lot of stress down the road, so don’t rush into the project. Each trailer hitch is going to follow a slightly different procedure, so do a quick walkthrough before breaking out your tools.
Tool Time
Trailer hitch installation doesn’t require a long list of specialized tools. That said, there are some essentials that drivers should have on hand before beginning the installation process. A good socket set, ratchet, and ratchet extension are all must-haves, as are vital safety equipment like work gloves and protective eyewear. You’ll also want to break out the jack and jack stands, a pry bar, tape measure, screwdriver, utility knife, and even a rotary cutting tool and power drill with carbide drill bits, depending on the complexity of the installation. If you don’t want to invest in some gear that might not see frequent use, consider opting for a more basic trailer hitch kit that involves easier installation.
Prepare the Vehicle
Before launching into the installation, you’ll need to make sure your vehicle is ready to go. While a jack and jack stands are not required for every kit, they can provide some extra space that’ll come in handy when you’re trying to affix the trailer hitch. When using a jack and jack stands, always remember to chock your wheels and engage the emergency brake. When the vehicle is elevated off the ground, use a work light to illuminate the undercarriage. Lastly, you’ll want to remove any spare tires mounted underneath the vehicle, as they may get in the way of the installation process.
Get to Work
Once your vehicle is prepared, it’s time to start removing any parts that might stand in the way of the trailer hitch assembly. Identify any bolts, rubber plugs, small panels, or heat shields that might be in the way and use your tools to trim or remove them accordingly. The instructions that came with your kit should make it easy to identify which parts need to go, so don’t just start indiscriminately removing parts unless you want to risk some potentially serious consequences. If your vehicle isn’t designed with pre-threaded holes to accommodate a trailer hitch, you might need to do a little drilling. Some trailer hitch kits might require drivers to remove or lower the tailpipe and other parts of the exhaust assembly, but this is rare.
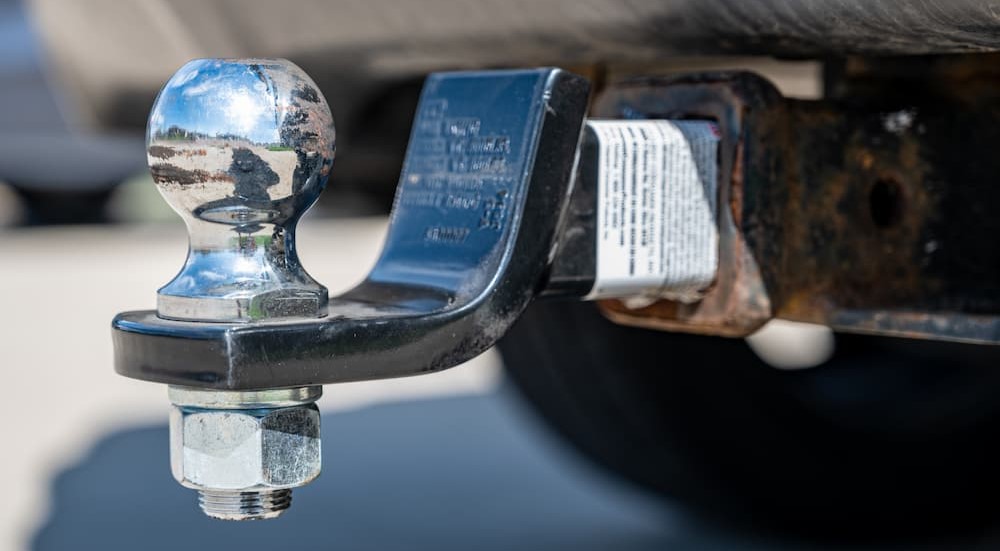
Install the Hitch
Now it’s time for the main event. Move the trailer hitch into place and use the bolts included in your kit to attach the hitch to the frame. This step might require you to use blocks or call in a set of helping hands, as some trailer hitches can weigh more than 50 lbs. Don’t worry about tightening down the trailer hitch just yet. Simply get it into the correct position before breaking out the torque wrench. Once you’re confident about the fit, tighten down the bolts. Again, the specific requirements vary by make, model, and trailer hitch kit, but you’ll generally be looking to ensure every bolt is tightened down with 100 to 150 lb-ft of torque.
Install Electronics
In order to run your brake lights and take advantage of any integrated braking systems, you’ll have to finish up your trailer hitch installation project with some light electrical work. A simple wiring harness will allow you to connect your trailer to the vehicle’s electrical system and isn’t nearly as complex as it seems. Just closely follow the instructions that came with your wiring kit, wrap the assembly in protective tape, and firmly attach it to the underbody to avoid interference from any unexpected debris.
Installing a trailer hitch is one of the easiest ways to increase the utility of your vehicle, and it is a lot easier than it might appear. It’s hard to go wrong when installing a trailer hitch. The process doesn’t involve messing with any of the mechanical, safety, or electrical systems that can lead to serious problems. Unless you start drilling holes willy-nilly into your frame, it’s difficult to do any serious harm. That said, drivers should still approach the project with plenty of care and attention to detail. A good trailer hitch install can turn your vehicle into a towing machine, but rushing the process, choosing the wrong kit for your make and model, or opting for an inferior product could lead to your prized fishing boat breaking free and charting its own course while speeding down the highway at 70 mph. Just take your time, ensure proper torque, stay within the prescribed towing capacity limits, and you’ll enjoy miles and miles of towing success.