When the going gets tough, the tough turn to recovery hooks and tow straps. These indispensable pieces of off-road gear are a must-have for any driver looking to test their mettle against the road less traveled. They should be part of any driver’s load-out before they set off on the trail. Many of today’s off-road trucks and SUVs come standard with integrated tow hooks, but that’s just half the equation for a recovery scenario. Tow straps play just as important of a role, but their exact use and design are often a mystery to drivers right up until the moment they actually need them. What makes for a good set of tow hooks, what are your options if your vehicle didn’t come with a pre-installed set, and how do recovery straps differ from the deceptively similar tow straps? We’ll answer all those questions and dive into some off-road recovery 101 as we take a closer look at recovery straps and tow hooks.
Tow Hooks
While tow hooks are traditionally associated with pickup trucks, SUVs, and other types of vehicles that tend to see a lot of off-road use, they can actually be installed on every vehicle under the sun. According to regulations set forth by the U.S. Department of Transportation, every production vehicle must be designed with four strong attachment points located directly on the vehicle’s frame or unibody. Reinforced areas like these are the only places tow hooks should be installed. The other prime candidate is a vehicle’s trailer hitch receiver, built to accommodate an aftermarket tow hook that can be bolted on where the trailer hitch and tow ball would normally be attached. This is a great solution if you’re driving a truck or SUV, but these receivers often aren’t found on some lighter-duty vehicles.
If your vehicle didn’t come with a factory-installed tow hitch, you have two choices: installing a bolt-on trailer hitch or welding a hitch directly to the frame. Both projects require special skills and equipment and are typically best left to the professionals. A trailer hitch install will typically cost around $200 for a Class 1 or Class 2 receiver rated for 1,000 to 3,500 lbs, or up to $750 for a Class 3 or 4 receiver that can accommodate 4,000 to 12,000 lbs.
Weld-on tow hooks can be found for as little as $15, but installing them is another story. Unless you’re handy with a welder, you’ll have to find a local shop that’s down for the job, so expect to pay anywhere between $65 and $125 an hour in labor plus the cost of the hook itself. While many outlets will sell bolt-on tow hooks, they’re often seen as inferior to their more heavy-duty weld-on competitors. Recovering a vehicle wallowing in the mud or sand is tricky enough without worrying about a bolt failing and a recovery strap whipping through the air at the speed of sound, so make the investment and thank us later.
Recovery Straps
The other part of the equation is recovery straps. There are many different kinds of straps out there that may seem alike, but they are not. Let’s take a closer look at these straps to see what kinds are best for off-road recovery.
Recovery Straps vs. Tow Straps
Not all straps are created equal when it comes to freeing your vehicle from a sticky situation. The most important distinction to remember when shopping for off-road recovery gear is the difference between recovery and tow straps. While some less-experienced drivers might use the two terms interchangeably, the two products couldn’t be more different from a practical standpoint.
Let’s start with recovery straps, which are built with significantly more elasticity than tow straps. This elasticity allows recovery straps to store much more kinetic energy than tow straps, which can come in handy if you find yourself stuck on the side of the trail. When a recovery vehicle pulls away from the stuck vehicle, the recovery straps stretch out like an oversized rubber band. This tension creates a consistent pulling force on the stuck vehicle even while the recovery vehicle is stationary. This approach eliminates slack and simplifies the process, as only one vehicle has to be moving at any given time.
Then there are tow straps. Designed for towing a vehicle across a flat surface over a long distance, tow straps don’t have the same elastic properties as recovery straps. They don’t stretch or store energy in the same way, which is ideal when you’re moving down the highway at a constant speed. That said, tow straps should never be used in place of recovery straps, as their lack of elasticity can easily lead to sudden breakage when subjected to the kind of forces an off-road recovery could require.
Snatch Straps vs. Kinetic Recovery Ropes
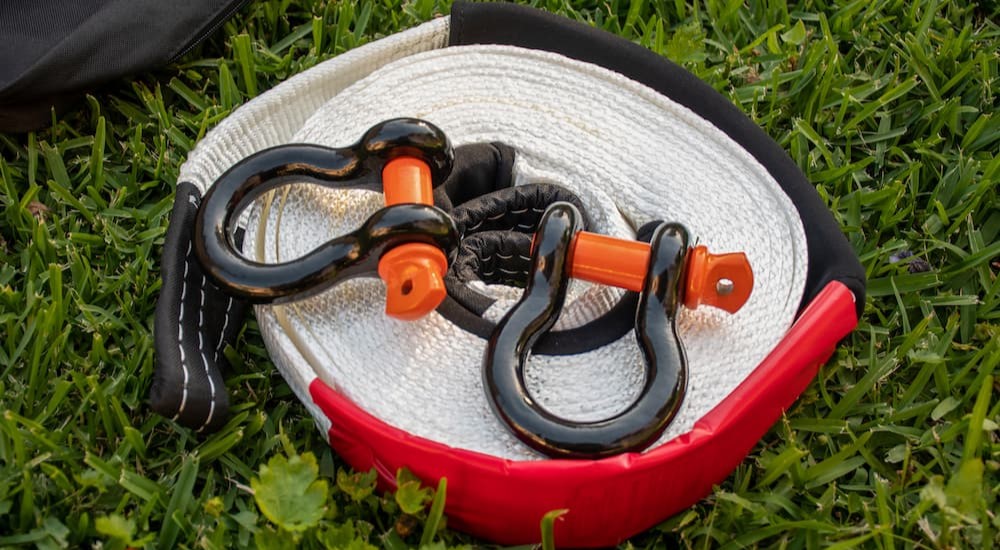
Recovery straps come in two flavors: snatch straps and kinetic recovery ropes. The difference between these two also comes down to elasticity. Snatch straps, made of flat webbing material with a loop on each end, are the less elastic of the two. When stretched between two vehicles, a snatch strap will stretch by around 20 percent, storing energy that can be used to aid in a recovery. Snatch straps might look like traditional tow straps, but this elasticity sets them apart.
Then, there are kinetic recovery ropes. Stretching by around 30 percent, kinetic recovery ropes can store more energy than snatch straps. They are usually made with a rounder, more rope-like design with looped ends that are reinforced for added durability. Kinetic recovery ropes are a more recent development than snatch straps and are often used in pairs.
Recovery Basics
So you misjudged the depth of that mud puddle, and now you’re axle-deep in the muck. While this might seem like an ignominious end to your day, you’re not out of luck as long as you’ve got another towing-capable vehicle in your off-road pack. Those who spend more time riding solo might want to invest in a winch, which can be a valuable bit of recovery gear if a suitable anchor point is nearby. Let’s walk through a typical recovery scenario and see how, with a few simple pieces of gear and some trustworthy riding buddies, that unplanned mud bath will end up being nothing more than something to laugh about over drinks when the ride is finished.
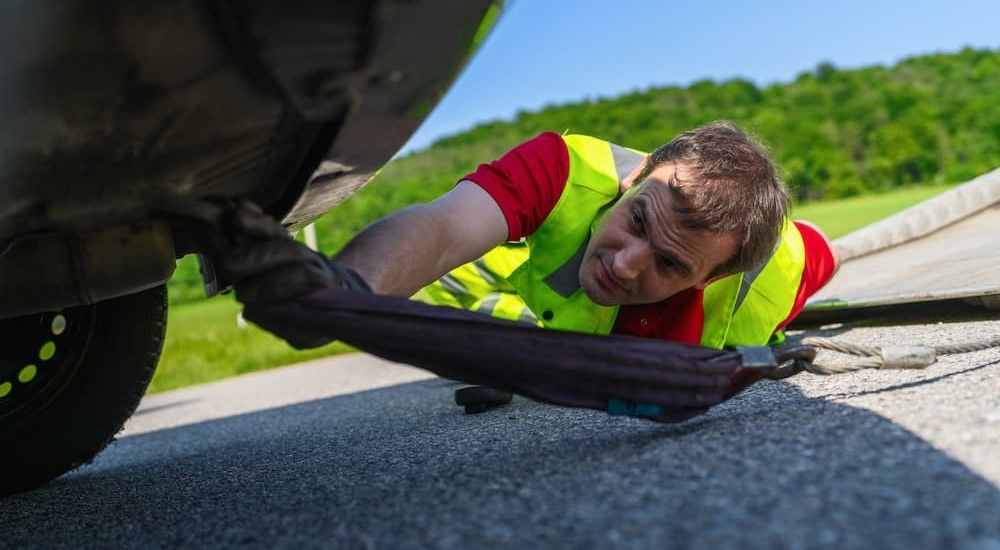
Inspect Your Gear
Preparation for your off-road excursion should begin miles before you hit the trail itself. Before setting out on any off-road journey, it’s important to do a quick inspection of your vehicle, including fluids, brakes, shocks, and tire pressure, and checking the frame for cracks and the safety and recovery equipment you’ll be bringing along for the ride. Take a moment to inspect your recovery straps, shackles, and tow hook, and pay close attention to any conspicuous wear, fraying, cracks, or other signs of damage. They might not seem like a big deal when you’re sitting in your driveway, but when exposed to the type of pulling forces that come with the typical recovery job, even the smallest imperfection can make a huge difference.
Ensuring your recovery straps are up for the job is also important. All recovery straps are sold with a specific break strength, and while it might be tempting to cheap out, experts recommend investing in a strap with a break strength that’s at least twice the weight of the vehicle itself. Never try to daisy chain two sets of recovery straps together, and make sure the towing vehicle is heavier than the one being towed, or at least in the same ballpark.
Prepare the Area
Off-road trails aren’t immune to the same traffic you’ll find on paved roads, so before starting the recovery process, make sure both vehicles are visible to drivers who might come speeding around the corner. A good set of reflective triangles or lights can come in handy and should be part of any off-road arsenal. You’ll also want to take time to prepare the human element. During a recovery scenario, things can get loud and messy, so both drivers should take a little time to discuss a set of hand signals that will help guide the process. Using a two-way radio or your phone’s speakerphone setting can also work, though sometimes the analog approach is best.
If you have an extra driver or rider who isn’t behind either wheel, have them climb out of the cabin to act as another set of eyes for recovery. Spotters can prove to be invaluable resources, noticing potential hazards and giving progress reports, though they should be sure to stay clear of the vehicles and straps.
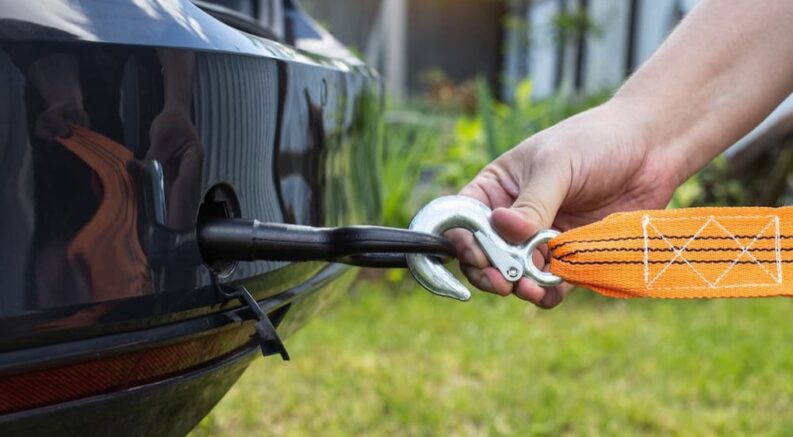
Attach Recovery Straps
Now it’s time to attach the straps themselves. First, attach the recovery straps to the stuck vehicle, either by looping the strap through the tow hook or attaching it to the tow hook via a shackle. While these straps can be attached to appropriate recovery points on the front or rear of the vehicle, the front tends to work a little better due to improved visibility and the fact that a wider range of gear can be employed when moving forward rather than backward. In some recovery scenarios, you might not have a choice, especially if the front bumper is submerged in two feet of mud.
Once the straps are attached to the stuck vehicle, secure the other end to an appropriate recovery point on the recovery vehicle. Remember, this doesn’t include the trailer hitch’s tow ball, the axle, or any other point on the vehicle except those directly mounted to the frame itself.
Tow Time
Now, the fun can begin. Both drivers should put their vehicles into gear. The driver of the recovery vehicle should pull away from the stuck vehicle until the recovery straps are nice and taut. Once everyone is ready, accelerate and stretch out the recovery strap. This stretching creates tension in the strap, turning it into a giant, heavy-duty elastic band, making it much easier for the struck car to pull itself free.
When the strap stretches, the driver of the stuck vehicle should point the wheels straight ahead and steadily accelerate until you start to make some progress. If you are able to make a little headway but then get stuck again, have the recovery vehicle back up, then drive forward until the recovery strap is once again stretched and able to provide some extra pulling force. Repeat the process until you’re free, and pull the recovered vehicle close to the recovery vehicle to take any tension off the straps so that they can be removed.
Aftermath
When the vehicle is free and in a safe spot, it’s time for a little post-recovery inspection. Give both vehicles a close look to make sure nothing became damaged or loose during the process, and inspect any gear for wear or breakage. The second task can probably be left until you’re back home, but skipping over the first could lead to another sticky situation before the ride ends.
While some drivers avoid messy situations like the one described above, others will tell you that if you’re not getting stuck every now and then, you’re not doing it right. No matter your off-road ethos, it’s important to make sure you’re equipped for whatever the road or trail can throw at you. Investing in a good set of recovery straps and making sure your vehicle is outfitted with a solid set of tow hooks can mean the difference between a successful off-road excursion and one that ends with a humbling call to your local recovery service. It never hurts to do a dry run with your equipment. While we wouldn’t recommend getting stuck on purpose, spending a little time learning the ins and outs of your gear, watching off-road recovery videos, and reading articles like this one can lead to a much better outcome if you ever find yourself floundering in a particularly messy stretch of trail.