When it comes to vehicles, many drivers often overlook or take for granted just how complex and amazing vehicles are. Many drivers possess a bare-minimum amount of mechanical knowledge, just enough to know that smoke rising out an engine is bad, but not enough to why that is. When it comes to vehicle repairs, most people would simply take their vehicle to a trusted mechanic or a garage/dealership and pay to have them work on the vehicle. While sure, that is certainly the easier option, and those people are trained to work on vehicles, most repairs including a simple brake service can turn out to be pretty costly when all is said and done.
Not only are you paying for the parts, but you are also paying the mechanic for labor, as they need to make a living somehow. This can run up the pricing of certain repairs significantly, and can easily turn a cheap part replacement to a multi-hundred dollar affair. That is why it is always a good idea for any vehicle owner to learn how to take care and work on their own vehicles to a degree. While mechanics and garages will always be necessary due to just how complex vehicles are, there is a number of simple and frequently required repairs that can actually be performed from home relatively easily. One of the most important forms of service that can be performed on a vehicle is brake service. Brakes are critically important for any sort of vehicle, as stopping is just as if not more important than moving, and brakes are what slows and stops a vehicle.
What Brakes Are/Why They Are Necessary
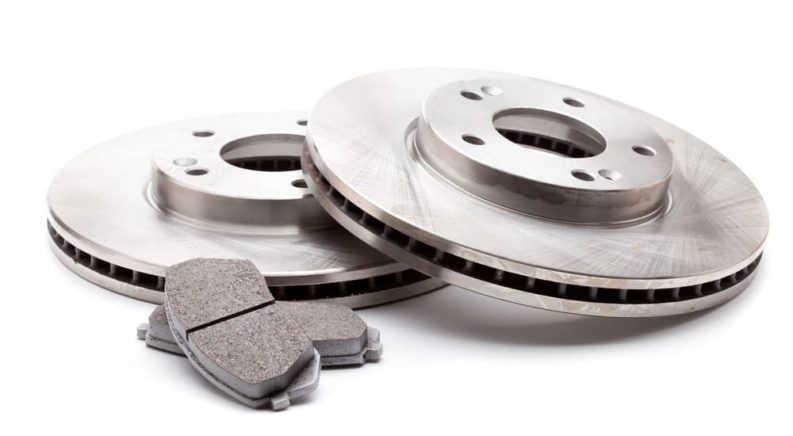
In terms of motion, brakes are some of the most important components on a vehicle. Essentially, they are responsible for slowing and bringing the vehicle to a stop. There are two primary types of brake systems that vehicles will possess; disc brakes and drum brakes. Disc brakes are the most common type of vehicle brakes and will be the focus of this guide, while drum brakes are found most commonly on older cars and trucks, although some newer cheap vehicles will sometimes use drum brakes in the rear to keep the cost of production down. Disc brakes are composed primarily of 3 parts; a caliper, a brake rotor, and brake pads. The caliper squeezes the brake pads up against both sides of the rotor, which is attached to the wheel of the vehicle. This creates friction, allowing the vehicle to be slowed to a halt. Without brakes, the only way of slowing the vehicle would be to stop applying any gas, and hope that there is no downhill surface ahead.
What Can Be Done From Home and Why You Should
While not every brake service can be performed by home (unless you happen to be a trained mechanic or self-taught), there are a few things that someone who has little mechanical training can do, and that is changing the pads and rotors on disc brakes. Due to the nature of disc brakes, the pads and rotors are actually the most common form of brake service that will be required, as they can both get worn-down by repeated use and are meant to be frequently replaced. There are quite a few advantages when it comes to performing a pad and rotor change at home, so long as one is careful and patient. When it comes to garages/dealerships, most will usually have the parts that they intend to use on hand, or in mind. One of the conveniences of performing service from home is that one is given the freedom to select whatever parts they desire. While you can request certain parts from a mechanic, they will usually apply a slight upcharge on the parts, so that they can still get reasonably paid. By buying them directly, there is no middleman involved. You also do not have to pay any mechanic for their labor, as it will be your labor that is being used.
What You Will Need
Even though the process is rather simple, quite a few different parts are required. The first is the pads and rotors (obviously), and there are quite a few different options available to the average vehicle owner. However, one must first determine exactly what size pads and rotors they will need. The best resource available is the internet, where one can find not only the correct size for their brake pads and rotors but also many different buying options. For pads, I would personally suggest ceramic brake pads. Although they are a bit pricier than standard pads, they last longer than most pads and provide a smoother braking experience. As far as rotors go, there is not much variety involved, so whichever option is most affordable is just fine. However, the quality control is not the best for some of the cheaper options, so the rotors may need to be ground down a bit if the braking feels uneven. A jack/car stand is required in order to lift the vehicle off the ground to remove the tire, as well as either a 1/2” ratchet or a tire wrench to remove the tire. Most vehicles will come with a small car jack, as well as a tire wrench in the back where the spare tire is for roadside flat tire emergencies. Next, either a 3/8” ratchet or a wrench is required for removing the caliper. After that, one will need either a clamp of some sorts or a special brake caliper tool. This is required in order to re-compress the brake caliper; otherwise, the new pads will not fit. Visegrip makes a clamp that works very well and is considerably cheaper than an actual caliper tool. One will also need a small pry-bar of sorts or a larger flat-head screwdriver. While not necessarily required, a can of brake cleaner is also a very good idea, as the new rotors can get covered in dirt and grease in the process. Finally, while also not required, a wire brush is a great tool to have, so that the area where the pads are placed can be cleaned out and touched up a bit, which aids in placing the new pads in.
Steps to Performing a Home Brake Change
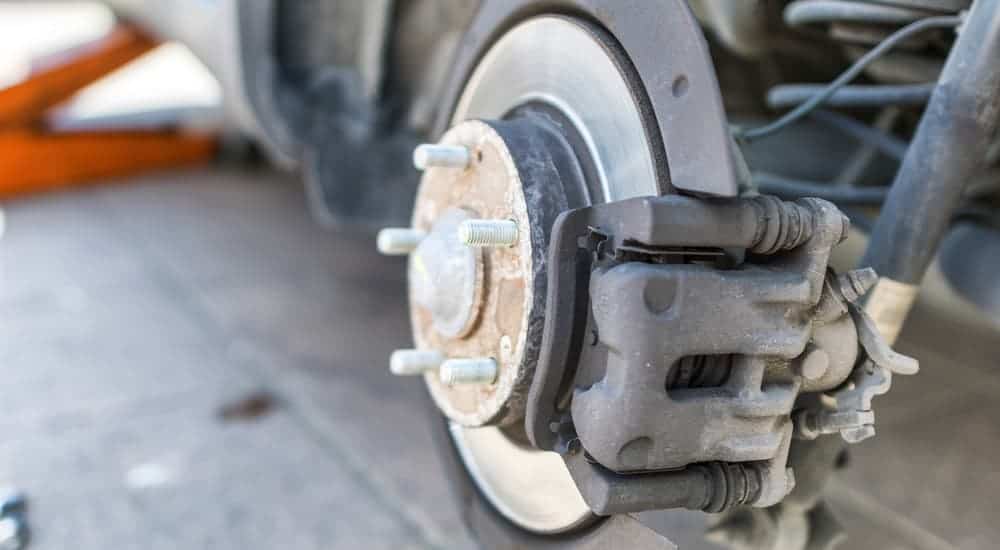
With the proper tools and parts assembled, the pad and rotor change can be started. The first step would be to loosen the lug nuts on the first tire a bit while the car is still on the ground. Once the tire is elevated off of the ground, it begins to free-float, and getting enough force to turn the lug nuts by hand can be difficult if the tire is moving. Once all of the lug nuts have been loosened, the car can be jacked up using the hydraulic jack. Once the tire is off the ground enough, the lug nuts can be fully loosened, and the tire can be removed. With the tire gone, the brake system is exposed. A good idea would be to turn the vehicles wheels to the opposite side of the one you will be working on; left for the right side and right for the left side. This makes it easier to reach access the bolts holding the caliper on. The next step would be to remove the brake caliper using either the wrench or the 3/8” ratchet to loosen the bolts holding the brake caliper on. These bolts look like this:
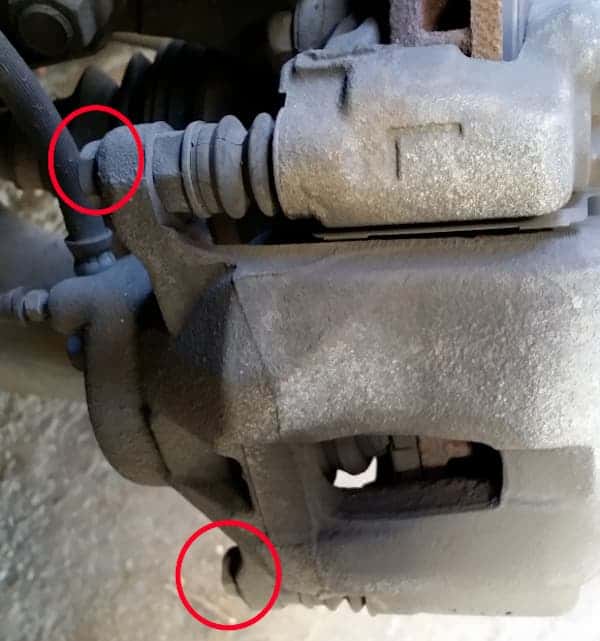
After removing the bolts, the caliper can be removed, although the pry-bar/flat-head screwdriver may be required to force it off, as it can be tough. Once removed, it can be placed off to the side. However, one should never let it hang from the hose that attaches the caliper to the vehicle, as it could damage. This would be a good time to re-compress the caliper by squeezing the exposed caliper inwards using the clamp. Once it is fully back inside, it can be truly set aside for a while. Next, using the pry-bar/screwdriver, remove the old brake pads from the rotor. The bracket that holds the brake pads must then be removed by unscrewing the bolts attaching it to the rotor. These are larger bolts, however, so either a larger wrench or a 1/2” ratchet should be used. With this gone, the rotor can finally be removed. The new rotor can then be placed on the hub, and sprayed with the brake cleaner to ensure it is clean. Then, the new brake pads can be opened. Inside the brake pad box, there should be a set of metallic clips and a small package of grease along with the pads. Place the new metallic clips on the bracket, and place the bracket back on to the rotor. The grease should be applied to the outside of the brake pads only, as the inside needs to generate as much friction as possible, and then the new pads can be placed on to the bracket. The caliper can then be replaced on to the rest of the brake system, and with everything tightened the tire can then be replaced. Simply repeat this process for the rest of the tires’ brakes, and the pad and rotor change has been completed.
When it comes to vehicle maintenance, one of the most important factors involved is cost. By performing maintenance from home, one can save a lot of money over time, as well as gain valuable skills working on vehicles. One of the simplest forms of brake service that can be performed from home is changing the brake pads and rotors. By using this guide, anyone can channel their inner mechanic and perform a pad and rotor change from the comfort of their own home. However, you can always have a mechanic do the work for you so that you don’t have to get your hands dirty.