
There aren’t many things that are more inconvenient than having a flat tire. You’re just going about your likely very busy day, and all of a sudden, boom, you’re carless. However, it doesn’t have to be this way. If you prepare yourself and follow the steps in this article, you can quickly and safely get yourself back on the road long enough to find yourself a “tire shop near me.”
First, let’s go over some items that you should keep handy now in the event that you or someone you come across gets a flat. You’ll need a car jack, a lug wrench, a spare tire, and your vehicle’s owner manual. The latter will help your specific case by pointing out any variations or unique differences that may be necessary for your tire replacement. It’s also not a bad idea to keep a 2×6 piece of wood, a flashlight (yes, your phone counts), and if you really want to make things easier on yourself, wheel wedges. Although strictly speaking, none of those are required to change a tire.
Let’s begin with some safety stuff first. Most of this is basic, but anxiety can make us forgetful sometimes, so we are including these basic reminders. Unless you abruptly busted a tire on the interstate and there’s no way to calmly approach the situation, it’s best to pull off somewhere with little traffic and level ground. Make sure to turn on your hazard lights, set the parking brake, and if you have them, place your wheel wedges to prevent any rolling.
Step 1: Pop The Cap
First, you’ll need to remove your hubcap. This is the piece on your wheel that covers the lug nuts. Many modern cars do not even have a hubcap, but if yours does, it has to come off. In most cases, you’ll pop off the hub cap by using the flat end of your lug wrench or a flathead screwdriver. Simply take your tool of choice and apply pressure from behind until the hub cap comes off.
This is only for the types that pop off, though. There are two other hubcap types, which include bolt-on and screw-on methods. These are the ones that you should consult your owner’s manual for because it’s possible to damage them if you don’t know which kind you’re dealing with. For bolt-on hubcaps, you’ll need to remove your lugs first. For screw-on hubcaps, your vehicle should come with a special tool that fits your wheels’ needs – don’t ever lose this tool!
Step 2: Loosen Those Lugs
Now it’s time to loosen the lug nuts. This one is simple – just use your lug wrench to loosen them up, but don’t loosen them so much that they come off completely. If your tire comes off at this point, you might damage your car or even injure yourself. Loosening the lugs takes some force, so if strength isn’t your strong suit, don’t be afraid of looking silly. You may have to work harder than you’d think.

Step 3: Jack It Up
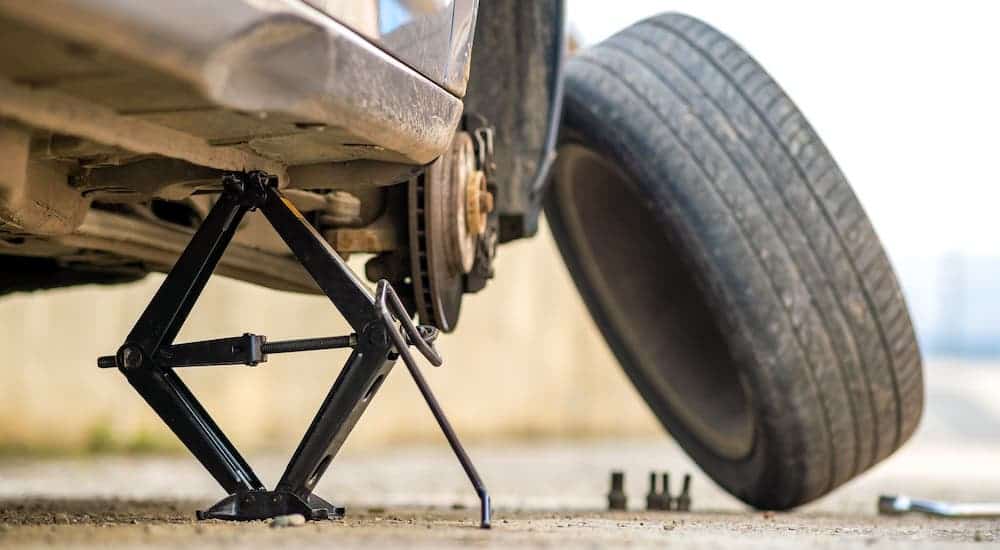
First off, place your 2×6 piece of wood under the jack to make sure everything is level. Then it’s time to place the jack. Again, some vehicles may break the status quo by having their own unique differences. Your vehicle may have its own specific guidelines for placing the jack, so again, if you have that owner’s manual handy, that’ll be great. However, most vehicles are made in a way that makes this easy.
Look for something that we call a “jack point.” These are typically located behind the front wheels and in front of the back wheels. These are usually flat areas or notches where the jack point is at. You may also be lucky and have a fancy car with labels that show you exactly where your jack points are. Once that’s settled, jack up the car until it’s around 6 inches off the ground.
Step 4: Remove The Lug Nuts And The Flat Tire
Now that your car is safely supported by the jack, it is time to remove the lug nuts. Finish unscrewing them until they fall out and put them somewhere safe. Your pocket or your purse are great options. Now, pull the tire toward you until it comes off. It may be heavy, so feel free to just roll it to the side if you aren’t able to lift it for very long.
Step 5: Put On The New Tire
Now you’re just doing the opposite of what you just did. Line your new tire up to the lug bolts and slide it on. Replace the lug nuts that you hopefully safely placed in your pocket, and then tighten them by hand. Lower your vehicle via the jack, remove the jack, and then tighten the lug nuts up with your wrench. You can add the hub cap back on if it fits, but if not, just deal with the lack of style for now.
Step 6: Check That Pressure
You definitely don’t want to drive on an unsafe spare. That would defeat the whole point of even replacing the flat in the first place. It’s important to check your tire pressure after installation, just to be safe. Normal tire pressure is between 30 and 40 psi. If you have a spare donut tire, the norm is around 60 psi. This is a big difference, so make sure your donut tire is properly (ideally before it is needed).
Step 7: The Obvious Step – Taking Your Car To A Service Center
Well, now that everything is fine, well, and safe, it won’t stay that way for long. Once you’re back on the road, it’s only temporarily until you get a permanent replacement. If your spare is a donut rather than a full-size tire, remember not to drive at high speeds or attempt any sudden acceleration or braking.
A Backup Tip: Tire Plugging
If you don’t have a spare, but you do have a flat, it’s still possible to plug a tire. This is specifically if a hole is the culprit behind your flat. If you want to do this, there are a few ways you can go about it. You can purchase a tire plugging kit, or you can use products like Fix-a-flat, but most technicians will rightfully tell you that the latter may do more harm than good.
We’re simply looking at the tire plugging kit option today. For this, you’ll need a lug wrench, a valve stem tool, pliers, and that good ole trusty vehicle jack. Your tire repair kit comes with your cement, your plug holder, and your plugs.
You’ll first remove the tire by completing the same method, as we listed above. You’ll then need to locate the leak. If you can’t find it, you can use soapy water to surface the leak. It will help you find the area because the escaping air will produce bubbles. If there’s something stuck in your tire, bring out your pliers and get the offender out.
Now you’ll need to remove the valve stem core using your valve stem tool. It sounds bizarre, but you’re going to let your tire go completely flat. Then you’ll use a reaming tool to ream the hole so that you can insert the tire patch without any debris. Basically, the reamer is your cleaner here. You don’t want anything to keep the plug from sealing.
Your plug holder and plugs are used to insert into the hole. Slide your plug into the plug holder until it is evenly poking out through both sides of your plug holder. You’re going to insert the plug into the tire, but first, you must apply your rubber cement. It’s best to apply it directly onto the plug (AKA: your patch) before inserting it. This will help the plug slide in with ease.
Using your plug holder, you’ll insert the plug into the hole. Once it is in there good and secure, you’ll release the plug holder and you’ll be good to go! The air will stop escaping, and your tire should be usable again, at least for now. Don’t forget to check your tire pressure before getting back on the road