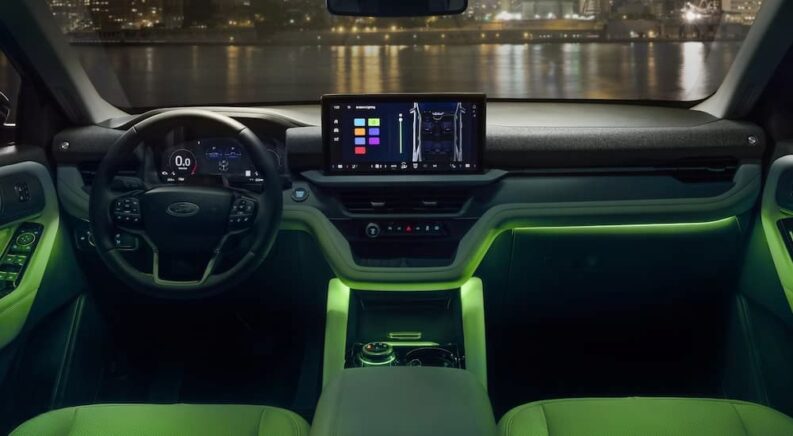
Basic interior car lighting, like overhead and map lights, is standard equipment throughout the industry. In recent years, more high-end vehicles and trim levels have been offering ambient interior lighting. These strategically placed decorative lights add a lot to a vehicle’s ambience and atmosphere. I’ve sat in vehicles with ambient lighting before, and it was surprising how much it added to the experience.
However, you don’t need to buy an expensive vehicle to experience this upgrade. With the right equipment and a little know-how, you can install car interior ambient lighting or have it installed by an experienced mechanic. In this guide, I’ll go over the required parts and accessories for ambient lighting, ideas on how to set it up, and other things you should know before making the plunge.
Benefits of Car Interior Ambient Lighting
Why should you install interior ambient lighting in a vehicle? It adds a little more visibility inside the vehicle, helping you see control buttons, gauges, door handles, and more, especially at night. It also lets you personalize the interior and set the right mood, whether you prefer it to be opulent and comforting or big and aggressive.
Ambient lighting may improve a driver’s performance, with a 2010 study suggesting that it increases alertness. The same study also indicated that ambient lighting improves spatial perception, which further reduces accident risk. It also makes the entire interior feel like it’s of higher quality. Ambient lights can also increase the vehicle’s resale value through enhanced functionality and aesthetic appeal.
Lighting and Layout Ideas
Planning the layout of your car interior lighting is important for achieving the desired effect. Some of the places you might place ambient lights include:
- Steering wheels
- Footwells
- Door panels and trim
- Center consoles
- Dashboards
- Storage areas
- Touchscreens
- Speakers
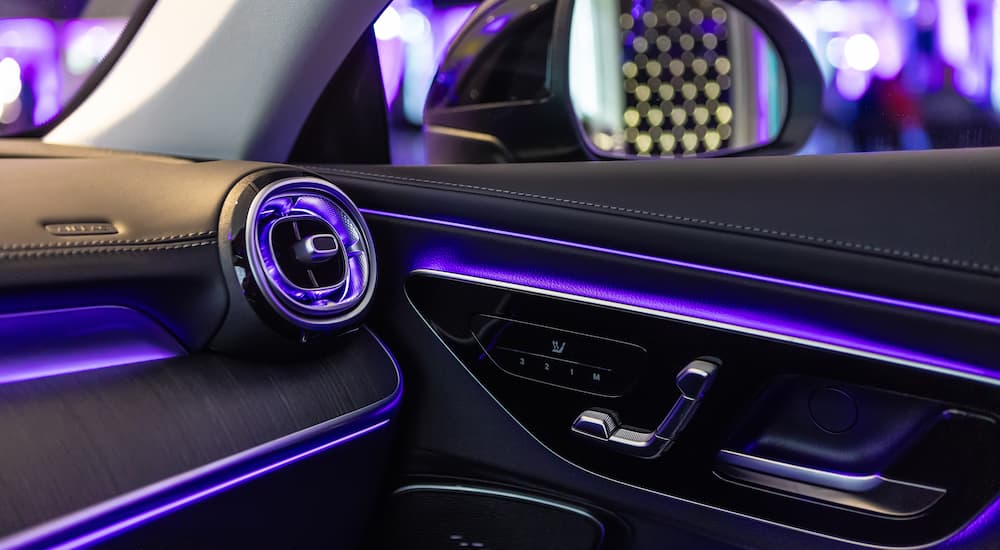
- Air vents
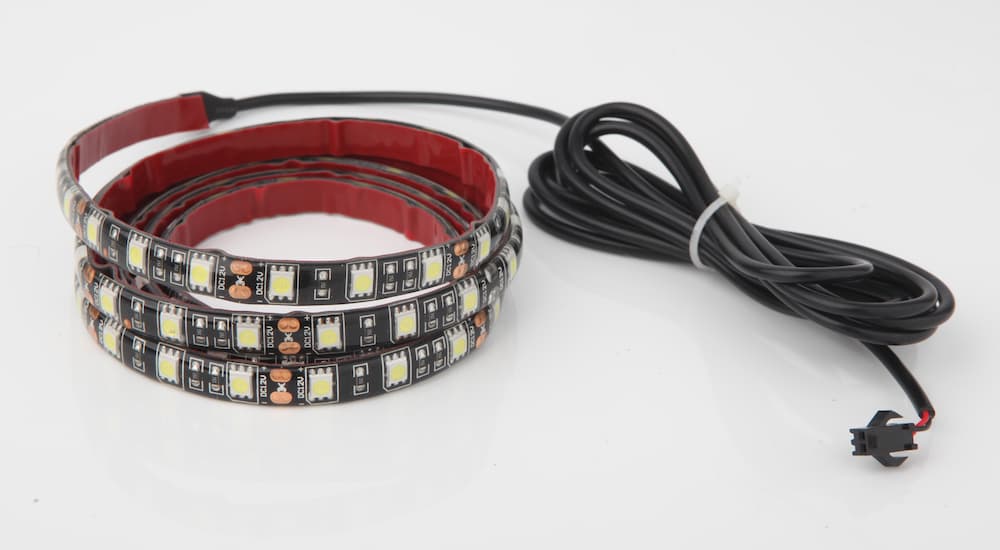
Limit lights to one or two per area and mirror time on each side for a balanced setup. If you put lights on one of the door panels, put them on the opposite door panel, too. LED strip lights are the fixture of choice because they are efficient, versatile, and easy to install. Pod accent lights will showcase smaller items. Some lights use fiber optic cables to reduce heat and allow more visual effects like dimming and strobing.
Generally, you should use softer colors like warm white, green, blue, and purple. Bright white, red, yellow, and similar colors are fine in moderation, but too much will cause glare and reflections that hurt visibility. Keep these loud colors away from places you’re constantly looking, such as windshields and instrument panels. Some light kits have RGB color-changing ability, enabling you to swap colors depending on outdoor lighting conditions and your mood.
Ambient lights are typically connected directly to the fuse box or to the vehicle’s 12V power outlet. The fuse box method gives you more control over operating the lights, such as activating them when the headlights come on. You can also run more powerful LEDs, and they will have protection against circuit overload. Power outlet connections are easier to install for simple plug-and-play lights.
What You Need to Install Ambient Lighting
Many companies sell car ambient interior light kits that include all the parts for a standard installation, though you can customize a kit separately. Along with lights, installation requires various wires and cables, a power box/control module, adhesive backing or hook-and-loop strips (i.e., Velcro), a fuse adapter for the fuse box method, and a way to operate the lights. Most kits use a handheld remote control or an app. You may also need a wire cutter and stripper, electrical tape, a drill or hole saw, and zip ties to mount and organize the wiring.
Be aware that despite the efficiency of LEDs, ambient lights will still draw some power from your vehicle’s battery. If you are installing a larger kit or already have other power-heavy accessories like high-wattage speakers and heated seats, you may need to install a larger battery or add an auxiliary battery so everything can function normally.
How Much Does It Cost?
Adding ambient lighting to a vehicle is surprisingly affordable if you install it yourself. I found several six-output light kits from reputable retailers in the $130 to $200 range. Basic trim lighting kits cost even less, while more wide-ranging kits are a little pricier.
The biggest expense would be having a professional technician install the lighting. This can easily exceed $1,000 and perhaps go higher. However, professional help may be necessary for complex installations, such as those requiring the removal of body panels or drilling large holes. The upside is that you’re having someone experienced and knowledgeable do the work, which minimizes the chances of system failure. Many installers include some sort of warranty.
Installation Steps
Do you want to try installing a vehicle ambient lighting kit? Here are the basic steps, which may vary slightly based on the kit. Most kits also include more detailed instructions for how to connect wires, power boxes, etc.
-
- Sketch a basic layout for where you plan to put the lights, wires, and controllers.
- Gather your parts and tools.
- Clean all mounting surfaces using rubbing alcohol and let them dry. This will help the component stick securely.
- Mount your lights in the desired locations using adhesive or hook-and-loop strips.
- Mount the control module in a concealed location such as underneath the dash.
- Route the wires so they reach the power box mounting location while being as hidden as possible. Options include placing the wires along the floor, beneath the dash panel, or through the door panels. Drilling holes will be necessary for the last option.
- Use zip ties or clips to bundle the wires so they take up less space.
- Connect the LED wires to the control module.
- Connect your control module to the power source.• For fuse box connections, find the fuse panel diagram in the owner’s manual and determine which accessory fuse you want to connect to. Remove the fuse, place it in a fuse adapter, and put it back in the original location. Connect the fuse adapter to the ambient light power box using the red wire, then connect the black wire to a metal grounding point.
• For power outlet connections, strip the wire ends, crimp the exposed wires to a butt connector, and wrap the connection with electrical tape. Connect the other end of the butt connector to a 12V power outlet adapter and plug the adapter into the outlet.
- Double-check that the connections and wires are secure.
- Turn the ambient lighting system on and test to confirm it works, including any custom functions.
Enjoy a Bright Journey Inside and Out
Just like in homes and businesses, putting ambient lighting in a vehicle makes it feel different in the best way. An aftermarket lighting kit lets you enjoy this sophisticated addition regardless of the make and model you drive, and you get to decide everything about the lights’ location, color, brightness, and power method. From simple dashboard light strips to multi-light systems and accent lights for the second and third rows, the right ambient lighting offers an instant boost. Use this article to help you come up with a dream ambient lighting plan and make it a reality.