While we rarely see or even think about it, motor oil is one of the most vital substances in your vehicle. Motor oil lubricates the moving parts of your vehicle’s engine, helping to keep everything running smoothly and playing a vital role in slowing down the inevitable wear-and-tear. Unless you have an electric vehicle, oil changes will be a required part of the maintenance schedule and tied to your vehicle’s warranty, so a failure to change your oil, or using the incorrect type of oil, could result in that warranty being voided. If you are new to DIY maintenance, it is time to open up Google and search for “professional oil change near me.”
While you might have heard oil referred to as the lifeblood of a car, it might be more accurate to look at it as the water instead: it keeps everything well lubricated, cleans out build-up, and prevents it from overheating. Just like you wouldn’t head to the gym without a full water bottle, you never want to try operating your vehicle without the proper amount of oil in it. In both cases, the result would likely be the same: things might seem like they’re working well for a minute, but before too long, you’ll be left with quite a headache.
How Often Should I Check or Change my Oil?
You can really never check your oil too often, though it is unlikely to change day-to-day unless there’s a leak somewhere. Still, checking your oil is one of the easiest car maintenance tasks you could imagine, requiring nothing more than a spare rag or paper towel, so there’s no excuse for putting it off. One good rule of thumb, assuming you do an average amount of driving, is to check it every other time you fill up your gas tank. It’s easy and quick enough that it can easily be completed in the time it takes your tank to fill.
Changing your oil is a little more complicated. Despite the time-tested advice handed down by your father and your father’s father before him, the old “change your oil every 6 months or 3,000 miles” rule isn’t as relevant as it once was. Modern technology and advances in automotive lubricants have doubled that figure, with the typical recommendations now advising a change every 5,000 to 7,500 in many newer vehicles. Those that require full-synthetic oil can go even further, some even logging 15,000 miles before needing a change. A lot will depend on your vehicle, so refer to your owner’s manual to determine your oil change interval. Do keep in mind that drivers who put very few miles on their vehicle should still perform an oil change every year, regardless of actual mileage.
The oil change schedule and procedure also depend on the age of your vehicle. In older vehicles, you’ll need to reference your owner’s manual, roll up your sleeves and get under the hood to monitor your oil level yourself. Most older vehicles will provide two distinct maintenance schedules depending on the frequency of use, one “normal” and one “severe” service schedule. If you’re typically taking trips of 5 miles or less, constantly navigating stop-and-go traffic, operating in exceptionally hot, cold, or dusty conditions, carrying heavy loads, or towing, your motor oil needs are going to be much different than the everyday driver, so take note.
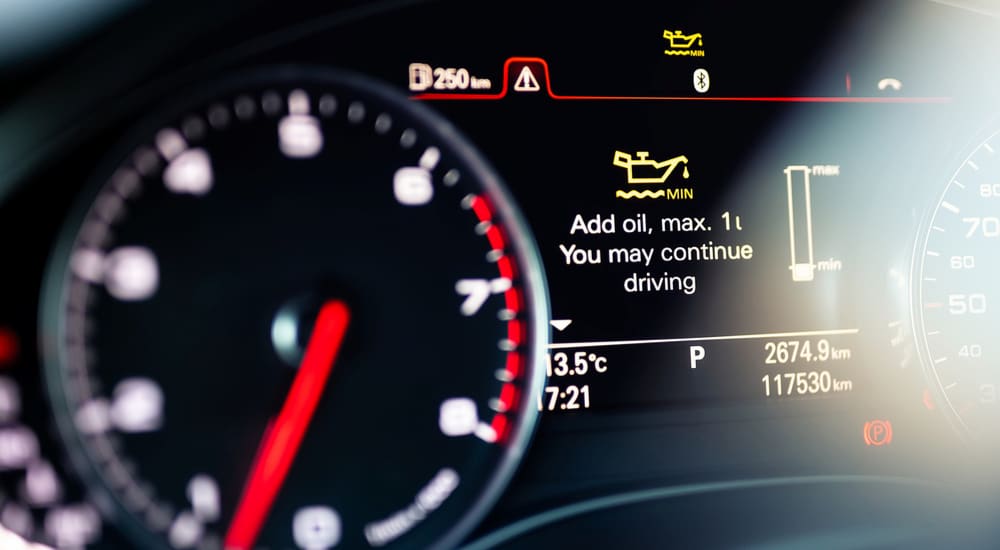
Many newer vehicles take a lot of the guesswork out of this process, using internal electronic systems to monitor oil levels and giving you an alert when it’s time for a change. In recent years these systems have become even more comprehensive and now can often be used to monitor not only oil levels but actual oil condition. They can also automatically detect normal versus severe use and adjust your maintenance schedule accordingly. Just make sure the system is reset by your mechanic at the end of each oil change to keep it calibrated. Your mechanic will also usually affix a sticker to your windshield showing the mileage at which you should stop in for your next change, but there are also a number of smartphone apps such as CARFAX Car Care and Fuelly aCar, which can help keep your service schedule on track.
How Do I Check My Motor Oil?
First off, make sure your vehicle is turned off and parked on level ground. Any incline could give an inaccurate reading, as the fluids within the car will be tilted to some degree. As a general rule of thumb, you’ll want to check the oil level after the engine has cooled, so wait for at least 5 minutes after shutting off the car. This not only ensures you won’t burn yourself with hot oil, but it also helps in getting a more accurate reading. If you’re feeling particularly impatient, you can take a reading on a warm engine – some auto manufacturers have actually redesigned their dipsticks to take accurate readings at running temperature – but know that it likely won’t be as precise.
Once the vehicle is cooled off, you’ll want to pop the hood using the lever or button typically located near the floor to the left of the driver’s seat. This will usually be labeled as such or show an icon of a car with an open hood. Don’t worry when your hood doesn’t immediately pop all the way open: as a safety measure, vehicle hoods usually have a secondary latch found directly above the center point of the front grill. This prevents the hood from flying up and blocking a driver’s view in the case of an accidental deployment of the interior lever. Put your hand in the gap between the hood and chassis, and feel for a lever. Once pushed, the hood should be able to swing wide open. You should now have easy access to the engine components, but before you do anything else, securely prop up the hood using the attached metal stand to ensure it doesn’t accidentally slam shut on top of you.
The next step is locating the motor oil cap. This will typically be a brightly colored plastic knob in an easy-to-access part of the engine compartment. If you see something else that looks like a cap, but it’s buried somewhere deep under the hood, it’s probably not what you’re looking for. You also don’t want the motor oil filler cap, which is typically larger and dark-colored.
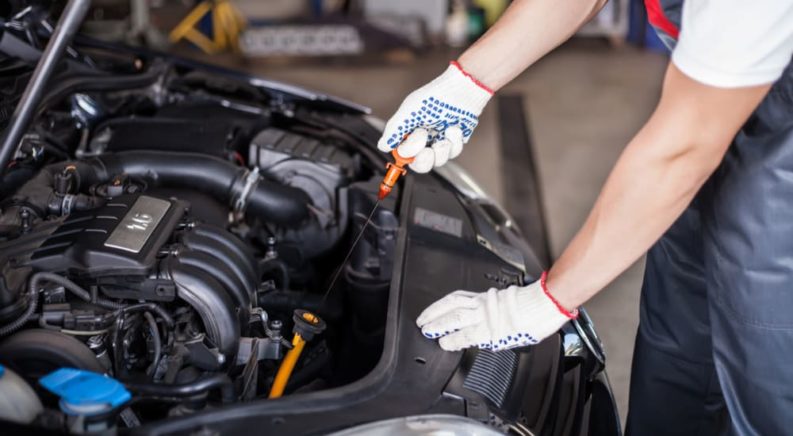
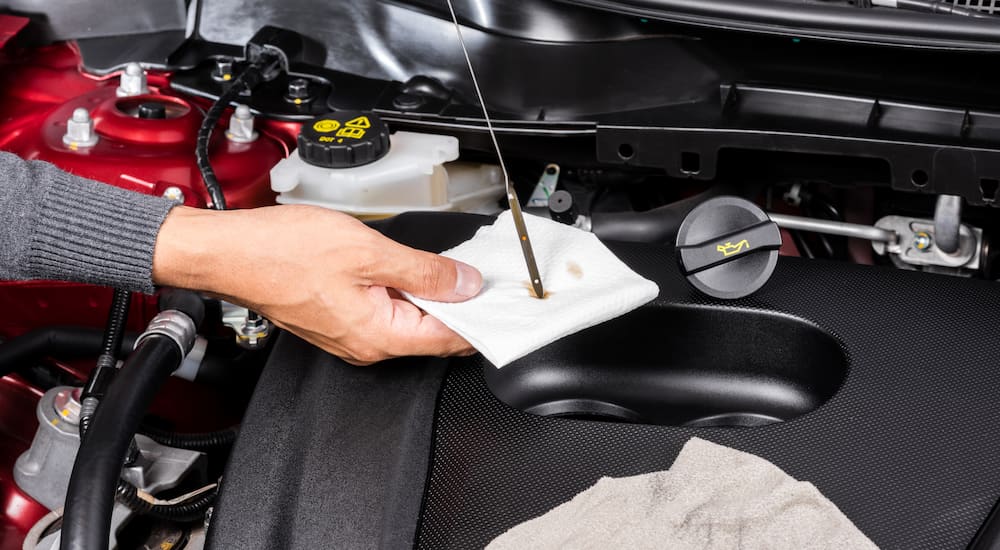
Twist the motor oil cap and pull the attached dipstick – a metal strip typically around two feet long – from the tube it’s resting in. Sometimes you’ll have to half-twist the dipstick as you draw it out, so don’t be surprised if you find a little resistance. At the end of the dipstick, you’ll see some sort of letters or markings indicating the highest and lowest recommended levels of motor oil, typically something like “H” and “L,” “MIN” and “MAX,” or simply two holes punched through the strip. Ignore these for now, and use a rag to clean the entire length of the dipstick – the reading which shows on the initial pull is typically not accurate.
Once it has no traces of oil left on it, insert the dipstick all the way back into the tube, and then remove it again. You should now have a dipstick with oil extending from the bottom to, hopefully, somewhere between your high and low oil markings. If the oil is below the minimum recommended amount, it’s time to top it off. If it’s not showing up at all, you’ve got a bigger issue on your hands that’s probably going to require an experienced mechanic and a tow truck. Too much oil can be almost as bad as too little, so if the oil reaches above the maximum recommended, you’ll need to drain some out – a much more complicated procedure we won’t get into here.
Assuming your oil tank just needs a little topping off, grab the correct type of motor oil and locate the oil filler cap, usually nestled right on or next to the engine itself. This plastic cap will also usually have the weight of oil your vehicle needs printed on the top – something like 5W-30, 10W-30, or 15W-40 – as yet another reminder that not all oils are created equal. Using a funnel, add a small amount to start, let it settle in for a few minutes, and then take another reading using the dipstick (remember to clean it, reinsert it, and remove it again). If it’s still below the minimum, add a bit more before checking the dipstick again. A single quart should be enough to top off most functioning vehicles, so if your oil level still isn’t satisfactory at this point, you might be burning or leaking oil. This is likely indicative of a deeper issue that you’d best leave to a mechanic.
There’s a lot to learn about your car and a lot of maintenance and repair work you can DIY, given a little knowledge and the right tools. Checking your oil, tire pressure, and fluid levels might seem pretty basic, but they’re important steps in building your automotive knowledge. Start small, only take on projects you’re comfortable with, and follow all recommended safety guidelines. Once you understand these basics and how they contribute to your vehicle’s overall performance, you’ll start to build a more holistic understanding of what exactly is going on under the hood every time you step on the gas. From there, you’ll build the confidence to tackle bigger and bigger projects, allowing you to keep your vehicle running smoothly and spot potential problems before they become big-ticket repairs. It might seem intimidating at first, but you’ll be amazed what you can achieve with a ratchet set, the right attitude, and some basic knowledge.