When it comes to your vehicle, few things peel back the years like a nice, fresh set of wheels. Of course, keeping your wheels clean can be a struggle, especially in areas with challenging weather or road conditions, but luckily Plasti Dip is here to help. Plasti Dip is the brand name of an air-dry, specialty rubber coating that’s become increasingly popular among gearheads as a quick and affordable way to breathe new life into old wheels, providing a striking plastic sheen that turns heads while also protecting your wheels. Products like Plasti Dip make it easier for drivers to change up their wheel color at a moment’s notice, and best of all, it isn’t a long-term commitment. While durable for up to three years under normal use, Plasti Dip can be easily peeled off once dry, just in case that blaze-orange color scheme you were going for doesn’t look quite so cool in the harsh light of day.
While there are a few companies out there producing similar products––Hyper Dip and Rust-Oleum Automotive Peel Coat, to name a few––we’re going to use Plasti Dip as a catchall term for these types of spray-on rubberized coatings. Each offers its own advantages in terms of color options, longevity, and shine, so make sure to do some research and try out multiple options before settling on a favorite. That said, there’s a reason Plasti Dip has become the industry’s standard. Not only does it hold up well under challenging road conditions, but the spray-on protective coating is also sold in a full spectrum of colors, making it easy to match your paint job or find the perfect hue to highlight your ride. Let’s take a closer look at Plasti Dip, learn a little about its history and the current product line, and discuss how to Plasti Dip your wheel with this age-defying rubberized coating.
Types of Plasti Dip
Plasti Dip traces its colorful history back to Minnesota in the early 1970s when founder Robert Haasl set out to develop a line of Plastisol-based products. These included an early, non-sprayable version of what would become Plasti Dip, alongside chainsaw scabbards, vinyl leather repair treatment, waterbed repair kits, a Scotchguard competitor known as Water Guard, and even rubberized children’s toys, including everyone’s favorite bendable, green buddy, Gumby. Many of Plasti Dips other early creations were aimed primarily at the sports industry, including 3-Way Racket Spray for leather sport grips and Super Grip, an air-dry non-skid fabric coating endorsed by pro athletes like Arnold Palmer and Tony Oliva of the Minnesota Twins.
Plasti Dip expanded its products line throughout the ’80s and ’90s, making in-roads in the industrial and commercial sectors that saw the company’s products used on everything from pool floats, wrestling mats, and meat processing plants to Holiday Inn swimming pools, medical equipment, and even the Golden Gate Bridge. The ’80s saw Plasti Dip take on its familiar aerosolized, spray-on form, but it was the 2010s that saw the company’s most impressive growth, with Plasti Dip building a new 60,000-square-foot distribution center to keep up with increased demand. These days Plasti Dip can be found at nearly every hardware store, home improvement center, and automotive retailer across the country. The product line is growing as fast as ever with the continual introduction of new colors and finishes and even a low volatile organic compound (VOC) offering known as Plasti Dip Spray 50 for drivers in areas with VOC restrictions.
Current Plasti Dip Products for the Automotive Market
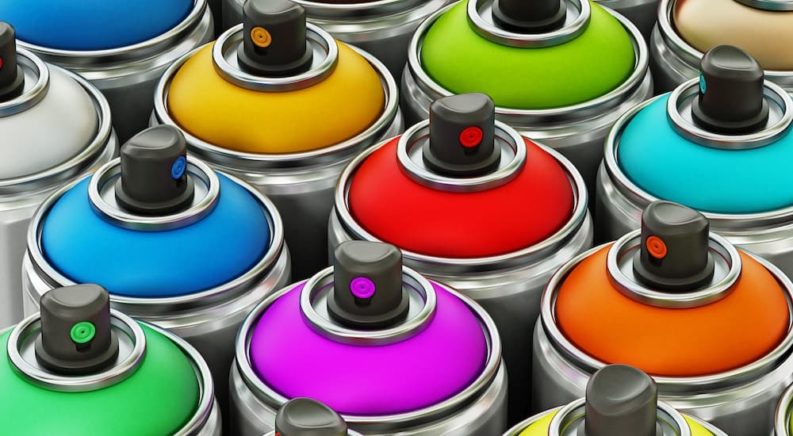
Standard Colors: There are a ton of standard pre-made colors, as well as a Create-A-Color option that allows drivers to match the hue of their specific vehicle
Classic Muscle: Thirteen colors specially designed to capture the unique finishes of the muscle car era. From Aqua and Daytona Yellow to Panther Pink and Wimbledon White, these colors perfectly capture that bygone era in American automotive history.
Luxury Metal: These nine colors offer a more metallic sheen than regular Plasti Dip products, making them the perfect option for drivers who want to make their wheels into a bold stylistic statement.
In addition to the wide range of colors, Plasti Dip also offers a line of enhancers that can really make your wheels pop––in a good way. These enhancers include:
Metalizier: For those who don’t want to go the full metallic route with the Luxury Metal line, Plasti Dip offers ten Metalizer enhancers that add a metallic sparkle to any of the base Plasti Dip colors. Color options include Silver, Gold, Copper, Violet, Bright Aluminum, and more.
Chameleon: Drivers seeking that distinctive color-shifting iridescent shimmer can opt for one of Plasti Dip’s Chameleon enhancers. Designed to be applied over a base coat of Black Plasti Dip, color options include Green/Blue, Turquoise/Silver, and Kaleidoscope.
Glossifier: Enhancing a wheel’s glossy shine while also adding in what Plasti Dip calls Fade Buster protection, these neutral Glossifier enhancers can be applied over any Plasti Dip color.
Satinizer: Plasti Dip’s Satinizer enhancer is basically the Glossifier minus the gloss. This enhancer offers the same Fade Buster protection but in a more subtle, satin finish.
Pearlizer: Finally, there’s Plasti Dip’s Pearlizer enhancer. Offered in five colors ranging from Burnt Orange, Cranberry, and Sapphire Blue to Lava Red Pearl and Green Gold Pearl, these enhancers add a pearlescent sheen to any base Plasti Dip color.
How to Plasti Dip Your Wheels
Step 1: Clean
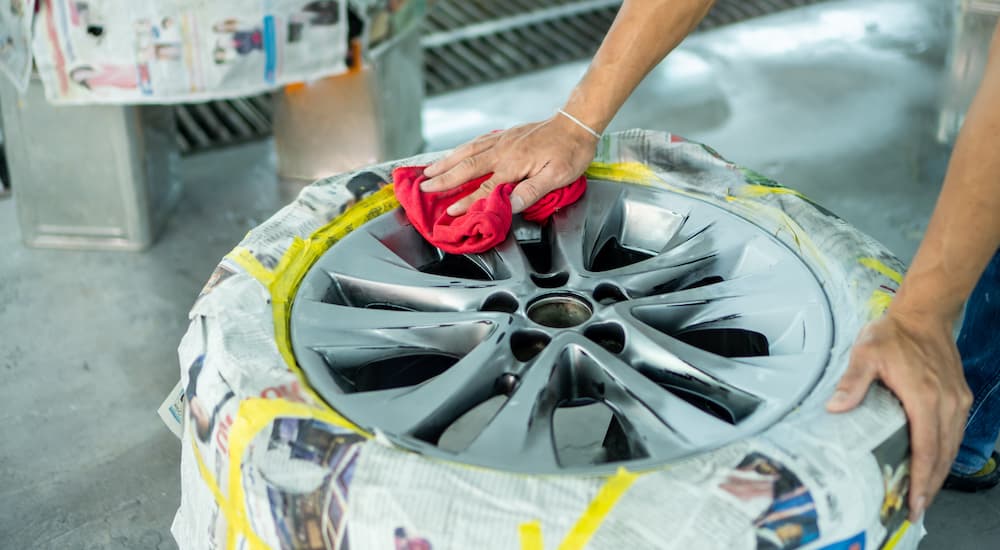
In order for products like Plasti Dip to properly adhere to your vehicle, it’s important to make sure the wheels are as clean as possible. Start by giving the wheels a quick rinse with fresh water from a hose or pressure washer, then wipe them down with an all-purpose cleaner before drying them off with a clean rag to remove stuck-on dirt, grime, and brake dust. Make sure to clean the backside of the rims as it will prevent the Plasti Dip from prematurely peeling up around the edges. The drying step is particularly important as any remaining moisture can cause bubbles to form once the Plasti Dip is applied.
Step 2: Tape Off Brake Pads
Now that your wheels are squeaky-clean, it’s time to make sure the Plasti Dip only goes where you intend it to. The brake cylinders located just behind your wheels aren’t designed to operate with a thin rubberized coating over them, so it’s important to protect them before you start the process. Use a plastic cover available at any hardware or auto store, or simply cut a trash bag into an appropriate size and feed it through your rims, stretching it to cover the entire brake assembly. Once it’s in place, secure it with some blue painter’s tape. Drivers who want to ensure a clean, seamless job can have the option of removing the wheels entirely prior to applying Plasti Dip, but that can be a lot of work and requires the use of a jack, jack stands, and a torque wrench.
Step 3: Tape Off Tires
Now that your brake pads are covered, it’s time to turn your attention to where your rims meet the tires. Getting Plasti Dip all over your rubber wheels isn’t only redundant, but it will hurt the clean, seamless look you’re going for, so tape your time and line the edges of your rims with painter’s tape. Overlap the tape so that Plasti Dip can’t get between the seams, and ensure it extends one to two inches out from the rim to make for an easier application. If you don’t get it perfect, don’t worry, Plasti Dip can easily be peeled off the rubber wheels, but it’s a lot quicker and cleaner to put in a little prep work. Once the tires and brake pads are thoroughly protected, put a piece of cardboard or old rags under the wheels so that the Plasti Dip doesn’t end up glued to your driveway or garage floor.
Step 4: Prep the Plasti Dip
Preheating the Plasti Dip in a bucket of warm water can go a long way in making sure it flows easily and doesn’t produce any bubbles or air pockets. Simply fill a bucket with warm water from the sink and lower the can into it, taking care not to submerge the actual nozzle itself. Let the can warm up in the water for one minute before use, and dry it off with a rag.
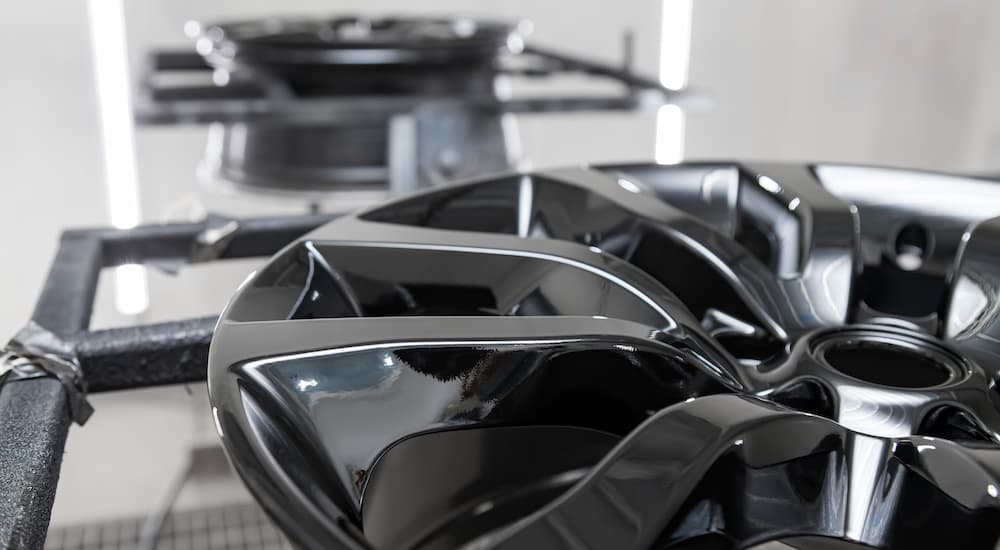
Step 5: Apply the First Coat
Before you actually start spraying, make sure you’ve got all the protective gear you’ll need. Plasti Dip isn’t particularly dangerous, but it can create some harmful fumes, so throw on some goggles and a respirator that covers both your nose and mouth.
Now the fun part. Hold the can of Plasti Dip about six inches away from the wheel and apply in short bursts while sweeping your way across the rim. This is just a first coat, so it doesn’t have to be perfect, but pay attention, and don’t forget to spray the gaps in the rims to ensure coverage from every angle. Let the Plasti Dip dry for between five and fifteen minutes, and do a quick test for tackiness in an inconspicuous area before moving on to the next coat. Dry time will depend on several factors, including temperature and humidity.
Step 6: Apply the Second Coat
Before applying the second coat, make sure the can of Plasti Dip is still well-warmed and flowing well. If it isn’t, use the warm water method and heat it up for another minute. Again, position the can six inches away from the wheels and work them over with short bursts in a sweeping motion. Try to concentrate on areas you might have missed with the first coat, and don’t worry if it goes on a little thick––just make sure it’s not producing bubbles. These can easily be hidden with another coat of Plasti Dip down the line, but in the name of time and expense, try to get it right the first time. Let the rims dry for another five to fifteen minutes before proceeding.
Step 7: Rotate Your Tires
To ensure proper coverage, take a quick break from spraying and move your vehicle forward or backward until the wheels rotate by 180 degrees. This will make it easier for you to reach every last bit of the rims with the Plasti Dip. Make sure to reposition the cardboard or rags back under the wheels as you move the vehicle.
Step 8: Third (And Maybe Fourth) Coat
After the second coat has dried, apply a third coat and, if necessary, a fourth coat after another five to fifteen-minute drying period. The fourth coat might not be necessary depending on how precise you’ve been with the application process so far, but it also can’t really hurt. Note that spraying all four rims with Plasti Dip will typically use four cans of the products, or about one can per rim.
Step 9: Add Gloss or Other Enhancers
Once the base Plasti Dip is applied, it’s time to add any of the Enhancer products you might want to give your vehicle a show-stopping look. From Glossifiers and Satinizers to Pearlizer and even color-shifting iridescent Chameleon, there are plenty of innovative Plasti Dip Enhancers that will make your rims stand out. These products are usually applied the same way as the basic Plasti Dip––hold the can six inches away and apply in short bursts––though the drying time is a bit longer at thirty minutes. As always, read the instructions on the can and account for factors like temperature and humidity.
Step 10: Clean Up
Once the base Plasti Dip or Enhancer product has dried, it’s time to take a look at the results. Peel off the painter’s tape on the edge of the rims and the plastic cover protecting the brake pads, but go slowly, as simply ripping it off could cause some of the Plasti Dip to come with it. If some errant Plasti Dip finds itself stuck on your tires, use your fingernail to peel it off or rub a dry cleaning cloth in a small, circular motion until the tire is clean. Stubborn, stuck-on Plasti Dip can usually be removed with that old mechanic’s standby: WD-40.
Add a Little Extra Style to Your Ride
Plasti Dip might not be the perfect solution for you and your specific automotive project. Painting wheels and applying wraps are two other popular options, though both tend to be more expensive and require more upkeep than spray-on rubberized products like Plasti Dip. As we mentioned earlier, there are plenty of competitors to Plasti Dip out there, so if you’re not satisfied with the product or are seeking a particular color that can’t be captured by the company’s Create-A-Color option, explore the market and take products like Hyper Dip or Rust-Oleum Automotive Peel Coat for a ride. No matter which product you choose, just remember to give your wheel a good, thorough cleaning before starting the process to ensure the best possible results. These spray-on rubberizing compounds are one of the easiest ways to give your old wheels a new look, so grab a can and start experimenting today.