As intimidating as it might seem, the modern internal combustion engine operates on a relatively simple principle: the more air you can cram into it, the more power you’ll get out of it. Forced induction––the use of superchargers and turbochargers––is one popular way of maximizing airflow, potentially doubling or tripling a vehicle’s horsepower. That said, forced induction usually comes with a hefty price tag and can introduce reliability issues. Bolt-on mods like cold-air intakes and exhausts offer a more affordable alternative but don’t produce nearly the same results, with often negligible increases in horsepower.
Drivers seeking a middle ground that’s cheaper than forced induction and more effective than cold-air intakes might want to look into porting and polishing. This approach, which involves smoothing out the engine’s cylinder heads as a means of improving airflow, can increase horsepower by as much as 10 percent and, compared to forced induction, is a relative steal. What exactly is porting and polishing, how does it work, and is it within reach for the average at-home mechanic? Read on for everything you want to know about this traditional way of maximizing performance.
What Is It?
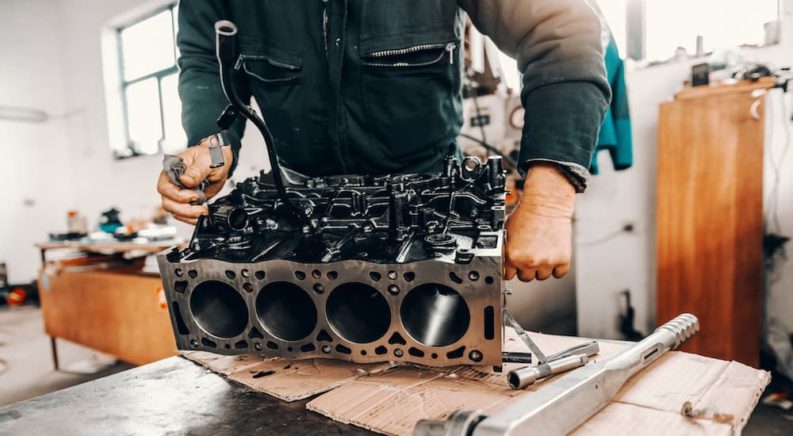
To accurately describe the benefits of porting and polishing, we need to take a step back and look at how cylinder heads are built. Manufacturers produce cylinder heads using a casting process, pouring molten iron or aluminum alloy into a mold and letting it cool until it’s one solid piece. This approach ensures the hard-working part will be able to withstand the rigors of internal combustion, but it has some disadvantages. When it comes to producing power, the largest drawback is that the casting process leaves behind rough edges and other imperfections.
These rough edges are an inevitable part of the mass-production process. Automakers are simply more focused on rolling new vehicles off the assembly line than painstakingly going over each model with a fine-tooth comb. Things have improved in recent years as computer-aided design tools have allowed manufacturers to create cleaner, more precise cylinder heads. However, for drivers seeking a little extra horsepower, a good porting and polishing job is still worth the time and effort.
Porting and polishing is basically the process of removing these casting imperfections, which is important since cylinder heads control the intake and exhaust. The smoother the intake and exhaust outlets on the cylinder head are, the easier air can pass through, resulting in more horsepower and, in turn, more fun behind the wheel. Porting and polishing are two distinct steps, with porting focused on enlarging the ports on the cylinder head with a grinding or cutting tool, and polishing involving smoothing out the newly enlarged ports with a sanding or grinding tool.
The advantages of porting and polishing are threefold. First off, larger intake ports mean less restriction on inflowing air. Removing burrs and bumps also reduces air turbulence, allowing the air to better mix with the fuel as they flow into the cylinder. Lastly, porting and polishing improve the engine’s exhaust stream. Getting the exhaust out in a hurry might not seem as important as increasing intake airflow, but it can go a long way in reducing exhaust back pressure and easing the burden on your engine.
What Does It Cost?
Porting and polishing are typically focused on an engine’s intake and exhaust ports but can also be a useful exercise on other parts as well. Valve throat pockets, valve seats, and the combustion chamber itself can all benefit from a good port and polish, but it all depends on how much work you’re looking to make for yourself or, alternatively, how much you’re willing to spend.
Porting and polishing are commonly broken down into stage 1, stage 2, and stage 3. However, there is no real standardization for what these different stages mean or which parts they cover. The higher the stage, the more work is involved, but be sure to ask the shop exactly what their different port and polish options provide.
You can be looking at a few hundred dollars to over a thousand for a port and polish, depending on the extent of the work and the skill of the shop. That said, if you’re looking to save some money and have a reasonable amount of confidence in your mechanical know-how, porting and polishing can be undertaken at home for those who choose to go the DIY route.
How to Port and Polish
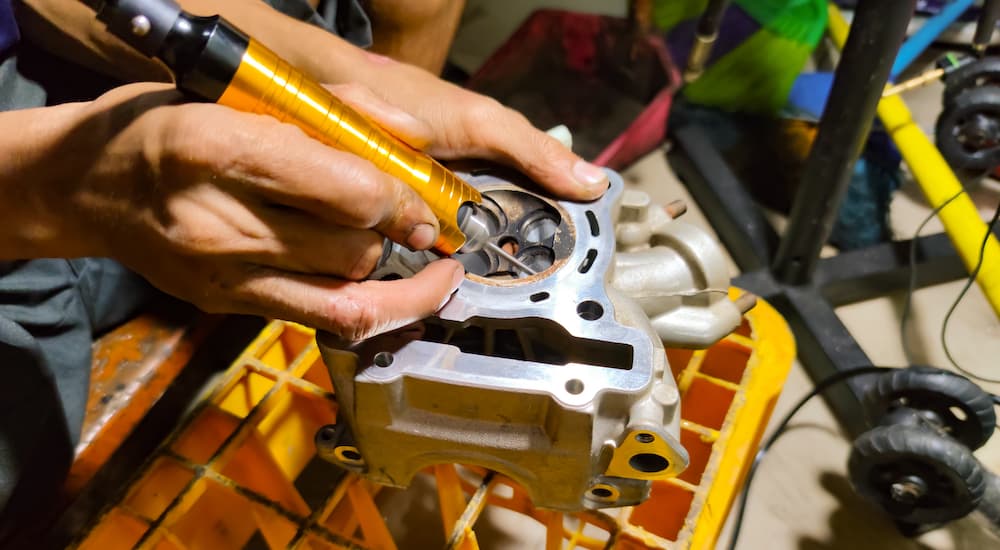
Before you begin the porting and polishing process, you’ll need to gather your tools. For the most part, this procedure won’t require any terribly specialized or expensive equipment, though investing in a good Dremel can make all the difference. In addition to the Dremel, you’ll need various grinding and polishing bits. Extensions can also come in handy when it comes to reaching some of the more recessed parts of the cylinder, so invest in a few three-inch and six-inch shanks as well as a flexible whip extension. You’ll want a vacuum, WD-40, permanent markers, a high-accuracy measuring device, and all the necessary safety equipment like a face mask and safety glasses on hand.
Step 1: As you might imagine, there’s plenty of prep work to be done before you can actually get to the cylinder heads themselves. Disassembling the engine to get to the cylinders may be the most complicated part of the entire process, so if you’re not confident about taking everything apart and putting it back together again, you will want to leave porting and polishing to the pros.
Step 2: Figure out how much material you want to remove and mark off the area with a scribing tool. For a gasket match, simply secure the gasket to the head and color the excess material you want to remove. If you want the process to be a little easier on the eyes, use a layer of layout stain on the metal before scribing, as it’ll allow the marks to stand out.
Step 3: Begin the process of removing excess material, starting with a carbide bit. Slow and steady is the name of the game, as it’s all too easy to remove too much material and leave yourself with a useless, gaping port. Make sure to keep your Dremel in the 10,000 RPM range during this part of the process, as it’ll make the bits last longer.
Step 4: Once you’ve removed the majority of the material you’ve marked out, switch over to polishing bits to smooth out the rough surface left behind by the carbide bit. We recommend starting with a 40-grit bit and finishing off with an 80-grit bit.
Step 5: Inspect the intake runners by placing the cylinder head bottom side up and use the Dremel to smooth out any obvious bumps, crevices, and angles. You don’t need a perfect finish here just yet; 80 grit should be fine to make sure there are no significant irregularities. Repeat the process on each intake runner before moving on to the exhaust.
Step 6: Porting the intake runners is only half the battle. If the exhaust side of the engine isn’t ported to match the intake, the exhaust won’t be able to efficiently exit the cylinder and will create exhaust back pressure. The process is almost identical to the intake side of the equation, so we won’t get into too much detail here; just remember to take your time to ensure the best possible results.
Step 7: Next comes polishing. This step requires a little less skill than porting but shouldn’t be rushed. The point of polishing is to make the cylinder heads as smooth as possible, so keep an eye out for any burs or conspicuous casting marks. Any major imperfections should be tackled with a carbide bit, but the majority of the polishing step will involve the use of sandpaper and stone bits. You’re probably going to wear out a few bits along the way, so make sure you have plenty of backups on hand and replace them as needed.
Step 8: Use the bits to polish the intake all the way down to about a half-inch from the valve seat itself. This is where the flexible whip extension can come in handy, allowing your Dremel to reach every nook and cranny of the cylinder. Use a swirling motion that follows a path from the outside towards the valve, as the wear marks can help the air generate something of a vortex as it rushes into the engine. While it’s tempting to give the cylinder a mirror-like finish, it’s not the best approach. Direct injection engines might like a good mirror finish, but carbureted engines prefer a rougher finish as it helps the air/fuel mixture.
Step 9: Once the cylinder is nice and smooth, you can move on to the combustion chamber. This will further improve airflow, but be careful not to damage the valve seat as you work. Stick with stone or sandpaper bits, as carbide bits carry too much risk of accidental damage. Lastly, give your intake manifold a once-over, repeating the port matching and polishing until you have a perfect match with the intake ports.

Add More Horsepower Without Breaking the Bank
Porting and polishing is an affordable way to maximize your horsepower and have more fun behind the wheel. While the process might involve a little too much busywork for some, those who have a little elbow grease to spare will be able to enjoy improved performance simply by cleaning up the factory’s mistakes. It might not offer the same results as forced induction or be as easy as installing a new cold-air intake, but porting and polishing is a nice compromise between the two and relatively hard to screw up as long as you have some experience with a Dremel.
If you don’t have much experience with this sort of work, we recommend practicing on a spare cylinder head before you dive into the porting and polishing process. These can usually be found on the cheap at a local salvage yard or even sourced for free if you know a friendly mechanic. Just make sure to set aside plenty of time for the process, especially the polishing step, as a rushed port and polish can easily net some underwhelming results.