Some drivers might hesitate at the idea of working on vital components like their vehicle’s brakes, but many tasks are well within reach of the average DIY mechanic. Brake calipers are a great example. A vital part of the brake assembly that’s responsible for slowing down your vehicle, brake calipers might seem like an ambitious place to start your DIY journey, but in reality, they’re relatively easy to both understand and access. As they get on in years, brake calipers can fall victim to the sort of corrosion that dramatically reduces their effectiveness, making for a less safe driving experience and potentially compromising your fuel economy. While full-on replacement is one option, most drivers opt for a simpler, more cost-effective approach: rebuilding calipers. Why would a driver opt for a laborious rebuild over a replacement? What are some signs of failing calipers, and what do they even do in the first place? Read on for everything you need to know about rebuilding your brake calipers.
What Are They?
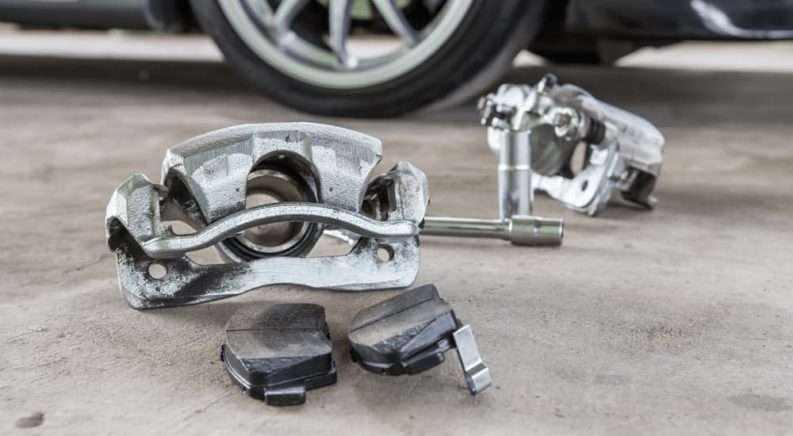
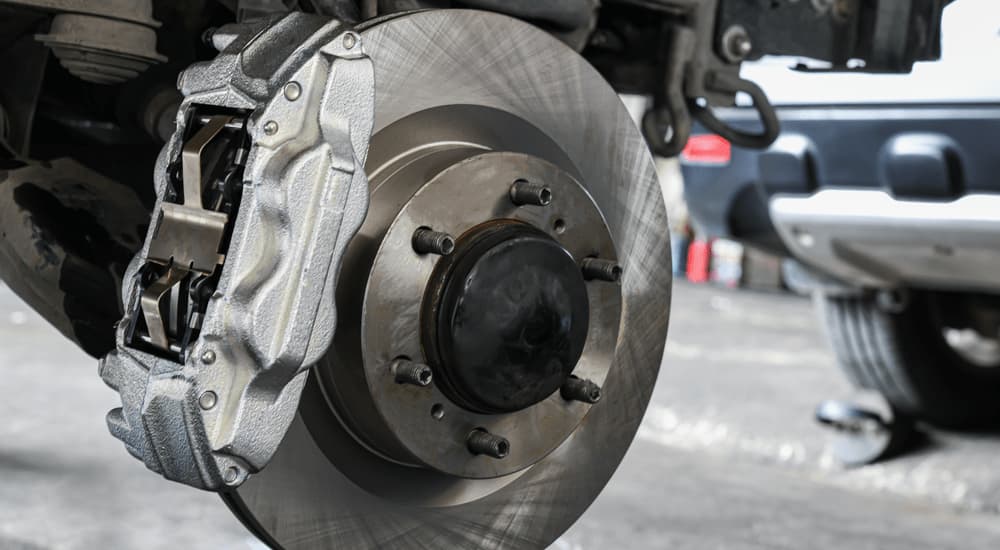
First, a little Brake Anatomy 101. In modern hydraulic disc brakes, brake pads are squeezed against the brake rotors to create friction, slowing the vehicle down. Brake calipers are actually an assembly of parts that includes mounting brackets, slide pins, locking bolts, dust boots, brake mounting clips, and brake pistons. When fed hydraulic brake fluid, the piston essentially squeezes the calipers shut, forcing the brake pads into contact with the rotor. Brake pads may need to be replaced around every 30,000 miles, and brake rotors can have a life of around 50,000 miles. Brake calipers, on the other hand, typically last much longer––well over 100,000 miles on average. But just like any other components exposed to the elements, they’re prone to corrosion and failure.
What’s a driver to do when their brake calipers have given up the ghost? Replacement is one option, although it can be pricey, with an average cost of around $100 a corner––and that’s if you can find the part to begin with. Brake caliper design can vary drastically between different makes and models, making it difficult to get your hands on the right part in a timely fashion. For those with a little ambition, a DIY rebuild is a much cheaper alternative to full brake caliper replacement.
Rebuilding calipers might seem like a bit of an anomaly in the automotive world where, more often than not, old, worn-out parts are simply switched out for new ones, but as long as they haven’t been too mangled, brake calipers are relatively easy to bring back to life. That’s because the caliper housing––the solid metal part to which the piston, seals, and guide pins are attached––is difficult to damage, but the attached components are another story. With a simple caliper rebuild kit, it’s easy to breathe new life into an old caliper without breaking the bank, with four kits often costing about the same as a single new caliper.
Common Signs of Failing Brake Calipers
Before we get into the step-by-step instructions for rebuilding your brake calipers, let’s go over a few common signs and symptoms that will help you tell when your calipers require a little TLC. From visual and auditory cues to reduced performance behind the wheel, these signs can make all the difference when it comes to spotting a compromised caliper before it’s too late. Read on for a few tips but remember, when in doubt, consult a professional because brakes are one area where it never hurts to get a second opinion, given their importance when it comes to the safe operation of your vehicle.
Strange Noises
When your brake caliper’s pistons become stuck due to corrosion, they might emit a distinctive grinding or squeaking noise. While several things can cause your brakes to make a strange noise, brake caliper-related issues are relatively easy to diagnose because they’ll often occur whenever the vehicle is in motion, not just when you put your foot on the brakes. This early-warning sign should be dealt with as soon as possible as the calipers could seize up completely, immobilizing your vehicle and requiring a tow to your local mechanic. If, on the other hand, you notice the noise more when you apply the brakes, it’s likely related to the brake pads instead of the calipers. Lastly, if you hear more of a clunking sound instead of a high-pitched grinding or squeaking, you could be looking at a broken bracket that holds the caliper in place. Driving with a broken bracket could result in a serious accident and cause further damage to the brake assembly, so again, get to a professional ASAP.
Reduced Braking Power
One of the first signs you might notice when it comes to failing brake calipers is a reduction in braking power, sometimes described as a “soft” or “spongy” pedal. If it takes more pressure than normal to bring your vehicle to a complete stop, you could be dealing with a corroded brake piston that’s having trouble performing its duty. While it’s important to get this addressed as soon as possible, rebuilding your brake calipers might not actually be the answer, as this issue could be related to leaking brake fluid, air in the brake lines, or overheated brake pads.
Odd Smells
If your brake calipers become locked into position due to corrosion, you’ll likely start to notice a noxious chemical odor as your brake pads grind away into oblivion. This process also creates a tremendous amount of heat, meaning you can often feel the effect of seized brake pads simply by placing your hand near the brake rotors after a drive. If left unchecked, this can drastically reduce your braking power and should be taken care of quickly.
Leaking Brake Fluid
As we mentioned above, brake calipers are actuated by a fluid that creates the hydraulic pressure to apply the necessary force. If the seal between the brake calipers and pistons becomes corroded, brake fluid can easily escape the high-pressure confines of the brake lines and start to ooze from the bleeder screw or piston seal. Keep an eye out for a wet, oily spot and get to a mechanic right away, as less brake fluid can mean dangerously decreased brake performance.
Sticky Brakes
Does it feel like your vehicle is slowing to a stop before you even put your foot on the brake pedal? This could be due to the caliper piston and cylinder fusing, preventing the piston from retracting and making it feel like the brakes are always being applied to some degree. If left unchecked, this can cause you to burn through brake pads at an accelerated rate and even have a noticeable effect on fuel economy as your vehicle is essentially fighting its own acceleration.
Pulling to One Side
Odds are your brake calipers aren’t going to fail at the exact same time, so when one goes, you might notice your vehicle pulling to one side whenever you apply the brakes. This sensation can be especially noticeable when slowing from a high speed. The increased drag due to a constantly-engaged brake pad causes one wheel to move slower than its counterpart on the other side, pulling the vehicle towards the side where the damaged caliper is located. On the other hand, if the piston fails to make contact with the brake pad because it is stuck inside the cylinder, the vehicle will tend to pull away from the side with the compromised caliper.
Rebuilding a Caliper
Aside from the brake caliper repair kit itself, rebuilding your calipers shouldn’t require any specialized tools that can’t be found in the average automotive toolbox. In addition to the kit and a fresh bottle of brake fluid, you will need a jack, jack stands, a drip tray, a socket set, screwdrivers, and a set of hex keys.
Step 1: Start by jacking up the vehicle, setting the jack stands, and removing the wheel. The jack stands are essential because, no matter how easy it might seem, it’s never a good idea to work on a vehicle supported solely by a jack.
Step 2: After the wheel is removed, it’s time to tackle the caliper itself. Remove the upper and lower mounting bolts, and then use a zip tie to secure one side of the caliper so that it’s not being supported by the brake line. Once the bolts are removed, you should have no problem removing the brake pads themselves.
Step 3: With the caliper exposed, you can now focus on removing the piston. While some mechanics like to make this more complicated than necessary by using compressed air or other specialized tools, the brakes themselves actually prove equally effective. Simply pump the brakes until the piston slides out, but make sure you have your drip tray ready, as the piston will be followed by a rush of brake fluid. Most pistons won’t require more than a gradual application of the brakes, but be prepared to stomp on the pedal when the component is particularly corroded.
Step 4: With the piston removed, it’s time for the caliper bore (the hole where the piston was located) to get a good cleaning. First, clamp the brake line to prevent any fluid leakage, then use a flathead screwdriver to remove the seals from the caliper bore. After these are removed, use fine-grit sandpaper, a wire wheel, or Dremel to clean out any obvious corrosion on the caliper bore as well as the channels and seats for the piston seals.
Step 5: With the caliper bore fully cleaned up, spray it down with brake cleaner to remove any remnants of sandpaper, metal, or other contaminants that could compromise the seal.
Step 6: Now, it’s time to install the new piston. Start by greasing all the seals using the grease included in the caliper repair kit, then insert the piston and seals into the caliper bore. Make sure the seals are properly fitted to the piston, or you might have trouble getting it to fit within the bore. It should be easy to insert the piston with your hands alone. If it seems to be taking more force than you can provide by hand, check to make sure everything is installed correctly.
Step 7: Once everything is greased up and fitted into place, it’s time to reassemble your brake pads and calipers. If your pads look worn, this is the perfect time to replace them, so add that task to the list if you’re so inclined. Then bolt the caliper to the bracket, and you are almost done.
Step 8: Remove the clamp from the brake line and bleed the brake system to remove any air bubbles that might have formed. To do this, simply have someone pump the brake pedal while you open and close the bleeder valve located on the caliper. Once the brakes have been bled, simply replace the tire, remove the jack stands, lower the jack, top off the brake fluid, and you should be good to go!
A Little DIY Can Pay Big Dividends
As you can see, rebuilding your brake calipers is a relatively simple task that only requires a little time, patience, and attention to detail. It doesn’t require much in the way of specialized equipment and is relatively difficult to mess up past the point of repair. That said, it’s important to perform a quick test before you get the vehicle up to highway speed. Try out the brakes in your driveway, feeling for any lack of responsiveness or outright failure that could indicate a mistake you might have made somewhere along the way. If everything works correctly, your brake calipers should easily last another 100,000 miles barring any catastrophic malfunction, so this is likely a task you’ll only have to complete once or twice over the course of your vehicle’s life. If you suspect that your brake calipers might be on their way out, pay attention to the symptoms listed above and always err on the side of caution when it comes to such a vital safety component.