Installing an aftermarket sway bar can be a simple way to improve the handling of your car, taming body roll and enabling flatter cornering. And unlike many performance upgrades, a sway bar is inexpensive, relatively straightforward to install, and will have zero effect on reliability. If you have some basic tools, are comfortable working under your car, and aren’t quite satisfied with its handling on twisty roads, then this is a project that you may just want to tackle. So, what exactly is a sway bar, how does it work, and what does it take to install? In addition to these common questions you are probably asking yourself, it is also important to talk about endlinks and their importance when installing a sway bar. It’s a lot to cover, so let’s look at each part one at a time.
A sway bar, or more properly, an anti-sway bar (sometimes known as an anti-roll bar), is a metal rod that connects the left and right wheels on an axle. Most modern cars and SUVs come with front and rear sway bars from the factory, but many older models lack them, and they still aren’t universal on trucks. However, even if your car came with factory sway bars, that doesn’t mean upgrading to an aftermarket unit isn’t worth it. Unless you have a sports car, the odds are that your car was tuned for comfort and safety over performance, and an aftermarket sway bar can significantly impact handling.
The Anatomy of a Sway Bar
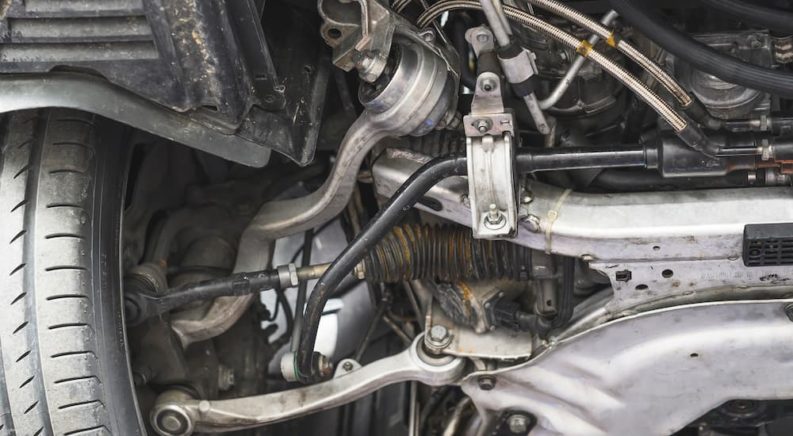
A sway bar may look like a simple metal bar connecting the two wheels, but it is actually a remarkably sophisticated piece of engineering. As a wheel travels up and down, it exerts a twisting force on the sway bar––but only if the opposite wheel is not moving in the same direction. If both wheels are moving up and down together, such as when you drive over a speed bump, then the sway bar has no effect. But if one wheel is moving while the other isn’t, such as when cornering at high speeds, then the sway bar provides extra resistance to keep the car level.
Sway bars are constructed from steel, but they can be solid or hollow. A solid sway bar will generally provide more resistance, but a hollow sway bar can save several pounds of weight. Sway bars are attached to the car’s body using brackets and rubber bushings and are linked to the wheels via separate endlinks at, you guessed it, the ends of the sway bar. Factory sway bars will have a single hole at each end to bolt the endlinks to, but some aftermarket options have multiple holes to allow for easy tuning. The closer to the end of the sway bar that you attach the endlink, the less resistance the sway bar will provide (because you are increasing the mechanical leverage against the bar).
Endlinks – The Key Connector
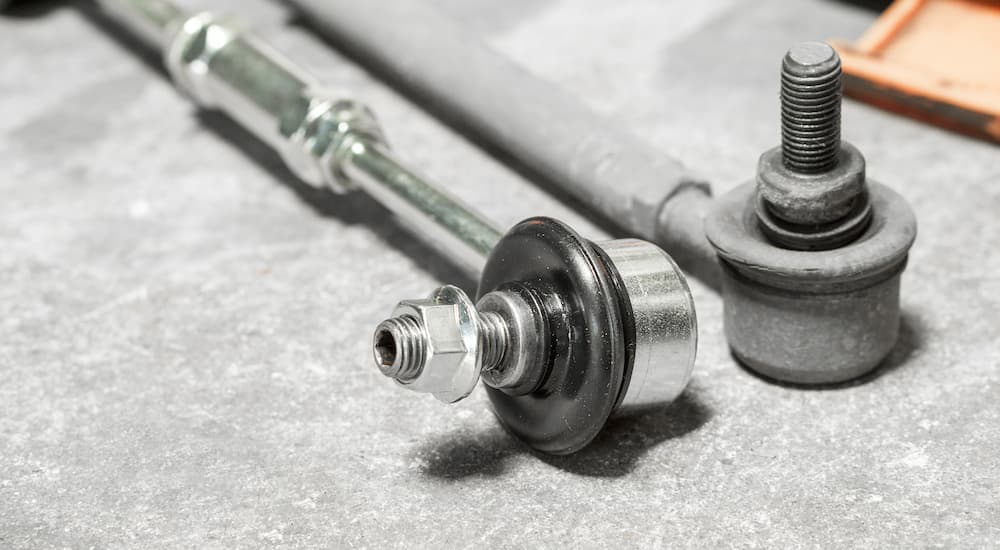
While the sway bar does all the real work, the endlinks cannot be ignored. These generally take the form of a simple metal rod with a ball joint and protruding bolt at each end. The ball joints are critical as they provide the bit of flex needed to accommodate the changing suspension geometry as the wheels move in relation to the body of the car. While a sway bar should last for the life of the car, the endlinks are wearing items and may need to be replaced over time. Older endlinks and some aftermarket designs are built with lube points that allow you to add more grease to the ball joints; however, most modern endlinks come packed with grease and cannot be lubricated.
If you add a lowering kit or coilovers to your car, then you may find that you need to replace the endlinks even if you don’t change the sway bar. Lowering a car a large amount will change the distance between the end of the sway bar and the suspension. If you use endlinks sized for the factory ride height, then you are “preloading” the sway bars, which can have adverse effects on handling. In extreme cases, it can even cause the sway bar to deflect into other suspension components when under load. The solution is adding adjustable endlinks. These look similar to your standard endlinks, but have a mechanism that allows you to adjust their length to fit your car’s new ride height exactly.
Choosing the Right Sway Bar
Selecting the right aftermarket sway bar for your car can be a matter of trial and error. As with any form of tuning, more isn’t always better. Adding a super-stiff sway bar can prevent the suspension from flexing adequately, causing the tires to bounce over bumps in the road rather than gripping properly. It can even lift the inside wheel off the ground through sharp corners. In order to find the perfect balance, it is usually a good idea to do your research and see what other drivers are using in their cars. But remember, if you have modified your suspension in other ways, you might need a different sway bar stiffness than you would with the stock suspension.
It is also important to consider how the front and rear suspension work together rather than thinking of them as separate systems. If one axle has a stiffer sway bar than the other, it will reduce the grip on that axle. Since most cars come from the factory tuned for understeer, many drivers choose to only put a stiffer aftermarket sway bar in the rear. Depending on how stiff the new rear sway bar is, this can make the car feel more neutral or even tend towards oversteer. Some drift cars are tuned very aggressively for oversteer by removing the front sway bar entirely, but this is not recommended for streetcars.
Sway Bar Installation
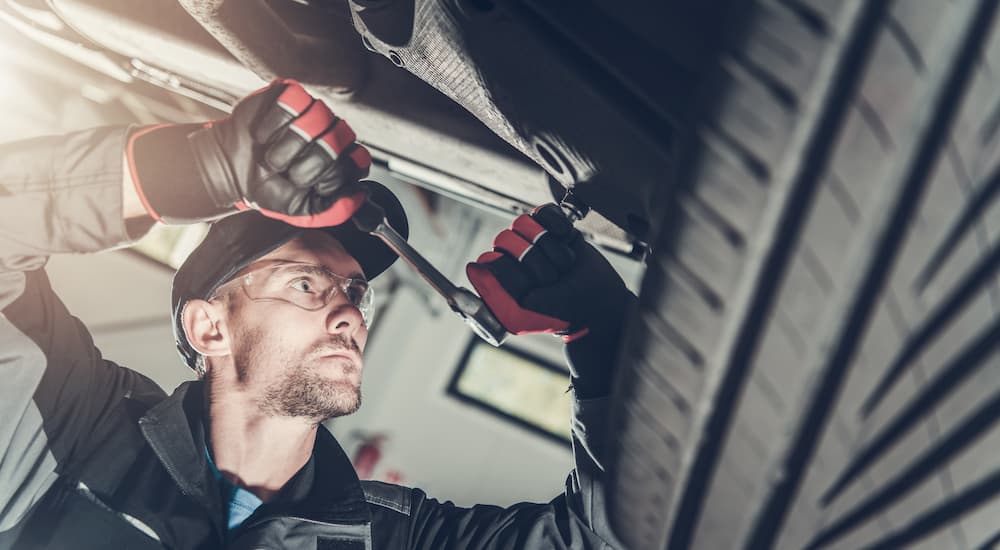
Installing an aftermarket sway bar is generally a straightforward process, although it will depend on the car in question. You will want to put the car up on jack stands to give you better access and allow the suspension to have some play as you are working on it. Disconnecting the endlinks can be the most difficult part of removing the old sway bar as the standard design requires using a small allen key to hold the ball joint in place as you unbolt the endlink. Unfortunately, it is very easy to strip the allen key socket. While you may be able to remove a stripped endlink with an impact, you might have to resort to cutting it off. If you are buying new endlinks, it is a good idea to look for a set that uses wrench flats on the ball joints rather than an allen key socket.
Once the endlinks are disconnected, unbolt the brackets holding the old sway bar to the body. This may require dropping the subframe or removing other components that are in your way, but in many cars, you will be able to remove the sway bar without touching anything else. Depending on the size of your aftermarket sway bar, you might need new brackets and bushings that will fit it, so be sure to get those if needed––it’s always a good idea to replace bushings anyways. Once the aftermarket sway bar is installed and everything is torqued down properly, double-check that the endlinks are the right length to keep the sway bar roughly parallel to the ground when unloaded, and you’re good to go.
The Easiest Suspension Mod?
Changing the swaybar on your car might just be the highest-value suspension upgrade you can make. An aftermarket sway bar can cost under $100, and even an inexperienced DIY mechanic can install it with a few basic tools. But despite its low cost and ease of installation, an aftermarket sway bar can dramatically change the handling of your car. Simply switching to a stiffer rear sway bar can liven up a car and eliminate factory understeer, while more extensive changes and tuning can produce serious performance returns. If you ask us, yes, this is one upgrade you should consider.