
We’ve all been there: you’re going about your daily drive, maybe commuting to work or running some errands around town, when you hear the dreaded crack of an object against your windshield. It could be a piece of road debris kicked up by a passing semi, rocks and gravel from an overloaded construction vehicle, or a rogue golf ball from a particularly nasty shank. Still, no matter the culprit, you now have a problem on your hands. It’s never safe to drive with even the smallest chip or crack in your car windshield as it can easily compromise the life-saving properties of this specialized glass.
If the chip is above a certain size, there’s usually no choice but to get the professionals involved, but in some cases, a DIY repair kit and a little elbow grease are all you need to breathe new life into a chipped windshield. Join us as we take you through the ins and outs of repairing a windshield, weigh the DIY approach versus your local auto glass company, and learn how, in some cases, installing a new (and free) windshield is as easy as placing a call to your insurance company.
To DIY or Not to DIY
Before we dive into the ins and outs of repairing a chipped or cracked windshield, it’s important to ask one question: is it beyond the scope of DIY repair? While we’re all about self-reliance here at CheckEngine, the fact is that your windshield is one of the most vital safety-related components in any vehicle. With the ability to protect the driver and passengers from any road debris and break in the safest way possible in case of an accident, you really don’t want to mess around when it comes to a compromised windshield. While smaller chips and cracks can usually be handled by a competent DIY-er, larger jobs often require a professional’s touch, if not wholesale replacement.
There is a simple rule of thumb to use when it comes to gauging the severity of a chipped or cracked windshield. Chips that are larger than a quarter are usually too far gone for home repair, though some experts say that even a dime-sized chip might be beyond D.I.Y. repair.
Drivers also need to consider how a crack progresses over time. A crack could start off as small as a few centimeters and rapidly spiral out of control as your vehicle encounters bumps, extreme temperature changes, or even old, worn-out windshield wipers.
If a crack seems to stay the same size over the course of a couple of days, DIY repair might be an option, but there’s no use in trying to tackle a crack that just keeps getting larger with every passing ride. While some kits might claim that they can repair chips and cracks of almost any size, it’s usually a classic case of “too good to be true.”
Is Your Windshield Replacement Covered by Insurance?
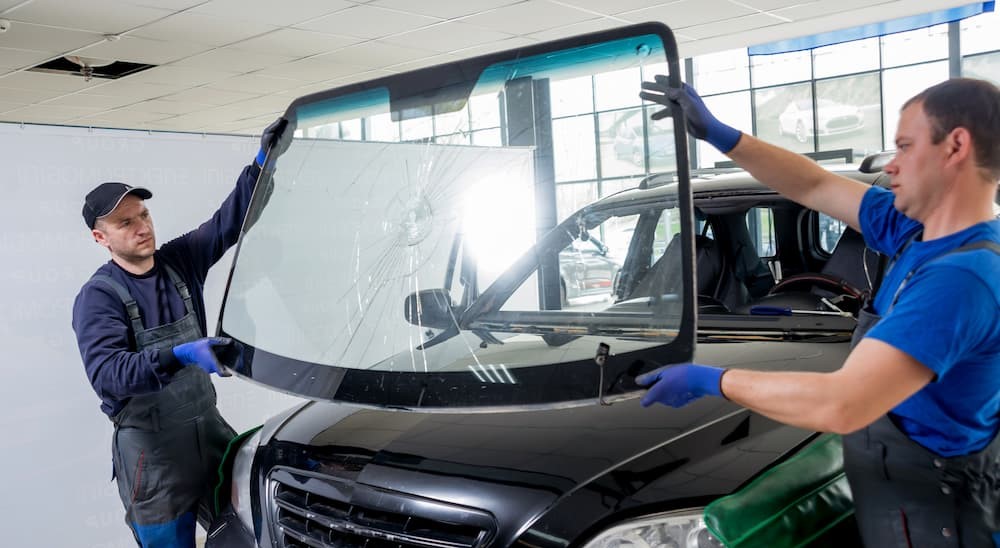
If the crack or chip is too large for the DIY approach, it’s probably time to call the pros. While this might seem like an expensive proposition, that might not always be the case. Most comprehensive auto insurance policies cover full windshield replacement, meaning drivers can part with a small deductible rather than the $200 to $400 they might otherwise need to spend. The specific deductible depends on the insurance policy itself, but there are a couple states where insurers are actually required by law to provide a full windshield replacement without a deductible.
Drivers in Kentucky and Arizona are the luckiest of the bunch, with zero deductibles for any glass that qualifies as safety equipment. This includes not only the windshield but also the glass used in the windows, headlights, and more. South Carolina and Florida also have a fairly generous law when it comes to glass-related deductibles, though it’s usually limited to the windshield. States like Massachusetts and New York allow drivers to purchase comprehensive insurance coverage with no deductible, though unlike the states listed above it’s not actually required by law. These policies vary by state, so before grabbing a DIY kit or buying a new windshield out of pocket, make sure to do a little research and see what sort of laws apply in your home state.
How to Repair a Chipped Windshield
Find the Right Kit
Used in everything from sealant for trendy tables to surfboard repair, epoxy resin is nothing short of a wonder material. Epoxy resin is basically just a liquid polymer that, when mixed with a hardener, curing agent, or even just a little sunshine, can create a strong, long-lasting bond. These properties make epoxy resin the perfect tool for a little windshield crack repair and is the main ingredient in most kits you’ll find at your local auto parts store. Epoxy resin is amazing, but it also has a pretty strict shelf life, so always remember to check the expiration date and avoid any products that have been sitting out for longer than six months.
Prep the Windshield
To get the best possible results, you want to ensure that the windshield is nice and clean, as it will allow the epoxy resin to form a stronger bond. Apply rubbing alcohol, not glass cleaner, to a microfiber cloth and carefully wipe the surface. If there are any loose chunks of glass or debris in the chip, work them out with a pin or some other fine-tipped instrument before you break open the repair kit. You’ll also want to make sure the windshield is dry before starting. While some experts recommend using a hair dryer to remove all the moisture, this could cause the crack to grow if the windshield is already at a low temperature. Most kit recommended applying the resin when the ambient temperature is between 50 and 70 degrees. Use your best judgment and delay the project until weather conditions improve if necessary.
Apply Patch
Epoxy resin windshield repair kits come with a double-sided adhesive patch with a small hole in the center. Before peeling off the backing on either side, place the patch against the chip and make sure that the circle fully encompasses it. If it looks to be the right size, peel off the backing and apply the patch, keeping it centered on the chip.
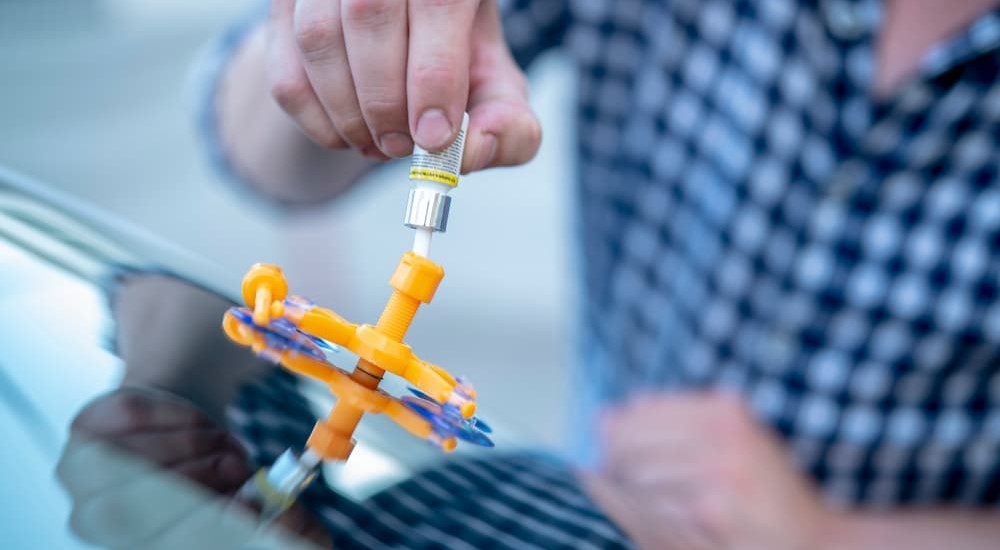
Apply Pedestal
The plastic pedestal is fitted with a tube and used to ensure the epoxy is accurately applied to the chip. It also keeps the epoxy resin in place while it cures. The base of the pedestal should be the same shape as the adhesive patch, so peel the backing off the top of the patch and apply the pedestal while keeping the tube angled upwards.
Apply Resin
Most resin will already come mixed and sealed in a plastic tube, but if your epoxy resin needs to be mixed, this is the time to do it. Carefully combine the resin and hardener and mix slowly so as not to create any air bubbles. Next, pour about 3/4 of the resin into the pedestal and let it settle. Save the rest of the resin for later in the process.
Use Syringe
Windshield crack repair kits come with a clear plastic syringe, and while you might be tempted to use it to inject the resin into the pedestal, that’s not its purpose. The syringe is actually used to create a vacuum within the pedestal to prevent the formation of bubbles and ensure a consistent coating. Press the plunger of the syringe all the way down to the base then insert it into the tip of the pedestal until you’ve formed a tight seal. Next you’ll want to firmly hold the syringe in one hand and use the other to draw out the plunger until you reach the second (lower) notch. This should click into place and can then be secured using the retaining clip.
Syringe Part 2
Give the syringe about ten minutes to draw all the air bubbles out of the epoxy, then remove it from the pedestal, keeping the plunger locked in the second notch. You’ll hear a little air escape as the vacuum is broken. Next you want to gently reinsert the syringe and press the plunger down to the first (upper) notch on the plunger to push air into the pedestal. Use the retaining clip to lock the syringe in the upper notch position and wait 20 minutes.
Remove the Seal and Pedestal
Once 20 minutes is up, remove the syringe from the pedestal and gently work the included safety razor underneath the seal’s tab. Once the tab is loose, grip the pedestal and peel both the seal and pedestal away from the window.
Apply Epoxy and Curing Strip
Once the seal and pedestal are removed, apply one or two drops of the remaining epoxy directly on the crack. Quickly cover it with the curing strip and use the safety razor to squeegee any remaining air bubbles.
Sun Cure
With the curing strip still attached, move the vehicle into direct sunlight so the epoxy resin can cure. This should take about 15 to 30 minutes on a sunny day but you might need to let it sit for as long as one hour if it’s a cloudy day.
Remove Curing Strip and Finish
Work the razor blade under the curing strip and slowly remove it. Use a twisting motion when directly over the crack so that the resin isn’t peeled away with the strip. Once the strip is fully removed, use the razor blade to scrape any excess resin from the windshield. Finally, buff and polish the area with an alcohol pad or glass cleaner.
Home Windshield Repair Is Easy With the Right Tools
With a little patience and the right tools, that annoying windshield chip or crack can easily be a thing of the past. The typical windshield repair kit costs as little as $25 to $30, which is a bargain compared to a full windshield replacement. That said, it might not always be the right choice. If the crack or chip has spiraled out of control it’s always better to err on the side of caution and call on the professionals.
A compromised windshield is no laughing matter and, if left untreated, can easily turn even a small fender bender into a major accident. Never attempt to repair a crack or chip that’s larger than a quarter or three inches and always check your insurance policy before investing in a repair kit. A new windshield could be a quick call away and, in some cases, might not even require you to pay a deductible.