To the uninitiated, the modern internal combustion engine can seem intimidating. This inscrutable hunk of metal, with its mass of wires, valves, and pipes, might look complicated until you stumble upon one simple secret: it’s basically just a collection of small compression chambers. These chambers, known as cylinders, are where your fuel/air mixture meets an ignition source. The pressure from the resulting explosion drives the pistons that spin the crankshaft, transmission, driveshaft, and ultimately, your wheels. But a compression chamber is only as good as the seal it can create.
If this seal is compromised, the cylinder won’t be able to work at its best. The drop in pressure can manifest itself in any number of ways, from misfires and loss of power to generally poor engine performance. Of course, these are all also symptoms of other, more common vehicle problems, but once you’ve ruled out some of the easier-to-diagnose possibilities, a compression test is often the next step. Thankfully compression testing is one of the easier tasks you’ll ever come across, requiring little more than a few simple tools, a compression tester, and the know-how to remove spark plugs.
Running the Test
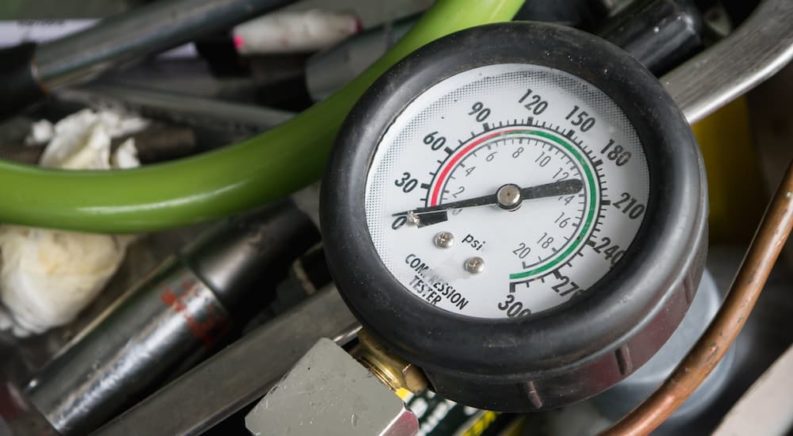
Before we get started, let’s talk about equipment. As we said, a compression test is fairly straightforward, requiring only one specialized item that you might not already have in your D.I.Y. toolbox: the compression tester itself. These usually cost between $20 and $40, making them a valuable addition to any home garage. You can’t really go wrong when picking out a compression tester; just make sure that it comes with the adapters necessary to accommodate different size spark plugs.
Aside from the compression tester itself, you’ll just need a pen and paper, some basic ratchets, sockets, and wrenches, as well as some extenders and universal joint socket adapters if your spark plugs are in a particularly hard-to-reach area. You’ll also want to invest in some spark plug-specific sockets, which feature a foam rubber insert that allows you to get a good grip on the plug and reduce the chance of damaging it during removal.
The Compression Test, Step By Step
Start by ensuring the engine won’t actually start up when the key is turned in the ignition. To do this, you’re going to disable two key systems that help the engine run: the ignition coil and the fuel pump. The ignition coil is responsible for delivering the electricity needed for your spark plugs to fire, and the fuel pump––you guessed it––pumps fuel. Since the compression test involves getting right inside the cylinder itself, we don’t need the spark plugs firing of the cylinders getting filled with fuel.
On most vehicles, this is as easy as finding the fuses that correspond to your ignition coil and fuel pump and simply removing them from the fusebox with a pair of pliers. Start with the fuel pump fuse, and then start up the car. If the correct fuse was removed, the engine should quickly sputter and die as the system loses fuel pressure. You can then move on to disabling the ignition coil. On some older vehicles, the ignition coil might be a little trickier, requiring you to physically disconnect the distributor rather than remove a fuse.
Now it’s time to remove the spark plugs to get into the cylinders. Each spark plug will have a thick black wire leading into it. Carefully remove these wires by twisting while pulling up––if it’s an older car with a distributor, label each wire with the corresponding cylinder number as it’s removed. This might seem like a minor detail, but these spark plug wires are designed to fire off in a specific sequence, so mixing them up could cause some real problems down the road. Now use the spark plug sockets to remove the spark plug themselves. This is a good time to inspect your spark plugs for any noticeable wear and tear or defects, which could also be responsible for some engine performance issues. Remember to remove all the spark plugs before beginning the compression test in order to get an accurate reading.
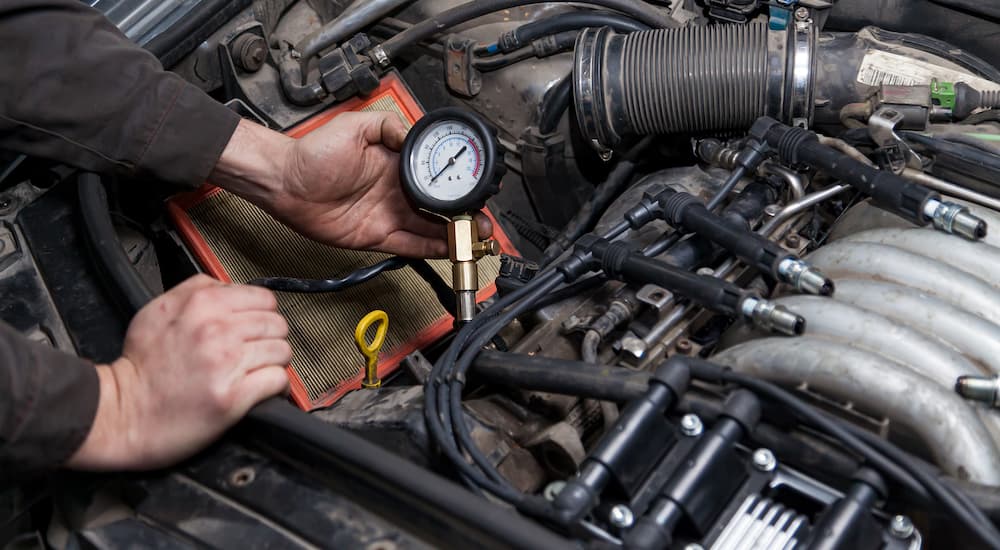
Once the fuses have been pulled and the spark plugs removed, it is time to get your compression tester. Affix the end of the tool to the threaded hole where the spark plug was located and screw it on by hand. As we mentioned above, different size spark plugs will require different adapters, so make sure you’ve got the right one attached before starting.
Now time for the test itself. Once the compression tester is attached to the first cylinder, it’s time to turn the vehicle on. At this point, it might be helpful to call in a helper, as it’s tough to monitor the gauge from behind the wheel. Get someone to turn the key in the ignition, letting the engine crank a few times. As this occurs, the pressure gauge should “puff” up incrementally as pressure increases in the cylinder, usually topping out after a half-dozen cranks or so.
Take a reading from the gauge and record the results. These readings should fall within the range of about 120 to 175 PSI (275 and 400 on diesel engines). More importantly, the readings from each cylinder should not vary by more than 10 to 15 PSI. If your reading is significantly lower than expected, check to make sure that the compression tester is properly attached. Label the paper with a heading for each cylinder and if you want to be really thorough, make two rows labeled “wet” and “dry” under each. The reading you just took can be written down under “Cylinder 1 – Dry”.
Now remove the tester and squirt about a tablespoon of motor oil into the cylinder, then reattach the tester and repeat the test, recording the results under “Cylinder 1 – Wet”. Then move on to the next cylinder and repeat the whole process, including both wet and dry readings.
Reading the Results
To understand how to diagnose specific compression-related issues, it helps to know a little more about what exactly is taking place within each cylinder. This internal combustion process takes place in four distinct stages: intake, compression, power, and exhaust, so let’s break those down individually.
In the intake stage, the engine’s intake valve remains open, allowing the air/fuel mixture to flow into the cylinder. The exhaust valve remains closed, and at this point, the piston itself is at its lowest possible point. Next comes the compression stage, in which both valves are closed, and the piston is driven to the highest possible point in the cylinder. This step compresses the air/fuel mixture into a tiny space between the piston head and the spark plug, awaiting ignition.
In the ignition stage, the valves remain closed, and the spark plug ignites the air/fuel mixture. The resulting explosion drives the piston to the lowest possible point in the cylinder, which in turn drives the crankshaft. In the final exhaust stage, the exhaust valve opens while the piston is driven back up into the cylinder, pushing the exhaust gasses out. The intake valve remains closed during the exhaust stage.
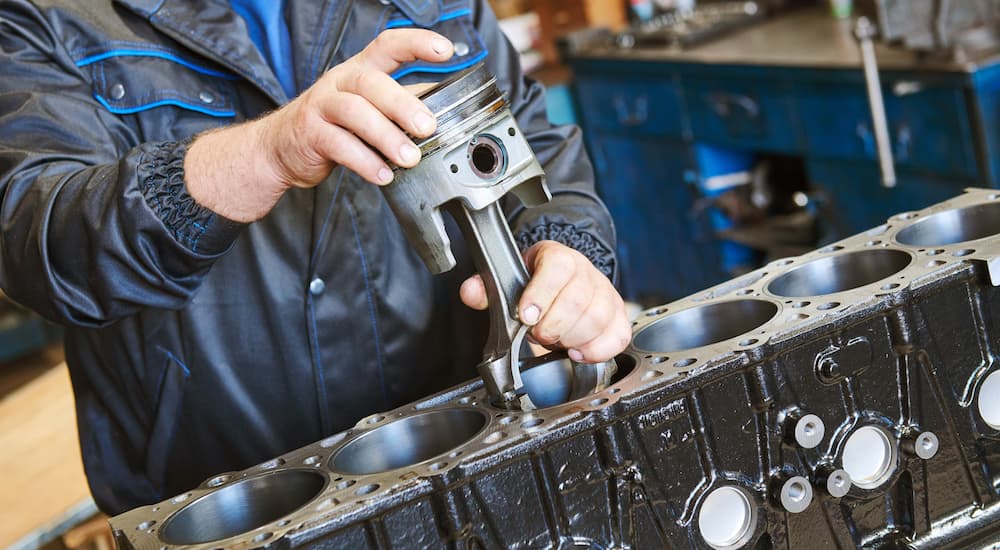
So how does this information relate to the test itself? With your compression test results in hand, it’s fairly easy to diagnose the three most common issues that can cause low pressure: worn piston rings, faulty valves, and worn head gaskets. The first issue has to do with the piston rings, small rings that are set into the piston near the head. When these wear out or break, there is no longer a good seal between the piston and the walls of the cylinder, which compromises the pressure in the cylinder itself.
Luckily there’s an easy way to tell if your pressure trouble is related to the piston ring, and it involves the wet readings you took earlier. By squirting motor oil into the pistons to get the wet pressure, you effectively reinforced the seal between the cylinder walls and piston head, doing the job that the piston rings have failed to do. This means that if your wet reading is higher and closer to the target PSI than the dry reading, then you’re probably looking at worn or broken piston rings.
If the oil method doesn’t do the trick, the diagnosis can be a bit more difficult. Low pressure in a cylinder might indicate a faulty valve that’s not opening or closing as it should due to being bent, burnt, or otherwise fouled, but it could also signal a blown head gasket. If the wet and dry tests give you the same low-pressure ratings on the same cylinder, it could point to a faulty valve. However, if you get a low reading in both wet and dry tests on two cylinders located right next to each other, the head gasket could be to blame. The head gasket is essentially the seal between the block and the head. If this seal is compromised, pressure from one cylinder can escape into an adjacent cylinder and cause low-pressure readings. There are other symptoms of a blown head gasket that can help you narrow down the issue, including a cloudy exhaust and opaque, milky motor oil.
Finally, conspicuously low pressure could indicate an issue with your valve timing. By “conspicuously low,” we mean a PSI of below 100 on all cylinders (or lower than 275 PSI on a diesel engine). When the valves aren’t opening and closing at the correct time, it’s difficult for the cylinders to maintain the appropriate pressure, and there is no shortage of components that can cause valve timing to be thrown off. You can inspect the timing belt, gears, and chains for any obvious damage, but this is one diagnosis that should probably be left to the professionals. Ambitious DIYers can move the timing inspection cover to get a closer look, but it takes a trained eye to know exactly what you’re looking for.
Demystify Your Engine and Save Money
Conducting your own compression test can save you a lot of time and money, usually around $150 on average. It’s also a simple, safe, and relatively quick project that is well within reach for any DIY mechanic. While any resulting issues such as bad piston rings, faulty valves, or a blown head gasket should be assessed and repaired by a qualified mechanic, the value of narrowing down the issue before you start paying by the hour for someone else’s opinion can’t be understated.
Doing your own compression testing is also a good way to get familiar with the inner workings of your vehicle, helping you to build a skillset and familiarity that will come in handy down the road. Engines––and cars in general––might seem overwhelming at first, but once you start breaking them down and understanding the various systems at work, you’ll see there’s nothing that you can’t accomplish with the right tools, a little know-how, and a lot of patience.