Protecting your vehicle from the elements is one of the easiest ways to keep it looking and running for years to come. While some might think of tasks like washing and waxing as two of the more optional chores that come with car ownership, they can go a long way in preventing corrosion and allowing a vehicle to retain the best possible resale value. That said, car wax is starting to look a little old-fashioned in this day and age as new alternatives like sealants and ceramic coatings rise in popularity.
So what is ceramic coating, and how does it differ from some of the other types of protective coatings on the market? Let’s look at three of the most popular options on the market and see how they compare when it comes to durability, appearance, and water-repelling properties, then take you step-by-step through the ceramic coating process.
Wax
Durability: Low
Appearance: High
Water-resistance: Medium
Cost: $12 – $30 (DIY), $50 to $100 (Professional)
Wax has long been the go-to option for drivers looking to protect their vehicles from the ravages of time, weather, pollution, and sun exposure. Car wax is derived from a naturally occurring substance found in palm trees and is often referred to as Carnauba or Montan wax. This wax is blended with other oils, waxes, and polymers to create a wide range of detailing products that can restore that new-car shine to older vehicles, but it has some obvious disadvantages.
The biggest downside to car wax is its longevity or lack thereof. Car wax tends to break down when exposed to abrasion, detergents, or extreme heat, with even top-quality waxes evaporating at temperatures of 160 degrees Fahrenheit and above. While traditional wax is great at repelling water due to its low surface tension, it’s no match for bird droppings, acid rain, or other low-pH substances. Depending on your local climate and other factors, you might find yourself needing to apply a fresh coat of wax as often as every two months, making it the least long-lasting of the three options outlined here. That said, it’s hard to beat traditional car wax’s shine; just be prepared to reapply it often.
Sealant
Durability: Medium
Appearance: Low
Water-resistance: High
Cost: $20 – $75 (DIY), $100 – $150 (Professional)
You can think of sealants as the synthetic alternative to naturally-derived wax products. Made from a blend of plastic polymers, acrylic resins, and aminos, sealants are engineered in a lab to perform where traditional waxes fail. The most obvious advantage lies in a sealant’s durability, which easily outperforms naturally-derived waxes with its ability to resist heat, UV exposure, detergents, and acidic substances. Where a traditional wax product might need to be applied every one to two months, depending on environmental factors, a good sealant can last up to four to six months between applications. Sure, they might be more expensive than regular old wax, but the longer period between applications is a fair trade-off for most drivers.
Sealants also provide excellent hydrophobic protection, with water easily beading off the vehicle thanks to low surface tension but require some compromises when it comes to appearance. While some sealants include a small amount of wax to give the vehicle a nice, glossy coat, they generally lack some of the shine of traditional wax products. This is less notable when it comes to certain vehicle colors, such as metallic silver and white. Sealant’s reputation as a lower-shine alternative to wax has begun to change in recent years as new and improved formulas have hit the market. Generally speaking, drivers can expect to trade durability for appearance. Sealants are typically offered as a spray or paste, with the former being easier to apply but the latter offering longer protection.
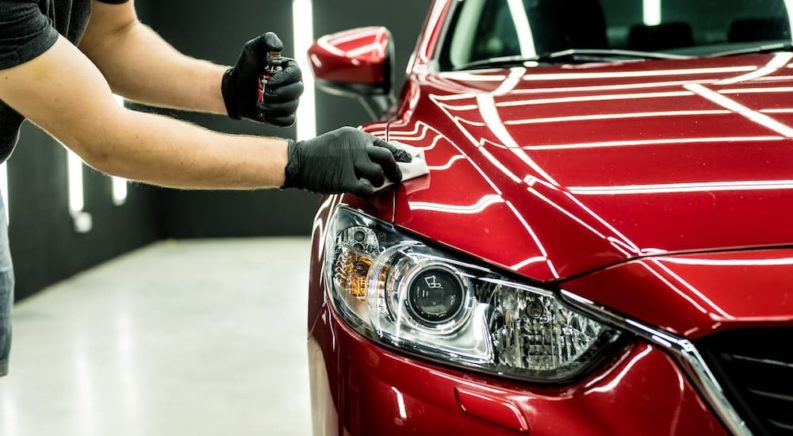
Ceramic Coating
Durability: High
Appearance: High
Water-resistance: High
Cost: $100 – $250 (DIY), $1,000 – $2,000 (Professional)
While not the cheapest of the three options, it’s the most well-rounded choice offering the highest possible levels of durability, appearance, and water resistance. Ceramic coating, or nano-coating, as it’s also been called, is a silica-based liquid polymer that provides unparalleled protection for your vehicle. While the details might be hard to decipher for those without a chemistry degree, ceramic coating’s effectiveness can be attributed to its unique chemical structure.
In silica-based ceramic coatings, silicon (Si) and Oxygen (O) molecules are arranged in a tetrahedron, an exceedingly strong triangular shape that contaminates have difficulty breaking through. These bonds can only be broken by abrasion or heat, giving ceramic coating a level of longevity not found in other vehicle protection and detailing products. When properly applied and maintained, ceramic coatings can last for years, giving them a clear edge over sealants, especially waxes.
Those admiring the shine of a freshly ceramic-coated vehicle probably won’t be surprised to learn that SiO2, the main ingredient in any ceramic coatings, is one of the three basic building blocks of glass. The abundance of SiO2 gives ceramic-coated vehicles a distinctive, glassy finish that not only turns heads but also provides unmatched protection, longevity, and water resistance. The main disadvantage of ceramic coatings comes down to the application, which requires far more prep work and patience than waxes or sealants.
Given the compound’s longevity, it’s a reasonable trade-off, but it can take a little time and practice to get the hang of it. Beware of products that claim to be ceramic coatings, as there is no shortage of imitators on the market. Some products might say they contain SiO2 but are designed as touch-up treatments to be applied between coatings and are not true, stand-alone ceramic coatings of their own.
How To Apply Ceramic Coating
Ceramic coating might offer the best protection around, but it doesn’t come cheap. Professionals will likely charge as much as $100 to $700 to ceramic coat a new vehicle, while older models can run a driver as much as $2,000 or more. Luckily, plenty of DIY kits are available on the market, which brings the price down by a considerable margin and puts ceramic coating well within reach of the average driver. Sure, it takes a little practice at first, but with time you’ll be able to give your vehicle the highest possible level of protection without breaking the bank.
There are some things to note before starting the ceramic coating process. First, you’ll want to ensure there’s no rain or high humidity in the forecast for at least the next 48 hours, as the coating needs a generous amount of curing time. An even better option is to find a garage or other indoor space where the vehicle can sit until the curing is complete. You’ll even want to avoid washing your vehicle for a week following the coating procedure. There’s nothing worse than pouring your heart and soul into a project like ceramic coating only to see the results ruined by an unexpected shower, so make sure to plan ahead.
As far as tools and supplies are concerned, the list is fairly short. You’ll need a ceramic coating kit, but aside from that, the rest of your supplies should be things you already have lying around the house, like car soap, a sponge, paper towels, microfiber towels, and a wash bucket. The biggest investment in the ceramic coating is your time, with the typical application taking between three to six hours, depending on the amount of prep work involved. Let’s take a look at the steps involved in the at-home ceramic coating process.
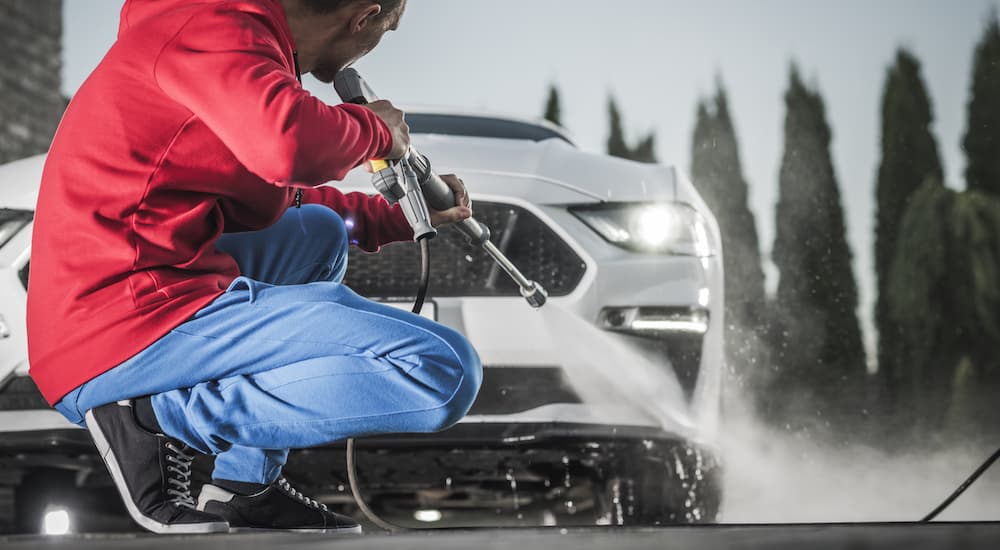
#1. Clean
The first and most time-consuming part of any ceramic coating job is the pre-application prep. For a ceramic coating to work its best, a vehicle must be fully cleaned before starting the process. Washing with some soap and a sponge is only the first step in a multi-step process and shouldn’t be skipped over because you “just washed it last week.” Nothing too fancy here; use the same old car wash you always do and then let dry thoroughly before continuing.
#2. Decontamination
Car wash is great at removing obvious dirt and grime but less effective when it comes to iron deposits and other sneaky bits of gunk. While plenty of iron-filling remover products are on the market, a good clay bar or mitt will also do the trick. These clay bars are great at removing contaminants that regular car wash might leave behind, though the process isn’t quick. Work the bar over the vehicle’s surface, keeping it nice and slick with a clay bar lubricant. A quick look at the bar will show you how much secret junk can stay adhered to a vehicle even after a wash, so don’t skip this step.
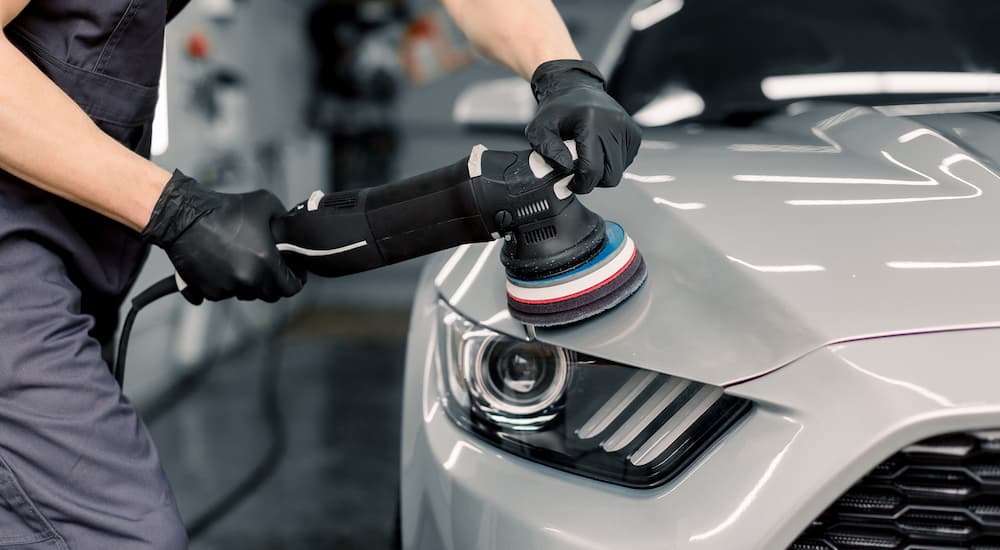
#3. Remove scratches and polish
Any imperfections still present when you apply the ceramic coating are going to be on full display until it wears off. While it might seem a little obsessive, removing any scratches and giving the vehicle a good polish before moving forward is important. Some newer vehicles might be able to skip the scratch removal step, but all vehicles should get a good polish before the actual ceramic coating is applied. Experts recommend following a two-stage polish, with the first stage focusing on compounding and correction and the second aimed at polishing and refining.
#4. One last cleaning
All that work you’ve put in up until this point can have the unintended effect of leaving excess polishing oils and other residues behind. Use a ceramic coating prep spray, panel, or simply an isopropyl alcohol mix on the vehicle’s exterior and wipe it down with a microfiber towel.
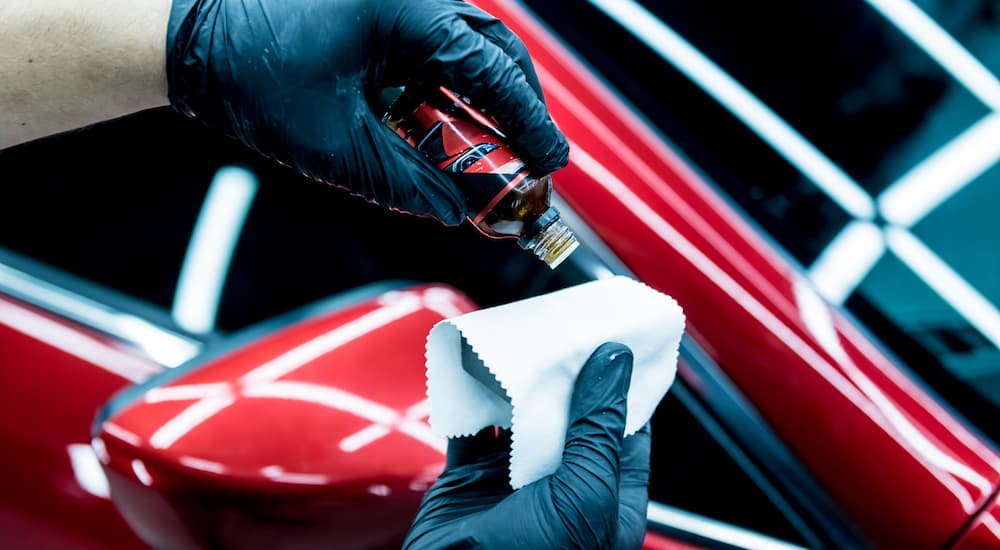
#5. Apply Coating
Finally, we get to the application of the ceramic coating itself. While you’ll want to follow the specific instructions on the ceramic coating product of your choice, we can share a few guidelines. First, ensure you work in an environment of between 65 and 75 degrees. Most ceramic coating products will come with a mitt, pad, or other applicator, which should always be used to obtain the best results. Shake the bottle of ceramic coating and apply a small amount to the applicator, then work the vehicle over in a small area of about 2 ft by 2 ft.
It might be tempting to work over a larger area, but most ceramic coating products will begin to “flash” after about 30 to 60 seconds. This essentially means the coating has set and can now be followed up with a microfiber cloth to remove any excess liquid; just make sure to wipe in small circles and apply very little pressure. Keep an eye out for any high spots that might develop; using a bright light helps spot these. Then buff the surface like you would with any other car wax or sealant.
#6. Cure
Now the easy part: waiting. With the ceramic coating applied, you just have to resist the urge to use your vehicle for up to the next 48 hours, as any moisture, excess sun exposure, or other factors can undo all your hard work. The ceramic coating will continue to harden for up to seven days, but you should be good to go after one or two.
#7. Upkeep
A ceramic coating is no substitute for car washing. Make sure to stick to a regular schedule and pay special attention to any especially acidic contaminants like bird droppings. There are lots of car washes on the market designed specifically for vehicles that have been ceramic coated, and they’re probably worth the investment after how long that whole process took (and how much it cost).
It Takes Time, but the Results Are Worth It
It might not be the cheapest option for protecting your vehicle, but there’s no beating the longevity and performance of a good ceramic coating. The upfront investment is well worth it when you consider how rarely the task needs to be completed, giving drivers a worry-free shine and saving them some serious labor. The DIY route is a great way to save some money when it comes time for your next ceramic coating, but make sure you have plenty of time to spare, a covered area protected from the elements, and at least a rough sense of what you’re doing.
For those who don’t want to deal with the hassle, there is no shortage of detailing shops and auto garages that will give you professional results at a premium. Traditional wax and sealants represent a more affordable form of protection, but for those looking to treat their vehicle to the best, there’s no beating a good ceramic coating.