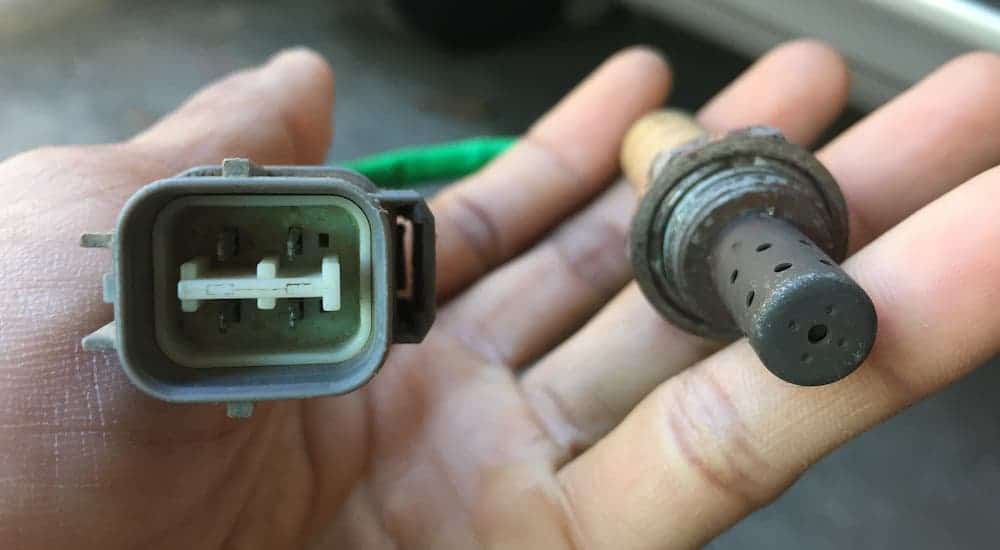
Part of the joy of working on your own vehicle is learning about the different components and parts in it and then discovering how beautifully they all work together, every moment you’re driving, to make your car function. One part that most people never really think about is the O2 sensor – that’s “O” as in oxygen – which is a vital part of your engine’s exhaust system. While this isn’t a part most people think much of, it’s still important to know what it is, how it works, and what to do if you need a new one.
Whether you just want to know more about how your car works, or you’re interested in doing some repairs and replacements on your vehicle yourself, I’m here to help you out. We’re going to talk about the O2 sensor on your vehicle: what it is, what it does, where it is, and how many of them you have (it’s not a set number). Then, I’ll go over some reasons an O2 sensor can fail and how you might know when it has failed. Finally, we’ll look at a general guide on how you can replace your O2 sensor because it’s not all that difficult if you have the right equipment, some experience, and a little patience. You’re not going to be able to build your own O2 sensor after reading this, but you’ll have a good idea of how it all works.
What is an O2 Sensor, and What Does it Do?
An O2 sensor, also known as an oxygen sensor, does exactly what it sounds like it should do: it senses or detects oxygen. Specifically, it detects oxygen levels in the emissions that come out of an internal combustion engine while it’s doing its thing. To keep things simple, your engine (assuming you don’t have a hybrid or EV model) works by sucking in air from outside, mixing it with gas from your fuel tank, and then uses that as fuel to create a small explosion – with ignition from the spark plug.
After all of that goes on, excess gases go from your engine through the exhaust system of your vehicle, ultimately exiting through the exhaust pipe(s) out the back of your vehicle. On their way out, they pass through a catalytic converter, which makes the emissions less toxic by doing things like turning the carbon monoxide that comes from your engine into carbon dioxide – carbon monoxide is much worse. The point is that your emissions are made less horrible.
The O2 sensor, or sensors, detects the oxygen levels in these emissions on their way out of your vehicle. They make sure you have the right amount of oxygen going out. If the sensors detect too much or too little oxygen in your emissions, your car makes adjustments to the fuel going into the engine and the combustion that’s happening to maintain optimal overall performance.

How Many O2 Sensors Do I Have, and Where Are They Located?
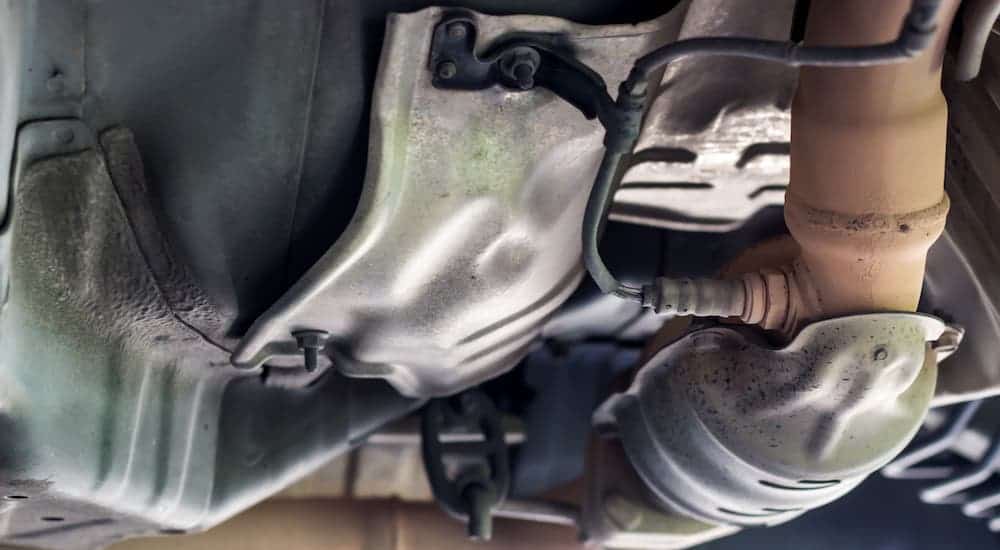
As I said, your car’s O2 sensors are located on your vehicle’s exhaust system. If you have an older car, it might only have one sensor, though any car from the last few decades will likely have either two sensors or four sensors, depending on the design of your exhaust system. At the very least, you probably have two O2 sensors: one located before and one located after the catalytic converter that’s part of your exhaust.
The one before the catalytic converter is located on the exhaust pipe close to your engine, and the one after the converter will be closer to the muffler. These sensors work together to detect oxygen levels both before and after your emissions go through the catalytic converter to get a more accurate idea of how everything is functioning. If you have a vehicle with a dual exhaust, then you probably have four sensors: a pair before and after the catalytic converter for each exhaust pipe on your car, truck, or SUV.
Why Might an O2 Sensor Fail?
There are a few different reasons that one of your O2 sensors might fail:
- Wear and Tear Over Time – Like any part of your vehicle, the O2 sensor has a limited lifespan. Modern sensors are usually good for 100,000 miles or more, however, so this is not usually the cause.
- Engine Problems – Issues with your engine burning oil or having other problems can cause damage to your O2 sensors. If pollutants and carbon are going through your exhaust that shouldn’t be there, then they can gunk up your sensors.
- Outside Problems – It’s possible that external issues can damage or contaminate your O2 sensors. Salt from the road, chemicals from other parts of the engine, and more can all potentially make your O2 sensors fail.
Whatever the cause of a failed O2 sensor, figuring out if your O2 sensor has a problem is fairly easy.
How Can I Tell if My O2 Sensor Has Failed?
You can often feel that one of your O2 sensors has failed because your car will start running and idling rougher than before. This can feel a lot like a misfiring spark plug, but if you’ve changed or checked your spark plugs and it still runs rough, then it’s probably an O2 sensor. Similarly, if you notice your vehicle’s performance or gas mileage is much worse than it should be, then this is a warning sign that an O2 sensor has failed.
Your check engine light can also come on to indicate that you have a failed O2 sensor. This is actually one of the most common reasons for the indicator to illuminate. You can use a scan tool or code reader to plug into your car and see which sensor has failed.

How Do I Replace an O2 Sensor?
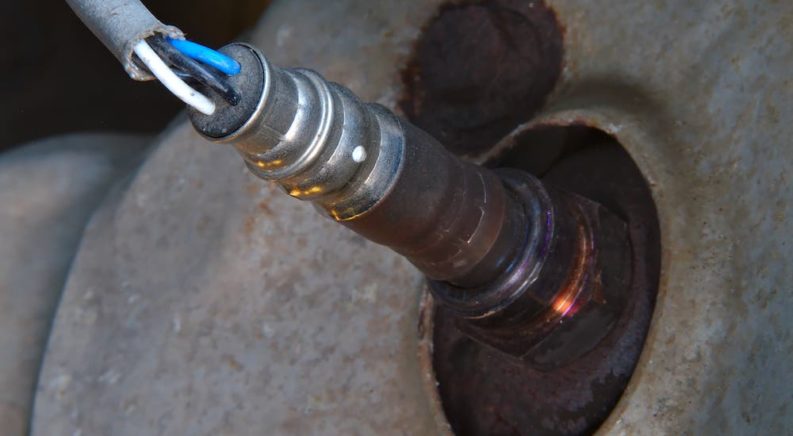
Once you know where the problem is, then replacing an O2 sensor is relatively easy, but you’ll need to be able to get to it. This requires disconnecting the negative battery cable from your vehicle, safely and securely lifting up your car on jacks, and then getting under it. Once under your car, locate the faulty O2 sensor, but know that removing it can be difficult.
The hot and cold cycles that go on with your O2 sensor can make it almost welded into place. So spray the base and threads of the sensor with heavy-duty penetrating oil and wait for 10 minutes. Then try to loosen the sensor – be gentle with it, though, as you don’t want to damage the threads. You can also use a heat gun to heat up the base and threads of the sensor to help loosen it up. A 7/8” wrench will usually fit onto an O2 sensor to help with loosening it.
Disconnect the wiring on the sensor and try to remove it with an open-end wrench or an O2 sensor socket, which is designed specifically for replacing these sensors. Remember to be careful when removing it and don’t strip the threads. Once removed, use penetrating oil and a rag to clean the threads carefully.
Compare the old O2 sensor to a new one you’ve bought to make sure it’s the right replacement, and then put a little anti-seize compound on the threads of the new one before carefully screwing it in by hand. Don’t cross-thread it as you get it into place. Finally, tighten it to the right torque spec based on your vehicle’s manufacturer instructions, connect its wiring, and reconnect the negative battery cable. Turn the ignition to “on” and use your code reader to clear the trouble code from your vehicle’s computer.
DIY if You Can, Bring It to a Repair Shop if You Can’t
And that should be it. If that sounds like more than you’re comfortable with, however, then having your favorite mechanic replace the sensor for you is a safe bet. Replacing your O2 sensor is a bit more complicated than changing your own oil, but it can be done with the right tools and a little bit of patience. So, the next time your check engine light comes on and obvious adjustments, like changing your spark plugs, don’t fix the problem; remember that it might be your O2 sensor acting up. I hope this guide helps you with your next auto repair.

