A fuel pressure test is an easy way to diagnose whether your vehicle’s engine is getting enough gas to operate at peak efficiency. A vehicle that’s not delivering adequate fuel pressure can act up in all sorts of strange ways. Signs of low fuel pressure include an unresponsive gas pedal, difficulty starting the engine, frequent stalling, misfires, and reduced performance. Drivers dealing with high fuel pressure might see it manifest in other ways, such as noxious exhaust with a strong fuel smell, blackened or wet spark plugs, reduced performance, and poor fuel economy. Of course, many of these issues could be related to any number of faulty components or poorly maintained systems within the vehicle, but a fuel pressure test is a quick, easy way to rule out issues within the fuel system itself. Retailing for around $50, fuel pressure testers are affordable, easy to use, and don’t require much mechanical know-how aside from knowing how to read a gauge and unlatch the hood of your vehicle. Let’s take a quick look at the science behind fuel injectors themselves before getting into how to properly use a fuel pressure gauge and diagnose the results.
Fuel Injection 101
In order to function properly, it helps to have fuel actually flowing into your vehicle’s cylinders. Prior to around 1990, this task was usually accomplished by a carburetor, which regulates the flow of air to create the ideal air/fuel mixture. This might seem like a simple task within a system as complex as the modern automobile, but until fairly recently, it was accomplished thanks to a physics theorem from 1783 known as Bernoulli’s principle.
Carburetors rely on Bernoulli’s principle to decrease air pressure and create a vacuum through what’s known as the Venturi effect. We’ll spare you the extended physics lesson, but the basic concept is relatively easy to understand: it’s essentially a pump that can create a vacuum without the use of any moving parts. The main chamber of a carburetor looks like an hourglass turned on its side, with two larger chambers narrowing to a constricted section in the middle. As compressed air is forced through this narrow middle section, it expands, increasing its velocity, reducing air pressure, and creating a vacuum. Fuel is swept up in this vacuum, mixing with the air before being fed into the engine itself.
In carburetors, the air/fuel mixture can be adjusted using two mechanisms: the choke and throttle. Functionally these are little more than two valves located on either side of the hourglass-like chamber, with the choke adjusting the air/fuel ratio and the throttle determining how much of the air/fuel mixture is sent to the engine. The carburetor is a remarkably simple solution for a complex problem, able to create a vacuum without any external power or moving parts, and it served the automotive world well for over a century, but then came fuel injectors.
As automotive technology and engineering techniques became more complex, the carburetor’s days were numbered. While it performed its job well enough, the advent of small, reliable fuel pumps offered too many advantages to be ignored. Fuel injection systems work by using a network of sensors and electronics to adjust the air/fuel mixture based on factors like air pressure and fuel temperature, allowing for the sort of precise control not offered by carburetors. There are other advantages as well: a carburetor cannot be used with diesel fuel, which requires higher pressure. Fuel injection systems can also improve fuel economy by adjusting the fuel/air mixture in response to changing engine conditions.
The carburetor, with its simple choke and throttle controls, couldn’t hope to keep up, and the fuel injectors won the job. The only advantage of a carburetor lies in its simplicity as, compared to fuel injectors, they’re easy to clean and rebuild into good working order. While you’ll still find carburetors on smaller engines like those found in many lawnmowers and other yard equipment, they’ve been entirely phased out of the automotive world since the early 1990s.
Using a Fuel Pressure Gauge
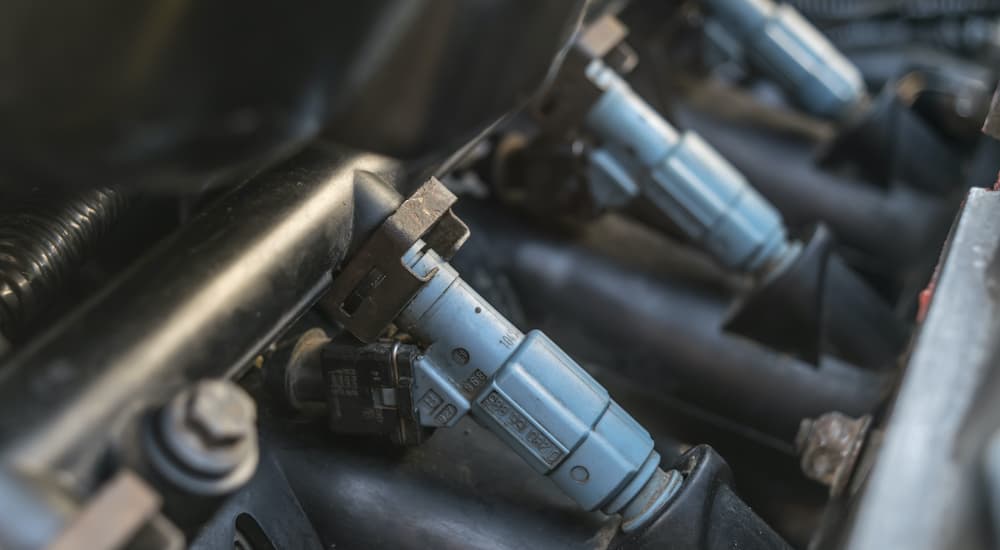
Fuel injectors are designed to run at a certain pressure. Too high or too low, and you won’t get a good spray pattern, resulting in compromised performance, so it’s important that your pressure lies within the specific range recommended by the manufacturer. On most vehicles, this will be anywhere between 35 and 65 psi but refer to your owner’s manual for the exact range.
The first step is determining if the fuel pump itself is in good working order. This is a relatively simple process, though it does require an assistant. Start by determining where in your vehicle the fuel pump is located by searching for a diagram of your vehicle’s fuel lines. These can be found in many vehicle-specific repair manuals or through a quick internet search. Once you’ve located the pump’s location––usually in or near the fuel tank itself––station your helper nearby and turn the key in the ignition to the “on” pre-ignition position. When the car is in this mode, the fuel pump will fire up to pressurize the fuel system and should produce a distinct buzzing or clicking motor sound.
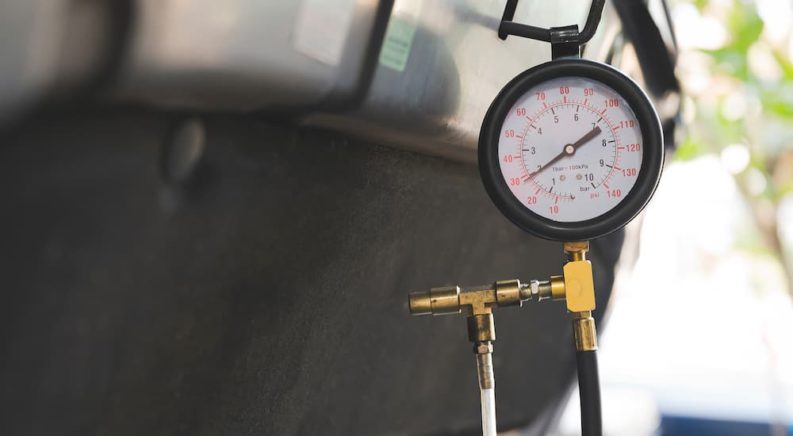
If the fuel pump seems to be working, it’s time to move on to testing the fuel pressure itself. This is actually a very straightforward process requiring little more than a fuel pressure gauge and a few common tools. Safety first: before commencing the fuel pressure test, make sure the vehicle is in a well-ventilated area and that the engine is entirely cooled off. It’s also not a bad idea to have a Class B fire extinguisher handy, as the aerosolized fuel within the system is especially flammable.
Pop the hood and locate the fuel rail that sits on top of the engine itself. This system distributes fuel from your fuel lines to each individual injector and should be easy enough to locate with the help of the fuel line diagram described above. The fuel rail might be located under a plastic engine cover, which can be uninstalled fairly easily. Now look for a common Schrader valve––the same type of air valve you’ll find on your vehicle’s tires––and remove the valve cap.
At this point, you simply need to attach the fuel pressure gauge to the exposed Schrader valve. Make sure the end of the gauge is properly affixed to the valve so you won’t experience any leakage, and get behind the wheel to turn the ignition to the “on” position. The gauge should now show a psi reading for the fuel, but leave it attached for five to 10 minutes and keep an eye out for any major fluctuations that could indicate a leak within the system. If the pressure drops noticeably over the course of 10 minutes, you’re likely dealing with a leak somewhere within the fuel system, whether in the pipes or fuel injectors themselves.
Once you’re satisfied with the pressure reading while the vehicle is in the “on” position, start the vehicle up to check fuel pressure while the engine is running. Let the vehicle idle while the engine warms up, taking note of any changes in fuel pressure. If everything looks good, let the vehicle reach its average operating temperature and rev the engine. As the RPMs begin to ramp up, the fuel pressure should follow suit, so you want to keep an eye out for any significant drops in pressure.
Diagnosing the Reading
If your fuel pressure falls outside of the normal range described in your owner’s manual, it could mean a number of different things. No fuel pressure at all is clearly a bad sign and likely indicates that your fuel pump is either dead or not receiving adequate power. Use the sound-based test described above or a multimeter to determine if the pump is working and if not, check the fuel pump fuse or start pricing out replacements.
Low fuel pressure is the most common result of a fuel pressure test gone wrong. Low fuel pressure could indicate a number of issues, from a clogged fuel filter or dead pump to improper tank venting. The tank venting issues could be the easiest fix of them all, sometimes requiring little more repair than simply re-tightening your gas cap to ensure a good seal. This is a frustratingly common occurrence, so whenever dealing with an issue in your fuel system, test the gas cap before you start anxiously Googling repair costs. High fuel pressure is less common and can usually be traced back to something like a clogged or kinked fuel line, bad fuel pressure regulator, fuel pump driver, or powertrain control module. These issues would likely generate a diagnostic trouble code (DTC) and accompanying check engine light, so they’re often a little easier to diagnose.
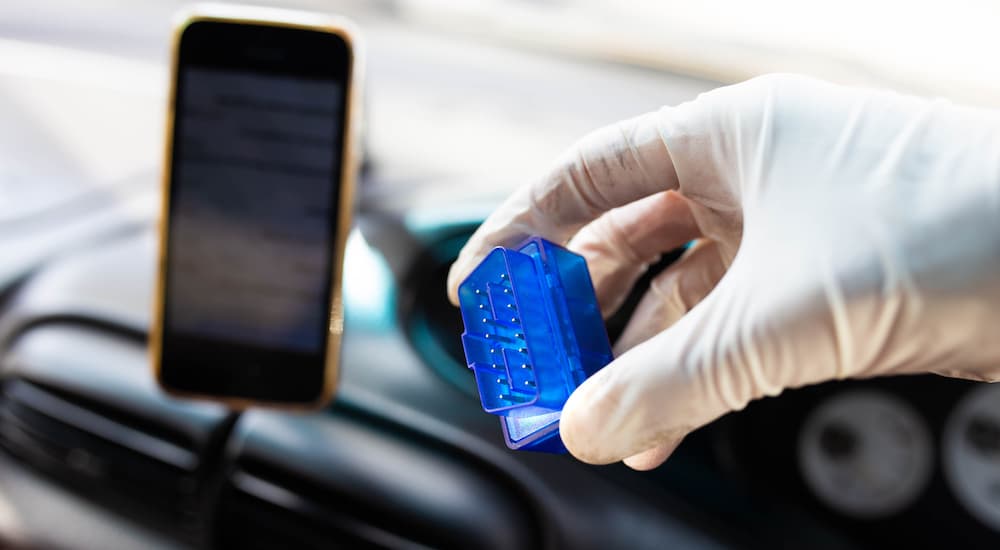
Don’t feel like investing in a gauge? Drivers with newer cars might be able to eschew the old analog method altogether if their vehicles have an adequate network of digital fuel pressure sensors. These sensors can be read with many OBD II scanners, which can provide all sorts of useful metrics and diagnostic tools. Here at CheckEngine, we’re big believers that no D.I.Y. mechanic’s garage is complete without an OBD II code scanner, and this is just another example of a time when it can come in handy. While the professional version of these tools can cost upwards of $500, a new breed of smartphone-based Bluetooth OBD II readers has put this technology well within reach of the average driver.
Some brands charge as little as $20 for a small sensor that can be plugged into your vehicle’s OBD II port and used to display everything from DTCs to vehicle performance metrics like the voltage, fuel economy, engine temperature, and of course, fuel pressure. The available information does depend on the age and sophistication of each vehicle, so do a little research beforehand to determine how much data can be pulled from your vehicle with an OBD II reader. Even if an OBD II reader can’t tell you the exact fuel pressure, it can display any common error codes related to high or low fuel pressure, such as P0087, P018C, or P0191.
A Simple But Useful Test
In many cases, conducting a fuel pressure test might only be the first step in a much longer repair journey, but it’s an important one. Once you’re confident that your engine is receiving adequate fuel pressure, you can start to narrow down the possibilities and zero in on the problem. It’s almost impossible to screw up and could go a long way in saving you the time and money associated with letting a mechanic start the diagnosis from the ground up with all the costly labor that might entail. Not only that: it’s a remarkably simple process. While there are many projects under the hood that we wouldn’t advise the average D.I.Y. mechanic to touch with a 10-foot pole, a simple fuel pressure test is not one of them. If you’re comfortable filling your tires with air, then a fuel pressure test is well within your wheelhouse. If you’ve noticed reduced performance, strange noises, and rough idles, or if you just want to get a better feel for how your vehicle works in general, pick up a fuel pressure gauge or OBD II reader today.