Vehicles require a constant supply of various resources to function correctly, one of which is a clean air filter. The vehicle has a system of fans, radiators, and blowers that control the airflow for the vehicle. This air is directed towards the engine, where it provides fuel for gasoline combustion. Due to potential air contaminants, vehicles are equipped with an air filter. This filter ensures that any tiny particles that may get sucked up along with the air will not reach the inside of the engine. This makes it a rather important little filter. It is very important to check the condition of your air filter regularly as it can become polluted over time, especially if you drive on dirt roads often. A clogged filter decreases the amount of oxygen coming into the engine, which reduces the performance of the vehicle. Luckily, it is a rather simple process to change your air filter, which can be performed from home by just about any driver. Keep reading to learn our nine easy steps if you’re wondering how to change an air filter.
#1 Determine the Correct Filter
Figure out what kind of air filter your vehicle needs, as certain vehicles require different types of air filters. There are quite a few different options out there as well, making it somewhat confusing. Luckily, there are many resources available to the average consumer to aid in choosing the correct filter. Different automotive parts stores will have either a guide or a staff member who can help you find what you need. Many even have this information available on their websites.
#2 Secure the Vehicle and Pop the Hood
Ensure that your vehicle is either, in park for an automatic, or in first gear with the parking brake secured for a manual. Locate and pull the lever that controls the hood latch, which is usually on the inside of the vehicle on the underside of the steering console. Lift the hood up slightly (as it will not fully open) and hold it with one hand, then locate the latch which should be accessible with your fingers, and release it. This allows the hood to be fully raised, and it can be secured with the prop rod, which is under the hood.
#3 Locate the Air Box
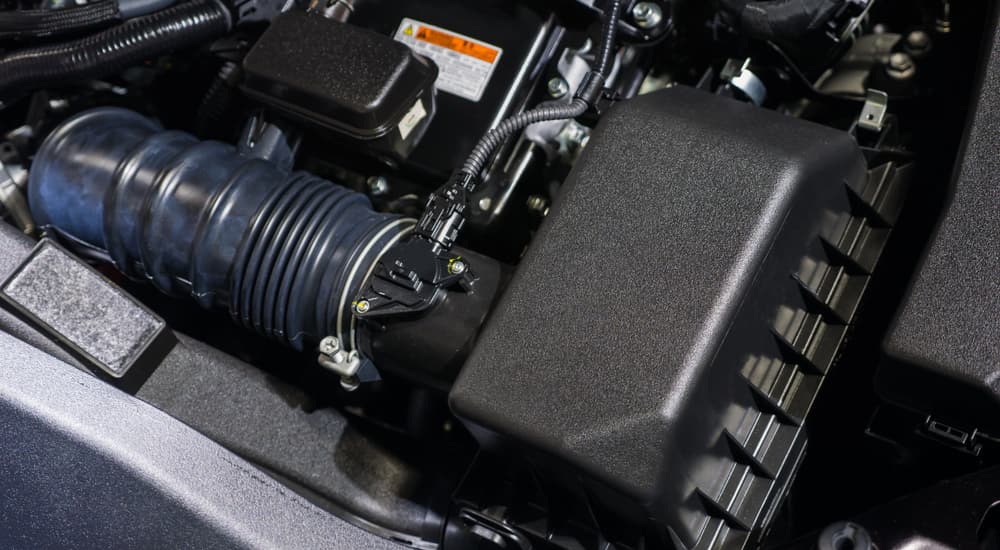
In modern vehicles, the air filter is usually contained in a small, rectangular/square plastic box. This box can be typically found on the top of the engine, connected to a long rubber/plastic hose on the side.
#4 Remove the Top of the Air Filter Covering
In order to change the air filter, you have to be able to access it. The covering can be removed by first unfastening the latches on the sides of the boxes. These can be undone by simply lifting up the clips. Some vehicles have air filter coverings that are only held on by these latches. However, some have additional things such as screws or wingnuts, which must also be undone. It is essential to keep all screws or wingnuts that are removed off to the side near you, in a place where you will not lose them or knock them into the engine bay (because then you will need a very long magnet). Once the latches and screws/wingnuts are undone, the covering can be fully removed. Place it off to the side.
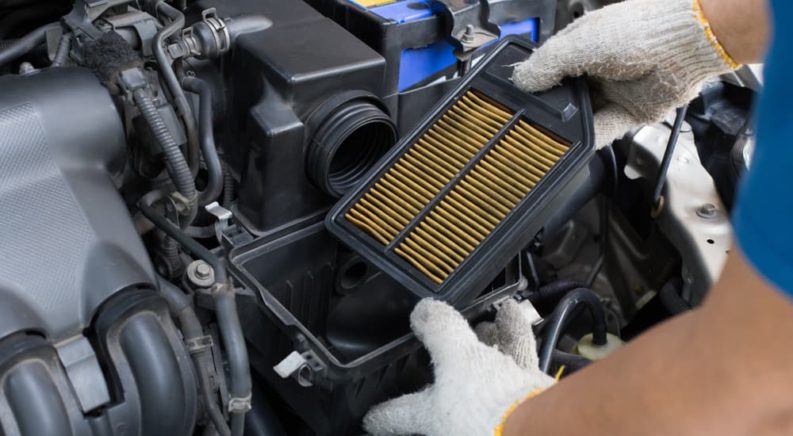
#5 Remove the Air Filter
With the covering off, the air filter can finally be accessed. It is usually a round or rectangular filter made out of either cotton, synthetic paper, or gauze. It is surrounded by a thick rubber rim, which helps to seal it in and prevent any leaks. This can be removed by simply lifting it up and out of the cover. After removing, the old filter can be discarded.
#6 Clean the Air Filter Cover
Over time, the air filter cover can pick up some of the loose particles that are not picked up by the filter. You can use a vacuum with a hose attachment to pick up any contaminants, or you can even use a damp cloth. However, you must ensure that the covering is completely dry if you end up using water, as any moisture could impact the ability of the new air filter.
#7 Place the New Filter In
Once the covering is cleaned and dried, it is time for the new filter. Take it out of the packaging and give it a quick eye test. You should be looking for any rips or tears in the material, as well as any other sort of defects. Air filters are required to be quite porous so that air can travel freely through it. However, this makes them quite fragile, making potential tears and defects not too uncommon. Once you are sure that the filter is defect free, you can place it into the covering. Make sure that the rubber rim covers the edges.

#8 Replace the Top of the Air Filter Covering
With the new air filter in place, the covering can be closed. Place the top of the covering back on to the base and press it in tightly. You should be able to hear and feel it snap in to place. Once it is placed correctly, you can fasten latches on the sides. If there are also screws and wingnuts, they should be replaced and secured tightly.
#9 Run the Engine
The final step is to turn your car on and allow the engine to run while monitoring it. If done correctly, the engine should run slightly better (although not noticeably).
Vehicles are amazing pieces of machinery, but they require a rather copious amount of resources in order to function correctly. Not only do they need things like gasoline, oil, electricity, and brake fluid, but they also require something as simple as oxygen. This oxygen is necessary for the engine’s combustion, as any fire requires oxygen to burn. Particles from the outside air can get into the engine, which is not good for the engine’s health. This can cause a buildup, which can cause the engine to overheat and stop functioning correctly. To help prevent future damage to the engine, vehicles come equipped with an air filter. This filter is responsible for filtering out any contaminants and particles that are sucked up by the vehicle. This helps to keep the engine free from any pollutants, which ensures that it lasts as long as possible. Over time, this air filter must be changed as they become too dirty to function properly. Most cars have a time frame on when the air filter should be changed. An easy way to remember when to change it is to change the air filter when you get an oil change, so about every 3,000 – 5,000 miles. This ensures that your engine will last as long as possible, and will be running as clean as possible.