
While a lot has been made of new cutting-edge automotive safety technology like automatic braking, backup cameras, blind-spot warnings, and the like, headlights remain one of the single most important safety components on any vehicle. Indispensable when it comes to lighting the road ahead, headlights tend to be taken for granted and are typically only addressed when there’s been an accident or burnt-out bulb. This can be a dangerous oversight, as your vehicle’s headlights are more exposed to the elements than almost any other component in your vehicle. Mounted on the front of your car, truck, or SUV, they’re hit by the elements almost daily.
While the metal and plastic components that make up your front bumper and body are designed to withstand the elements, headlights often don’t fare as well and can quickly lose their clarity and shine. Luckily, headlight restoration is one of the easiest and cheapest fixes you’ll ever hope to tackle. Before we get into some specific methods for bringing your old, foggy headlights back to life, let’s take a quick look at some of the specific factors that can cause them to lose their luster in the first place.
What Causes Foggy Headlights?
Oxidation
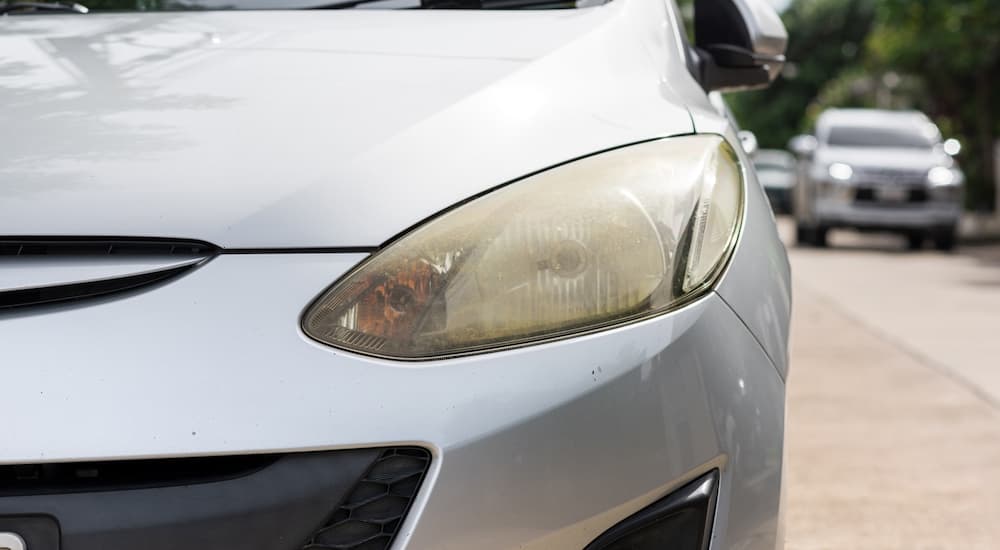
Once upon a time, headlights were made of glass, but safety concerns have seen those old-fashioned models replaced with polycarbonate plastics in the modern era. These plastic lenses have a lot of advantages over their glass forerunners but are still prone to fogging up. Headlights are lenses designed with a clear top coat to prevent oxidation when exposed to harsh UV light, but this coating breaks down, and the plastic lenses can turn a cloudy yellow color.
Time and Weather
UV light isn’t the only risk factor when it comes to foggy, yellow headlights. Exposure to any kind of harsh weather can turn lights cloudy after a long enough period as the elements take their toll on the acrylic coating.
Water
Headlights are designed to keep water out, but as any experienced gearhead knows, “designed to” and “actually do” are two different concepts. The seal that prevents water from getting behind the lens covers can break down over time, allowing water to seep in and cause condensation inside the lights themselves. This built-up film of condensation can dramatically affect a headlight’s effectiveness, scattering the light and making for a less safe driving experience.
Dirt and Chemicals
The road is full of hazards, including spilled chemicals and tiny dirt and debris that can quickly take the shine off your new headlights as a thin film develops. This is especially pronounced in areas that use a lot of road salt to melt snow and ice in the winter, which, in addition to causing dangerous rust, can also create tiny pits, dents, and scratches in your headlights.
So what’s a driver to do? There are a few tried-and-true methods for reducing the wear and tear on your headlights. These include parking your vehicle inside or in the shade whenever possible, reducing UV exposure, and lengthening the life of your headlights. If you’re going to be parked for an extended time and a garage or shady parking spot isn’t an option, try facing the front of your vehicle away from the sun. Keeping to a regular washing schedule is another easy fix, as periodic cleaning will prevent the buildup of dirt and chemical film that clouds your headlights.
Make sure to not only wash but also polish your headlights during every cleaning using a non-abrasive polishing compound and microfiber cloth to take the years off your lights and return them as close to showroom condition as possible. Of course, even the best maintenance and prevention work isn’t foolproof, so if your headlights are past the point where a simple wash will help, read on for our best headlight cleaning methods.
How to Restore Headlights
While headlight cleaning and restoration kits are available at most auto parts stores, there are some quick, easy DIY methods that can be done with tools and ingredients you probably already have lying around the house. We’ll cover a few of these approaches below and give some recommendations regarding ready-made restoration kits.
Home Remedies
Toothpaste; it’s not just for teeth anymore! This common household item can be found in your medicine cabinet and is surprisingly effective at bringing old, worn headlights back to life. Just find a toothpaste that contains baking soda, grab a clean, stiff toothbrush and get to work. Rub the toothpaste directly on the headlight lens using a toothbrush or rotary brush if you want to bring some power tools into the mix. Scrub the lens until the plastic loses its cloudiness, rinse the headlights with warm water, and wipe with a clean cloth and you’ve got practically new headlights that would make your dentist proud.
Those who don’t want to waste some perfectly good toothpaste on their headlights can concoct their own cleaning compound using nothing more than baking soda and water. Combine five tablespoons of baking soda with just enough water to form a paste, and then follow the same steps described above. Drivers can substitute white vinegar for water, mixing it with baking soda in a 1:1 ratio to create a foaming, bubbly paste that will work just as well. Vinegar can also be an effective cleaning agent, but it requires a little more elbow grease as drivers need to remove the entire lens and let it soak in a bath of distilled vinegar for an hour.
Dish soap also does the trick, but it is a less elegant and effective solution than others mentioned above. Those searching for a little novelty in their car maintenance might want to try one of the more unorthodox methods: try good ol’ Coca-Cola. The soda’s acidic nature can quickly clean up foggy headlights, though experts recommend opting for Diet Coke as it leaves less sugary residue behind. Just pour it into a spray bottle, mist the headlights and let them sit for a minute or two before wiping everything up with a soft microfiber cloth.
The Sandpaper/Headlight Restoration Kit Method
Drivers looking to do a more thorough job of headlight restoration have two options: the sandpaper method or investing in a headlight cleaning and restoration kit. We’re combining these two approaches as they’re largely the same. The typical headlight restoration kit combines the sandpaper method with polishing compounds and UV-resistant sealant to create an all-in-one package. There’s nothing wrong with going the store-bought route, and it might be the cheaper option for drivers who don’t already have a variety of sandpaper and sealants on hand. Let’s go through the method step-by-step.
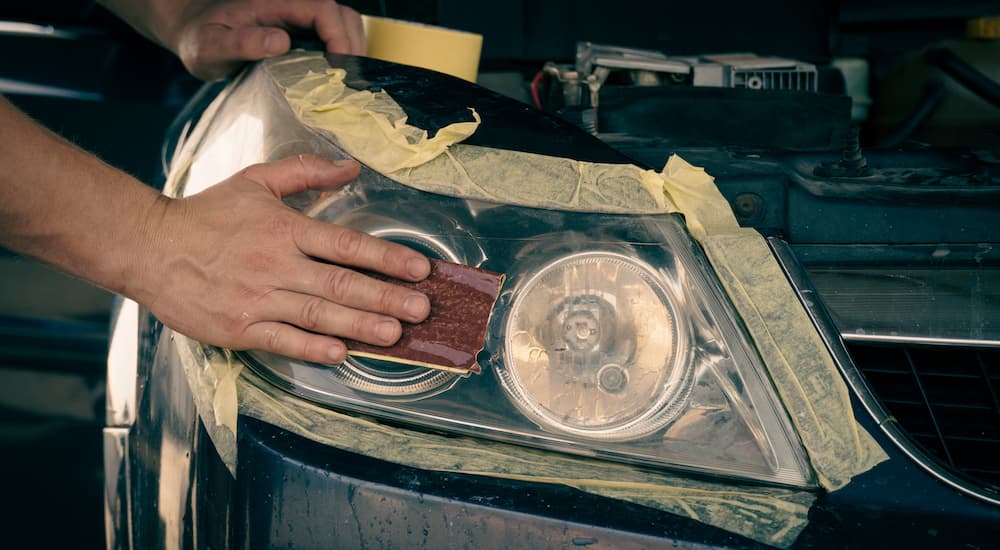
Start by giving your headlights a thorough cleaning using warm, soapy water. Rinse with clean water, then let the headlights dry on their own or speed up the process using a soft microfiber cloth. Also, make sure to wash the area of the vehicle immediately surrounding the headlights, as it’ll make things easier with the next step. Since this method is based primarily on vigorously sanding your headlights, it’s important to ensure that other areas of the vehicle aren’t affected. Use a less-sticky tape like masking or painter’s tape to tape off the area immediately surrounding the headlights. Two inches wide should do the trick, and you won’t have to worry about hurting your paint job as you try to bring your headlights back to life.
The sandpaper will do the brunt of the work when it comes to restoring your headlights, but it’s important to take a gradual approach. You’ll want at least three sandpapers or gradually higher grits: 600, 1,000, and 2,000, for example. Make sure to soak the sandpaper strips in water before you begin. This wetted sandpaper will prevent scratching due to particle buildup. Start with rougher sandpaper, like 600 grit (or 400 grit for exceptionally cloudy headlights), and work the lights over in straight, horizontal lines. This rough sandpaper might make the situation seem worse in the short term as it roughs up the lenses, but it’s an important part of the process. For best results, apply light pressure and repeat this motion for five to 10 minutes before moving on to the next finer grit of sandpaper.
When you move on to the 1,000 grit sandpaper, it’s important to give the lights a quick rinse and switch up your sanding motion from horizontal to vertical. Also, spray the headlights with water to prevent deep, damaging scratches to the lens. Once you’ve accomplished all you can with the 1,000 grit paper, switch it out for the 2,000 grit paper and go back to using a horizontal sanding motion. As you move on to finer grits of sandpaper, you should see the cloudiness disappear from the headlights, so keep sanding until you’ve achieved the desired results.
Sandpaper can work wonders, but it’s no substitute for a good headlight polish and wax. The second-to-last step in the headlight restoration process is applying polish and wax to add a little shine back into your old headlights and prevent future damage from taking hold. After you’ve cleaned and dried your headlights following the sanding step, use a soft flannel cloth to apply headlight polish in a firm, circular motion until you’ve achieved a satisfactory result. Again, this step can be performed using power tools like an orbital buffer, but a little swatch of flannel and some effort will give you much the same result. Those seeking additional protection can follow the polish-up with a waxing compound. The same type you use on the vehicle itself is fine, but it’s not the most essential step.
All that sanding probably removed any trace of the UV sealant that once protected your headlights, so finish up the process by replacing it with a fresh coat. Unlike the wax, this step is highly recommended as, without it, you’ll be undertaking the whole headlight restoration process before you know it. It’s as easy as rubbing the compound into the headlights using a soft towel or cloth, but read the directions on the bottle as some products require multiple coats while others need only one application. Once the process is finished, remove the protective tape around the headlights and park the vehicle out of the sun and away from the elements as the various chemicals cure.
An Important Part of Vehicle Maintenance That Is Cheap and Easy
With a little effort and some household supplies, restoring your old, worn-out headlights is a simple, cheap way to improve visibility and safety when it comes to nighttime driving. Brighter headlights will do a better job of illuminating the road ahead and alerting other drivers to your presence. It’s one aspect of regular vehicle maintenance that often gets overlooked in favor of detailing and wax jobs but can prove important and even potentially life-saving in certain scenarios.
Breathing new life into your cloudy, fogged-up headlights is also a great way to improve a vehicle’s curb appeal, which could go a long way in making a sale when it finally comes time to part with your vehicle. Best of all, it’s one of the cheapest fixes you could ever hope to encounter, requiring little less than some simple tools and household items. Make headlight restoration a regular part of your maintenance schedule, and your vehicle is sure to have a bright future.