A vehicle’s engine is basically a large pressure chamber. Air and fuel are drawn into each of the engine’s combustion chambers, called cylinders, which compress the fuel and air mixture before introducing a spark. This spark creates a small, controlled explosion, driving the piston down into the cylinder and setting off a chain reaction that ends in your vehicle moving down the road. This process is repeated tens of millions of times over the life of a typical engine, but eventually, these explosions can start to take their toll.
The heavy-duty components within your vehicle’s engine are designed to withstand the extreme force of the internal combustion process, but nothing lasts forever. Piston rings, valves, and cylinder walls are all prone to wearing out or breaking over time, compromising the sealed pressure chamber environment of the cylinders—resulting in decreased engine performance.
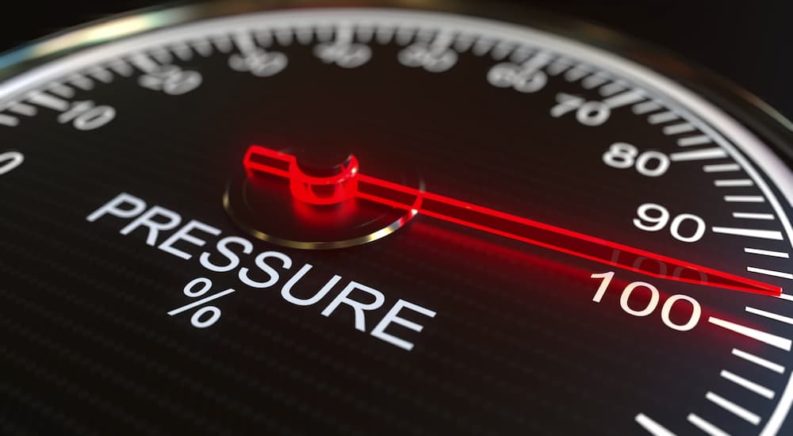
There are two basic tests you can perform to determine if your engine’s cylinders are properly sealed: a compression test and a leakdown test. The tests differ in some important ways, but rely on the same basic principle: You attach a device in the hole where a spark plug is normally located, introduce pressure into the system, and take a reading off the device’s pressure gauge. The compression test is the more common of the two, requiring less specialized equipment than the leakdown test, but both are valuable ways of tracking down potentially serious engine problems. Let’s take a closer look at the step-by-step process for using a leakdown tester, how to interpret the results, and some common signs of an engine that is lacking compression.
How to Perform a Leakdown Test
First, a quick overview. As I mentioned, a leakdown test is performed in order to determine if each of your engine’s cylinders are properly sealed. This is done by introducing compressed air into the system, then using the gauges on the leakdown tester to determine how much air is lost. The gauge will display cylinder pressure in PSI, so it’s really as easy as determining which cylinder has conspicuously lower pressure than the rest. In addition to spitting out a raw PSI, the leakdown tester can be used to perform an auditory diagnostic test; this can be really useful for tracking down specific pressure-related issues.
A compression test works in much the same way, except that instead of using compressed air to introduce pressure into the system, you simply fire up the engine. This method can be a little more convenient as it doesn’t require an external source of compressed air, but it’s more limited in its diagnostic potential since there’s no opportunity to use the hearing-based test described above.
Step-by-Step
Step 1: Gather tools and supplies. In addition to a leakdown tester and compressed air source, you’ll also need some basic automotive hand tools, your vehicle’s service manual, a pen and paper, and a specialized socket for removing spark plugs. The spark plug socket isn’t a dealbreaker, but it can come in handy—and will decrease the likelihood of spark plugs breaking during removal and installation. You’ll also want to warm up the engine so the piston rings have a chance to seal. Shut it off before the test begins, but be careful, as it means the engine could still be quite hot during the rest of the procedure.
Step 2: You’re going to be testing each cylinder individually, starting with the first cylinder. It’s not vital that you start with cylinder #1, but it’ll be easier to keep track of that way. As a general rule, cylinder #1 is usually the front-most cylinder in the array (which is to say, the furthest from the driver). Cylinders usually alternate on each side following #1, so all the even-numbered cylinders will be on one side and vice-versa. Use the spark plug socket to remove the spark plug from the cylinder.
Step 3: In order for the leakdown test to provide accurate results, it’s important that the cylinder you’re testing be in what’s called top dead center (TDC). This means the cylinder head is raised as far as possible within the cylinder in order to leave the minimum amount of space. There are a few ways to ensure the cylinder is in TDC, but the easiest involves inserting a long screwdriver into the spark plug hole and turning the engine by hand using a socket wrench on the crankshaft. Rotate the crankshaft clockwise (never counterclockwise) until the long screwdriver reaches its highest possible point—where it’s no longer rising or falling—and you’ve arrived at TDC.
Step 4: Most leakdown testers will come with a few different attachments for affixing the unit to the spark plug hole. Test them out to see which one fits and connect the gauge to the spark plug hole. Put the vehicle in gear and set the parking brake to prevent the compressed air from turning the engine over while you’re working. Leakdown testers feature two gauges: one on the left which measures air pressure from your compressed air source and another on the right which displays the percentage of pressure that’s being lost in the cylinder. Calibrate the leakdown tester by turning the regulator knob until the gauge on the right side reads zero, and then connect your compressed air source.
Step 5: If everything is connected properly, the gauge on the right should display the percentage of pressure loss in the cylinder you’re testing compared to the incoming pressure from the air compressor. Don’t be alarmed if there’s a small amount of leakage; this is normal. A loss of between 5 and 10 percent is considered fairly normal and is no cause for alarm, but if that number starts to creep up into the 15 to 20 percent range, you’re likely dealing with some sort of compression-related issue. It’s also important that each cylinder is in relatively the same range when it comes to leakage, so make sure to test every cylinder. A variation of 3 to 5 percent is normal, but anything greater could indicate a larger issue.
Auditory Test
So you’ve performed a leakdown test and discovered that one—or several—of your cylinders isn’t holding the proper pressure. That’s a useful fact to know, but it’s just a first step. Unless you want to take your engine apart to get to the bottom of the issue, the next logical step would be to use the leakdown tester to perform an auditory diagnosis. It’s as simple as introducing pressure into the system and then listening for the tell-tale leak. The specific location of the leak provides valuable insight into the root cause of your compression issues, so let’s get into some of those below.
Oil System
Check the oil dipstick, oil cap, positive crankcase ventilation, or road draught tube. If introducing air pressure into the cylinder results in air escaping from any of these components, you’re likely looking at worn or broken piston rings. The cylinder itself could also be deeply scratched or otherwise damaged, though this is less common.
While components like the oil dipstick and oil cap are fairly well-known, the latter two might not ring a bell. The positive crankcase ventilation is a one-way valve attached to the crankcase and the road draught tube is a pipe that runs down from the crankcase or valve cover. Refer to your vehicle’s owner manual for the specific location of these components in your vehicle.
Coolant Tank
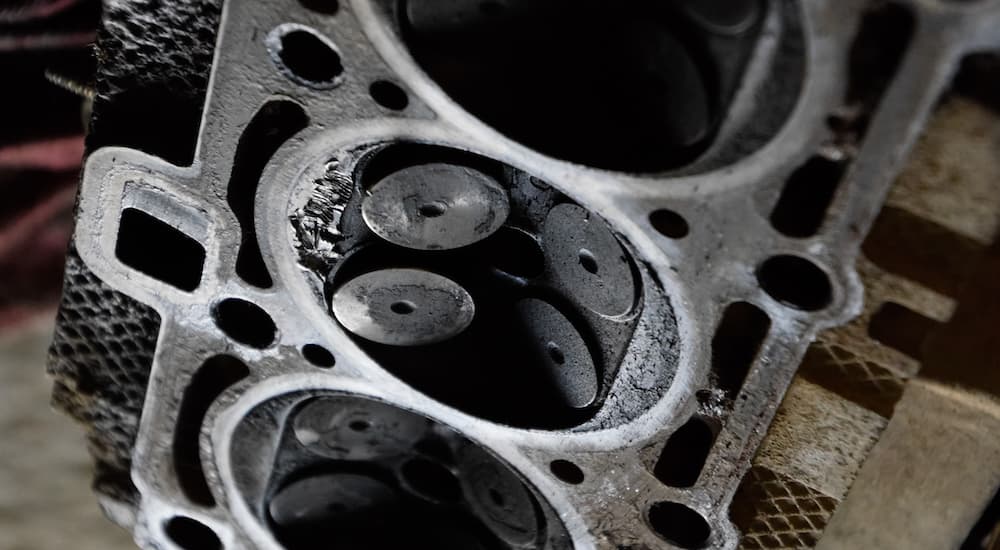
If you notice bubbles or signs of increased pressure in your vehicle’s coolant tank, you could be dealing with either a faulty head gasket or cylinder head. The coolant tank is easily visible in most engine compartments and often looks like an opaque plastic jug filled with orange, pink, green, or yellow fluid. Look for bubbles in the fluid—or a hissing noise and bubbling from the coolant tank cap—when trying to diagnose a compression-related issue. The head gasket is a thin layer of steel, rubber, or silicone that’s bolted between the two largest components in your engine: the engine block and cylinder head. The head gasket plays a vital role in creating a seal between the two elements and ensuring consistent pressure in each cylinder.
Intake Valve
Located on your engine’s cylinder head, the intake valve is responsible for allowing air to flow into each cylinder during step one of the four-stroke internal combustion process. It’s a large aperture, so it can be difficult to tell if air is escaping by sound alone, but just put your hand over the valve while pumping air into the system and you should be able to feel the pressure on your hand (alternatively—and more fun—squirt a little soapy water into the valve and watch for the bubbles). Air escaping from the intake valve probably points to an issue with either the intake valve seat or a bent intake valve.
Exhaust Outlet or Manifold
This one is just the intake valve in reverse. The exhaust outlet or manifold is where the spent air-fuel mixture escapes after the fourth and final step of the four-stroke process. Much like the intake valve, if you notice air escaping from the exhaust outlet or manifold you’re likely dealing with a worn exhaust seat or bent valve.
A Cylinder (But Not the One You’re Testing)
Performing a leakdown test is a step-by-step process that involves testing each cylinder individually. In theory, each cylinder will be its own sealed chamber, but if you’re dealing with a faulty head gasket or warped cylinder head, that might not be the case. These two malfunctions can cause air to escape not from the cylinder itself, but the adjacent cylinders to either side as it works to find the path of least resistance.

When Is It Needed?
There are a few tell-tale signs that your engine is suffering from low compression. These include the obvious—like an engine that won’t start—to the more subjective, like a vehicle running a little rougher than normal. The most common symptom of low compression would be a vehicle that consistently misfires. You may notice this misfire manifesting as a lack of power and acceleration, but it may also come to your attention in the form of an illuminated check engine light. While it can vary between makes and models, the diagnostic trouble codes (DTC) most associated with misfiring include P0300, which indicates a nonspecific misfire on one or multiple cylinders—or a code like P0302, P0304, or P0308, which would indicate specific misfires on cylinders 2, 4, or 8, respectively. Reading these codes is as easy as pulling up to your local auto parts store or investing in a $10-$20 Bluetooth DTC reader; you can easily find one online.
Other signs of low compression can be a little harder to pin down, as they can be symptoms of a wide variety of automotive issues. If your vehicle is running rougher than normal, hesitates on acceleration, or struggles to reach higher speeds, you could be dealing with a compression issue. If the vehicle turns over quickly but doesn’t actually start, it could be a sign that your vehicle lacks any compression at all. This can be confirmed by performing a leakdown test, but usually indicates a much larger issue.
As is the case when it comes to diagnosing many vehicle-related issues, it can often be tough to know what’s normal versus when you should truly be alarmed. The best advice is to keep close tabs on your vehicle, listen to how it runs, and then note the specific sights, sounds, and even smells it exhibits when it’s in proper working condition. This can make it much easier to identify when something is wrong—and save you a lot of stress, and money, in the long term.
A leakdown test is an easy way to track down potential compression-related issues from the comfort of your own home. While it does involve some specialized equipment like an air compressor, it could still be cheaper than paying by the hour to have a mechanic track down the problem. An air compressor can actually be a great investment for an ambitious DIY mechanic, allowing you to use a variety of compressed air tools that will make life under the hood a whole lot easier.
While you (hopefully) won’t be performing leakdown tests too often, it can also be used to power everything from impact wrenches and grinders to belt sanders. Not to mention, it’s useful for topping off your tires. Interpreting the results of a leakdown test can be a little tricky at first, but as you gain experience you’ll develop a better sense of how things are supposed to work. Soon, you’ll be able to discern a faulty head gasket from a leaky intake valve with ease.