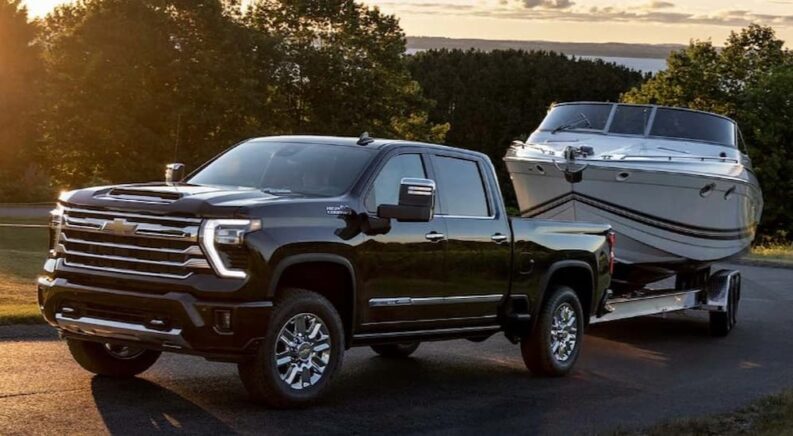
Whether you’re hauling a boat out to the lake, hooking up a camper for a wilderness adventure, or transporting landscaping equipment, being able to tow a trailer can go a long way in upping a vehicle’s utility. A good trailer is a worthwhile investment for any truck or SUV owner, transforming a daily driver into the ideal rig for both work and play.
The rules and regulations around towing vary by state, with different jurisdictions limiting the size and weight of trailers. That said, there is one law that’s always going to be applicable no matter what corner of the country you find yourself cruising through: all trailers must be wired to the tow vehicle. This wiring is primarily used to link the trailer’s turn signals and brake lights to the vehicle, making it a vital part of automotive safety.
Wiring a trailer might sound like a technical, complicated process, but in reality, it’s usually a task that’s well within the reach of the average driver. Before you set out on your next work call or weekend adventure, take a few minutes to brush up on some of the basics with our guide to trailer wiring.
Types of Trailer Wiring Connectors
From simple designs that use just four wires to complex systems that boast up to seven connections, trailer wiring setups vary widely when it comes to functionality. No matter what design you opt for, most systems will be based around a wiring harness that allows the electrical system to be easily unplugged when the trailer isn’t in use. A flat, four-pin connector is the most common design, though some vehicles and trailers employ a more complex connector with six or seven pins. Let’s start by taking a closer look at the different types of trailer wiring options and see which might be the right type for your purposes.
Four-Pin Flat Connector
As we mentioned above, the four-pin connector is the most common trailing wiring harness you’ll find on the market today. The design might be simple, but it covers all the basics, allowing a vehicle to relay its braking and turning signals to the back of the trailer, where they can be easily spotted by tailing drivers. The right and left turn signals––which double as the brake lights––are connected through green and yellow wires, respectively, while a brown wire operates the taillights and a white wire is reserved for grounding the system.
Thanks to the male/female design of the connectors, these wiring harnesses cannot be incorrectly attached no matter how hard you try, but knowing which wire is responsible for which function can be helpful when it comes to troubleshooting electrical issues down the line. For example, if your left turn signal isn’t functioning properly, tracking down the issue can be as easy as looking for a frayed, cut, or otherwise compromised yellow wire.
Five-Pin Flat Connector
A five-pin connector adds an important function to the trailer wiring system: brakes. In most jurisdictions, any trailer with a Total Gross Trailer Weight (TGTW) above 3,000 lbs is required to have its own braking system. Even in areas where this isn’t the letter of the law, it’s still a good idea, giving you more control over your trailer and improving overall safety.
Commonly found on boat trailers, this fifth wire is usually blue and is typically incorporated into the same sort of flat connector used for four-pin designs. In addition to supplying the power necessary to operate the brakes, this blue wire can also be used to disable the braking system and indicate movement when the vehicle is put into reverse.
Six-Pin Round Connector
When trailers and campers get above a certain size, they tend to swap the typical trailer hitch ball mounts for a more robust type of connection known as a gooseneck. The gooseneck design, which gets its name from the unique, curving section at the front of the trailer, arcs over the tailgate of a truck, connecting to a frame-mounted hitch in the bed that’s located just above the rear axle. This approach makes for a much more stable towing experience, giving drivers more control and less trailer sway than they would experience with a conventional trailer hitch.
These larger trailers usually use six-pin connectors that swap out the flat design of the four and five-pin models for a round plug and add a black wire in the process. This black wire is designed for auxiliary power, allowing drivers to enjoy 12V power directly from the trailer or camper. This auxiliary connection can be used to power any number of accessories, such as an electrical jack, and also serves to top off the trailer’s own battery.
Seven-Pin Round Connector
Typically reserved for large trailers, campers, and other power-hungry towables, the seven-pin round connector can vary widely between different makes and models. Generally speaking, the additional purple wire is used to activate a trailer’s backup lights, though that’s not always the case. These connectors also come in a variety of styles, from plugs with round prongs to a traditional RV blade style. With so many different options out there, it’s important to thoroughly read the documentation accompanying your trailer and vehicle to confirm the purpose of each wire.
How to Install
If you’ve purchased a pickup truck, SUV, or any other type of towing-capable vehicle, chances are it’ll come pre-installed with a four to seven-wire harness that makes the process as easy as connecting two ends of a color-coded plug. The process can become a little more complex for vehicles without an existing external wiring harness. The true DIY approach requires some basic electrical skills as well as a few specialized tools that include wire strippers, soldering irons, a drill, and adhesive-filled shrink tubes. However, there are also plenty of readymade trailer wiring kits on the market that take a lot of the busywork out of the process.
These kits are usually designed for a specific make, model, and year, so it’s important to make sure you select the appropriate product if you want to avoid a mid-project trip to the auto parts store. Known as a T-connector vehicle wiring harness, this type of kit includes everything you need to wire up a trailer to your vehicle’s existing wiring harness. The kits are quite affordable and don’t require any fussy cutting, splicing, or soldering on the part of the driver.
Instructions vary based on the specific wiring harness kit, but generally speaking, the process begins by locating the vehicle’s wiring harness, which can be found behind the tail lights. Simply remove the taillight housing or access it from inside the trunk or bed and find the wiring plug that feeds into each light. Disconnect the plug and attach it to the included T-harness, then reconnect the newly merged plug and harness right back where you found it. You’ll now have a second wire that can send a braking or turning signal to your trailer lights.
Repeat the process for the opposite side, and once you’re done, find a patch of bare metal in the vehicle where you can connect a grounding wire. You’ll now have a fully functioning trailer wiring harness that can easily be stowed away when not in use. When it comes time to hook up a trailer, just pull out the connector, make the connection, and you should be good to go. However, some older vehicles might not have a compatible electric connection, in which case you’ll need to visit a mechanic or call an electrically gifted friend for a little assistance.
Most trailers, campers, and the like will come pre-wired with a suitable wiring connection, but if not––or if you’re looking to replace an existing system––there are plenty of kits for that end of the project as well. Trailer wiring kits are a little bit simpler than the vehicle-side version, consisting of a length of color-coded wires with a connector on one end. These kits aren’t difficult to figure out, but they can require some patience to install correctly.
Wiring Your Trailer Should Be No Sweat
Wiring your trailer for brake lights and turn signals isn’t just a good idea; it’s the law. If you don’t give a trailing vehicle a little heads up when you brake or turn, you’re all too likely to end up in an easily avoidable accident. While the process might seem intimidating to the uninitiated, today’s wiring harness kits make the job easier than ever before. If the instructions that come with the kit aren’t clear, we’d recommend turning to the DIY mechanic’s most valuable resource: YouTube. A short instructional video should clear up any uncertainty, allowing you to rig your trailer for power with minimal fuss. Installing five, six, and seven-pin connectors can be a little more complex, but it should still be attainable for many drivers. One word of warning: if you’re wiring up a trailer with its own braking system, make sure you thoroughly test the connection before setting out on the road. But with a little elbow grease and the right kit, wiring your trailer should be no sweat.