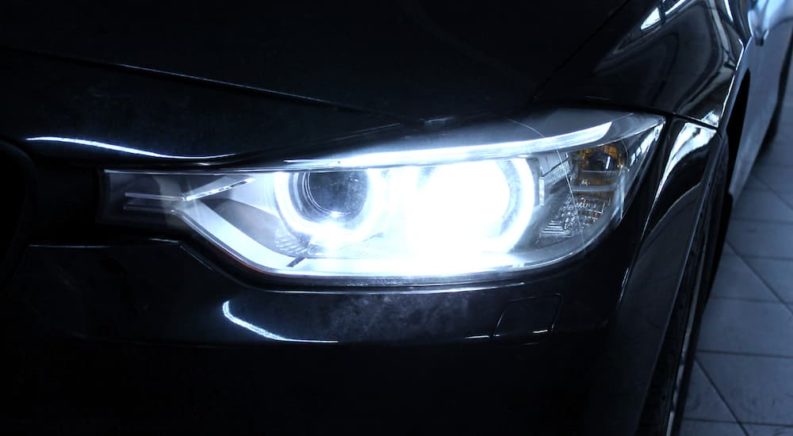
Is it time to upgrade your headlights? If you’re driving a car that has old, yellowish headlights, then the answer to that question is probably a resounding “yes.” Those older halogen headlights work well enough for a lot of city and daytime driving, but they fall short of the better options available today. If you live in a rural area, with few street lamps that come on at night, or somewhere with a light-pollution ordinance, then you’re much better off with High-Intensity Discharge (HID) lighting or Light Emitting Diode (LED) headlights on your vehicle.
You can look for HID or LED lighting specifically while shopping for your next vehicle, but they’re often part of an upgrade package that can add a lot to the price of your ride. Fortunately, there’s another option––one that works well if you already have a vehicle and want to make its lighting better: a headlight conversion kit. This lets you swap out older halogen headlights for the newer, more effective type of lighting. They’re relatively inexpensive, easy to install yourself, and can transform your driving experience at night.
Three Types of Headlights
Before we get into conversion kits, let’s briefly go over the three types of headlights out there and the pros and cons of each.
- Halogen Headlights – These are the traditional types of headlights that are still found in older vehicles or modern cars in a starting trim. They typically bounce light off a mirror behind the bulb to create a beam of light that illuminates the road. These are the least expensive option and cheap to replace; the downside is they create a yellowish type of light that only gets up to about 1,000 lumens of brightness and last about 1,000 hours.
- HID Xenon Lights – Prior to the development of LED headlights, these were the brightest upgrade available. These lights use a projector lens to create a targeted beam of light that shines further than halogen bulbs; they also create white light that’s closer to sunlight and less yellow. These are expensive to replace, but they can last up to 15,000 hours and can reach a brightness of 8,000 lumens.
- LED Headlights – The current trend for upgraded, brighter headlights, LED lighting creates bright, white light that’s similar to sunlight and can be highly focused. These can also be expensive, especially as an upgrade option that’s part of a package, but can last up to 45,000 hours and reach up to 10,000 lumens of brightness.
All three options are better than nothing, of course, but the classic halogen bulbs are definitely outshined by the other two. Personally, I prefer the look and longevity of LED headlights, but HID lighting is also a great choice. Largely, this comes down to what you prefer and your budget. In any case, if you have a vehicle with halogen lights and you want to upgrade, then you should check out a conversion kit.
Choosing the Right Conversion Kit
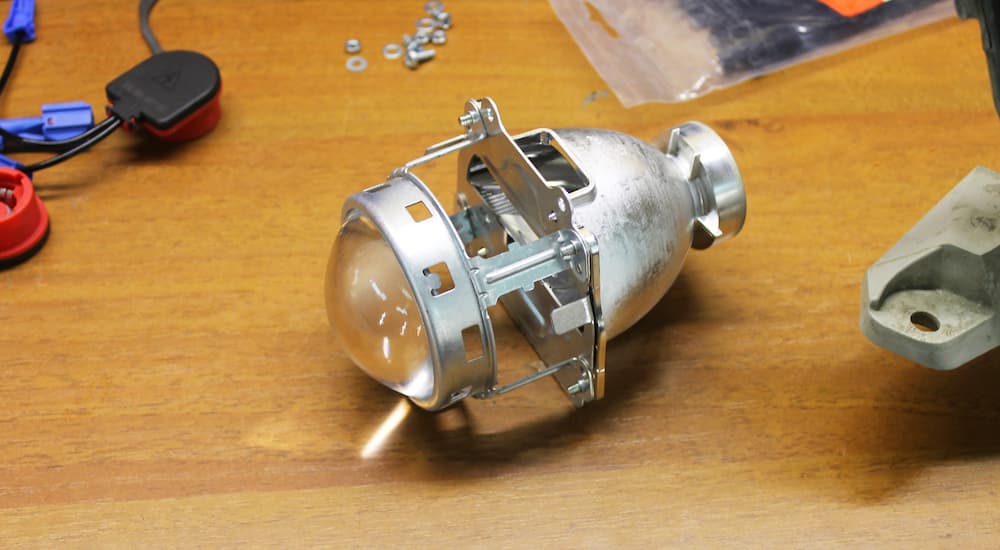
There are numerous conversion kits available from a wide range of manufacturers and sellers, but they’re all designed to do the same thing. You can’t simply swap out a halogen bulb for an LED headlight; they fit differently and require different power. With a conversion kit, however, you can use what you already have for halogen headlights and install new bulbs with a little extra hardware to make them function. There are both HID and LED conversion kits out there, so look at some comparisons of the light they create to see which you prefer.
Both types of conversion kits are pretty easy to install, and you can do it yourself quickly; just be sure to align them properly in the end. Depending on the vehicle you have and what your headlight enclosure looks like, you might need a couple of screwdrivers, but that’s about it for tools when installing a conversion kit. It’s also a good idea to have some sturdy double-sided tape or plastic zip ties for securing things in place (more on that down below). The actual installation process is pretty simple.
Easy Installation
First, you’ll need to determine what type of headlights you have: there are single-beam bulbs that use separate bulbs for the low and high beams, as well as dual-beam bulbs that use one bulb for both low and high. Once you know what you have, then you can look for an appropriate conversion kit with new HID or LED headlights for your vehicle. Order the kit you want, and when it shows up, be sure to take a minute to check that everything was included.
Next, it’s a good idea to shine your lights at a wall or something similar and take a few pictures to see what your current bulbs look like. Then, park your car on a level spot where it’s secure, shut it off, engage the parking brake, and give your bulbs a few minutes to cool down if you were just using them. When ready, pop your hood and find your headlights. There may be an enclosure around them that you have to open, which can require removing a few screws. This entirely depends on your vehicle, and you can check your owner’s manual or look online for details about how to get to your headlight bulbs.
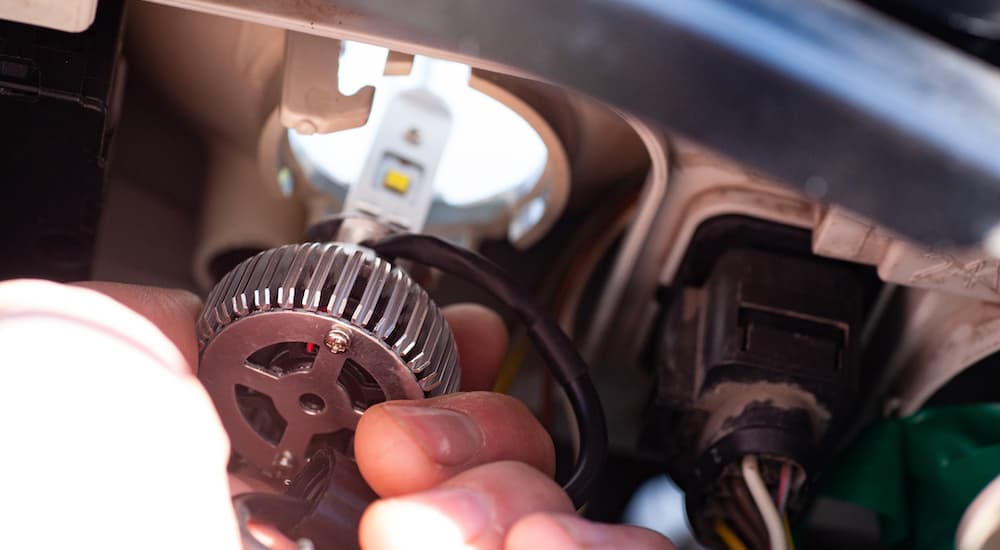
Once you reach them, simply disconnect your bulbs from the vehicle. There’s probably some plastic wiring connected to them, and there may be a tab that you need to lift with a flathead screwdriver to get them unplugged. Now you can simply unscrew your halogen bulbs from where they’re connected, just like removing any other light bulb––in some cases, there might be a metal clip here you need to unfasten too.
You can now install your new HID or LED bulbs. Since they’re part of a conversion kit, you should be able to simply screw them into place where you removed the halogen lights. Be careful not to touch the bulbs themselves with bare fingers, as your skin can leave grease and visible fingerprints on them. Secure the bulbs into place; now, there will be a secondary piece of hardware called a ballast that comes with your conversion kit. Connect this to your new bulbs and to the original wiring that connected to your old halogen bulbs.
Once connected, you need to secure the ballast so that it’s not just hanging loose. Find a spot where it’s not going to vibrate too much or be exposed to moisture or excessive heat, and secure it. You can do this with the double-sided tape or zip ties I mentioned earlier––taping it to the enclosure or housing for your headlights can be a great option. Finally, check to ensure your headlights are positioned correctly and not too high up by turning them on and seeing how high they shine. It’s best to do this with them aimed at the same wall you tested your old lights on in order to make sure they’re not shining higher than your other lights did.
Remember to Be Mindful of Others
This last step is the most important and one reason that some people prefer to let a professional handle a headlight upgrade. If your lights are too high, then you’ll blind oncoming traffic, and you can potentially cause a serious crash. You can adjust the positioning of your lights using alignment screens on the headlights––this can take several tries to get them where you need them to be, but it’s very important that you do this properly. If everything seems good, then it’s time to hit the road and check out how well your new lights illuminate things in front of you.
Conversion kits are a simple, inexpensive way to greatly improve your visibility while driving at night. About half of all fatal crashes occur at night, according to the Insurance Institute for Highway Safety, and nighttime fatalities for pedestrians and cyclists are particularly high. With HID or LED headlights, it’s a lot easier to see the road ahead of you, be aware of objects or people, and drive safely long after the sun has gone down. Just remember that your visibility is still limited compared to daytime, so be cautious, drive safely, and enjoy the road.