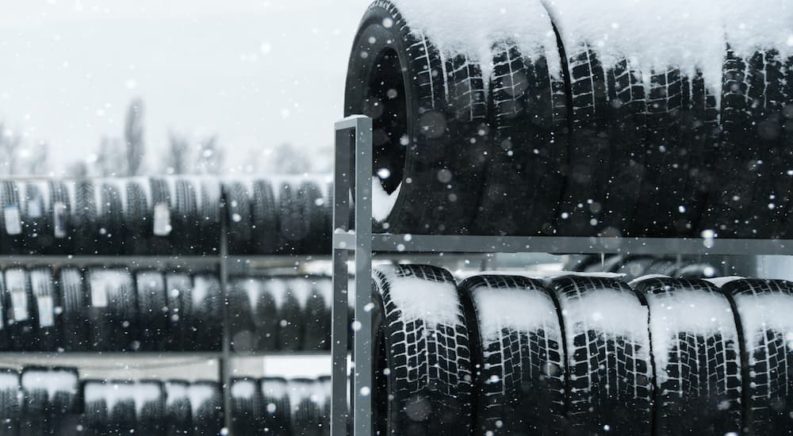
Winter tires are an invaluable addition to any garage, offering superb traction and reliability in snow and ice. They might not be cheap, but it’s important to think of them as an investment. While the $500 to $600 price tag might scare off some thriftier drivers, searching for a set of “winter tires near me” will more than pay for themselves if they can prevent a single accident. One way to keep the cost down is by installing and removing your winter tires on your own. If you have all the tools you need to replace a tire, this handy bit of DIY can easily save you over $100 a year. Not only that, but you’ll be able to avoid the scheduling headaches and long wait times at your local tire shop (though that will mean missing the chance to catch up on their generous selection of magazines from the late ’90s).
But why are winter tires so important in the first place? All tires offer different characteristics designed to accommodate certain driving styles and conditions, but winter tires are often among the most specialized. They’re not only made from different materials than all-season or summer tires, but they also differ in terms of their construction. When it comes to driving in wet, snowy, or icy conditions, it’s all about reducing the amount of moisture between the tire and the road itself. Modern winter tires accomplish this in a number of ways, primarily through the use of deeper, more aggressive treads that help improve acceleration while reducing stopping distance, but that’s only the tip of the iceberg.
Winter tires also feature special “sipes” (cuts in the tread itself), which aid in brushing water aside and improving grip on ice. The sawtooth pattern of these sipes increases surface area and outperforms the traditional straight sipes found on all-season tires. The tire’s composition also plays a big role in improving grip, with many winter tires opting to use silica in their rubber compounds as a means of increasing pliability in low temperatures. These attributes allow winter tires to improve stopping distance by as much as 20 feet, which could well be the difference that separates a major accident from a close call.
Like any investment, your winter tires should be protected. That means switching them out once temperatures consistently hit the 40-plus degree mark. Just make sure not to jump the gun when it comes to installing and uninstalling the tires. Put them on too early in the season, and you’ll wear out the tread, reduce fuel efficiency and make quite the racket when driving down bone-dry streets. Take them off too early, and you risk a late-season storm undoing all your hard work and preparation. In general, it’s a good idea to consider the weather in your area and plan accordingly.
Step-By-Step
Of all the basic repair skills for a driver to master, the ability to change tires is right at the top of the list. It’s not only useful when switching out tires for the season; it could also save you a costly roadside assistance call if you ever find yourself with a flat tire. While nominally a beginner-level repair, tire replacement does require a few specialized tools that you might not be familiar with. Let’s go over a few of those now, along with a basic how-to guide for switching out your own tires.
There are two routes to choose between when it comes to mounting winter tires. Drivers can either use the same set of wheels their all-season tires are mounted on or, as has become increasingly popular, invest in a second set of wheels dedicated for use with their winter tires. Opting for the latter option does mean an upfront investment in new wheels, but it will save time and money in the long run as tire shops will usually charge significantly more when dealing with unmounted tires.
Before you start, inspect your winter tires for any obvious damage. Mounted tires may have lost a conspicuous amount of tire pressure since the previous winter, so use a tire pressure gauge and take a quick reading before getting down and dirty. Once you’ve confirmed your tires are in good condition, get the vehicle prepped for the switch. Make sure the car is in park, engage the emergency parking brake, and place wheel wedges on the tires opposite the ones you’re changing. Any elevated vehicle presents some very real dangers, so it’s always better to make sure it’s not going to roll away when you’re working on it.
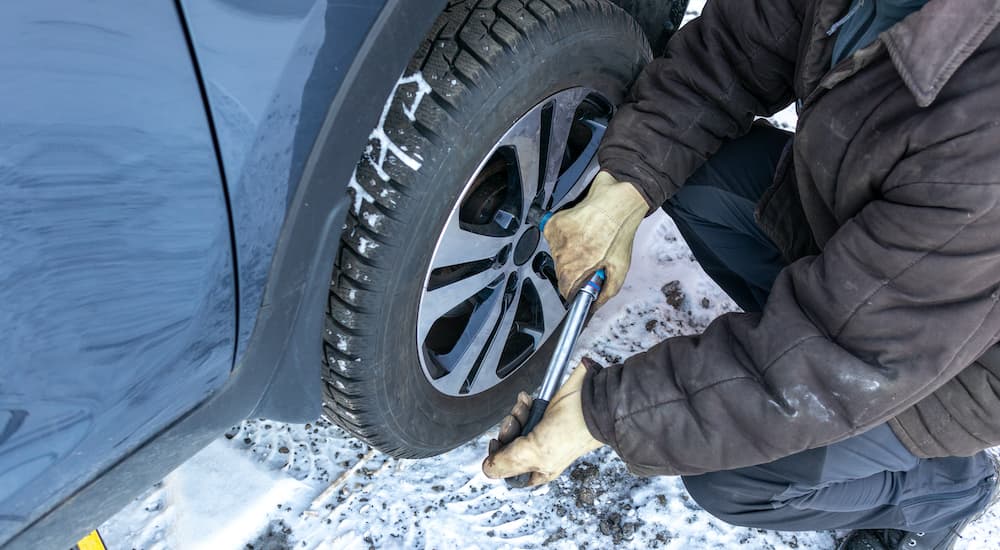
After you’ve confirmed the car is locked in place, remove the hubcap (if the wheel has one) and use a lug wrench, ratchet, or impact wrench to loosen the lug nuts initially. While any sort of wrench is fine for removing wheels and installing emergency spare tires, a torque wrench is a vital tool when it comes to reinstalling tires. Torque wrenches use clicks, a gauge, or a digital display to indicate exactly how much torque is being applied to the nut–an important consideration as most vehicles have very specific torque specifications that are nearly impossible to estimate by feel.
You won’t be removing the lug nuts all the way at this point because the weight of the vehicle actually makes it easier to loosen seized lug nuts, but getting them started while the vehicle is still firmly on the ground could save you some effort later on. Instead of proceeding clockwise, loosen the lug nuts in a star-shaped (ie: top left, top right, bottom left, bottom right, top) pattern for 5-bolt wheels and a cross pattern for 4-bolts to reduce stress and save yourself some elbow grease. Drivers using impact wrenches might be able to skip this step of initially “cracking” the lug nuts while the vehicle is still grounded, but for anyone using hand tools, it’s pretty much required. Don’t overdo it: give the bolts a modest quarter-to-half turn with the wrench before proceeding on.
On To the Main Event
Slide the car jack underneath the vehicle and find a suitable point to place it. All vehicles are different (check your owner’s manual), but you usually want to locate a reinforced portion of the vehicle’s frame directly behind the wheel well, taking care to avoid coming in contact with the molded plastic body that runs along the bottom of the vehicle. Many vehicles will have dedicated points where this plastic is interrupted to make room for jack points, so inspect the undercarriage thoroughly. While you can use the car jack that came with your vehicle, investing in a quality floor jack will save you a lot of time and frustration–just make sure you pay close attention to weight ratings when choosing one.
Before you start to raise the vehicle, double-check to make sure the jack is placed on a level surface, then get to cranking. You shouldn’t need to raise the vehicle more than a few inches to complete the wheel swap and any additional height just increases the risk of damage or injury.
Completely remove your loosened lug nuts using the star or cross pattern mentioned above and dismount the wheel itself. Important note here: when removing tires, use a tire crayon or chalk to mark each one with some sort of code indicating where it came from, like FL (front left) or BR (back right). This will save you a headache when reinstalling the tires and allow you to ensure an even wear pattern, making things easier come tire-rotation time.
Replace the all-season or summer tire with its winter counterpart and hand-tighten the lug nuts. At this point, you’ll want to lower the jack until the tire is touching the ground with enough resistance to stop spinning, but not all the way down. Use your lug wrench or impact wrench to firmly secure the lug nuts before lowering the vehicle all the way back on solid ground and doing the fine-tuning with a torque wrench. Remember, the feedback provided by a torque wrench is vital in meeting the wheels’ specific torque specifications, so definitely invest in one.
Complete the process for all four tires, and you’re ready to roll. Find a cool, dry place to store your all-season tires and if you really want to earn some brownie points, give them a little love before you stow them away. Make a quick pass with a brush to remove built-up grime, then bag each tire up in its own airtight bag. Try to remove as much air as possible, as this will slow the evaporation of oils from the tire’s rubber compound. Locate a good spot in your basement or garage, making sure to keep the tires away from furnaces, generators, sump pumps, or compressors that release rubber-damaging heat and ozone.

Practice Makes Perfect
Learning how to change your own tires might call for a few specialized tools, but it’s a very useful skill that’s sure to come in handy more than once. From roadside flats to seasonal tire changeovers, you’re unlikely to go more than a year without running into some tire-related issue, so make sure you’re familiar with the process before you suddenly find yourself struggling with a lug wrench on the side of a busy highway. While it might seem like a chore, winter tires are an important investment for any drivers regularly operating in harsh winter conditions.
The U.S. Department of Transportation estimates that almost a quarter of weather-related accidents occur in areas that receive five or more inches of snowfall each year, resulting in over 150,000 accidents, but a proper set of snow tires can drastically improve stopping distance and help you to avoid becoming a statistic. Being able to install your winter tires yourself will save you money, instantly defraying the cost of tire-changing tools you’ll need. Start familiarizing yourself with the tools and techniques for changing out winter tires, and you’ll be a seasoned pro by the time the snow starts to fall.