Few drivers ever take a moment during their daily commute to appreciate just how much is going on under the hood of their vehicle. From cylinders firing hundreds of times per minute to spinning shafts, whirring pumps, and rotating belts, it’s a veritable symphony of automotive harmony…until something goes wrong. Today’s vehicles are a marvel of modern engineering, but their complexity can lead to plenty of frustration when that dreaded Check Engine light pops on.
Luckily, tracking down such issues is just a matter of learning to speak the car’s language, which means familiarizing yourself with diagnostic trouble codes (DTC). These five-character alphanumeric codes can go a long way in helping drivers to pinpoint a specific problem, saving them time––and money––that might otherwise be spent on a frustrating game of trial and error. So what are DTCs? How were they developed, and how can the average driver use them to gain a deeper understanding of their vehicle’s condition?
History of the DTC
The predecessor to modern computer diagnostics first hit the market in 1981 when GM introduced its Computer Command Control system, which included a five-pin Assembly Line Diagnostic Link (ALDL) interface. The proprietary system could be used to access and modify a vehicle’s powertrain control modules and fulfill some basic diagnostic duties. It wasn’t long before a number of other automakers followed GM’s lead, introducing a range of offerings that would make up the first generation of onboard diagnostic systems that have retroactively been dubbed OBD-I.
The fledgling OBD-I system got a shot in the arm from the California Air Resources Board in 1988 when it introduced a new requirement that all new vehicles sold in the state had to include some sort of OBD capability as part of the state’s emissions testing program. The system was not yet standardized, which led to some headaches for mechanics as each automaker tended to use its own DTC connectors, ports, codes, and procedures. In some vehicles, DTCs were actually “read” by interpreting the pattern of a flashing Check Engine light or, on some more advanced vehicles, through the same LCD display used for the climate controls.
California continued to be the driving force behind the OBD push, issuing new mandates that required all new vehicles to be fitted with OBD-II systems in 1994. A standardized 16-pin connector was introduced by the Society of Automotive Engineers (SAE), allowing mechanics to access DTC without investing in a bunch of specialized equipment for each make and model. The new OBD-II protocols were also much more detailed, giving mechanics the ability to dive into a vehicle’s diagnostics without translating the ad-hoc Morse code of the Check Engine light. The rest of the country followed California’s lead, and in 1996, OBD-II ports were required on all new vehicles.
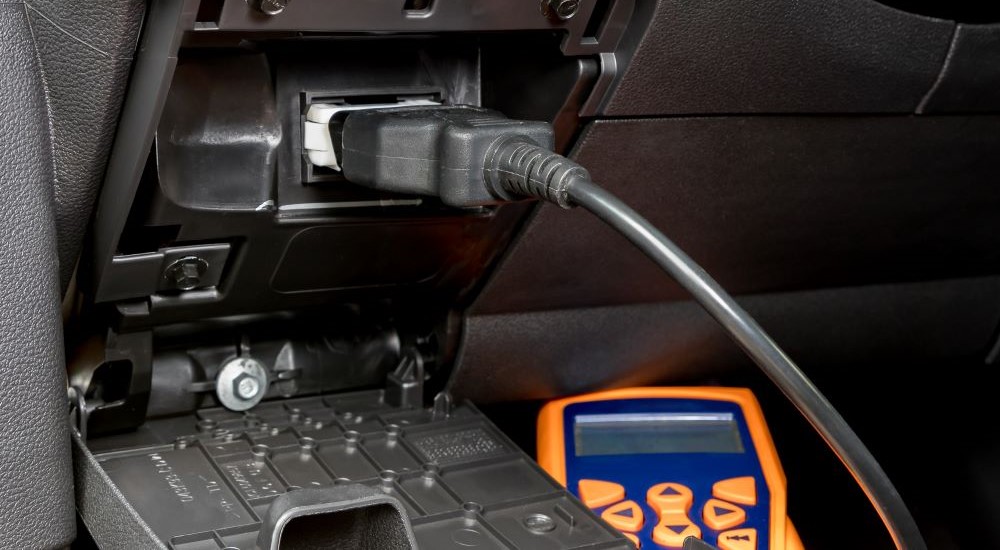
OBD-II remains the gold standard for onboard diagnostics to this day, but the way in which the codes are read has changed significantly in recent years. OBD-II scanners were once much too expensive for the average driver or DIY mechanic, but a new generation of affordable, consumer-grade scanners has made getting a peek inside your vehicle’s brain easier than ever. Smartphones have also been a boon for interpreting DTCs, as a number of brands now make a Bluetooth-connected OBD-II scanner that lets drivers read and reset codes––and even track performance––for as little as $20.
Types of DTC
Before we get into the specifics of translating DTCs, let’s take a second to break them down into three major categories.
Pending Code
If your vehicle has detected a potential issue but still isn’t quite sure there’s a problem, it might display what’s known as a pending DTC. A pending DTC will not cause the Check Engine light to come on, but it can be read using some OBD-II scanners. Most codes start out as pending until a vehicle can confirm that an issue does indeed exist, although that’s not always the case. A pending DTC can usually be ignored until it is upgraded to a stored code, but it’s always helpful to be aware of a potential issue before it spirals out of control.
Stored Code
The most common type of code you’ll encounter is what’s known as a stored code. These codes are generated when a pending code doesn’t resolve itself over time or passes a certain threshold. Stored codes indicate an issue that requires immediate attention and will always cause the Check Engine light to illuminate. Stored codes can be read by all OBD-II scanners, which can also be used to clear the codes. Most stored and pending codes can also be cleared by disconnecting and reconnecting a vehicle’s battery, but this step should only be taken for diagnostic purposes or if you’re positive that the DTC was generated in error.
Permanent Code
You might think you have a pretty close connection with your vehicle until it starts snitching on you with a permanent code. Unlike stored and pending codes, permanent codes cannot be cleared by using an OBD-II scanner or unplugging your battery. A permanent code will only be cleared once the underlying issue is addressed and the vehicle has gathered enough data to know that it’s gone for good. What’s with all the obnoxious honesty? Permanent codes are designed to prevent drivers from trying to pull a fast one during their vehicle inspection, locking serious codes in a sort of black box where they can’t be tampered with by less-than-honest owners. Permanent codes are usually triggered by emissions-related problems, which makes it more difficult to sneak through your next smog check.
![]()
Reading DTCs
You’ve got your hands on an OBD-II reader and want to figure out what triggered that pesky Check Engine light; what’s next? Well, there’s a lot of information packed into that little five-character alphanumeric code, but you have to know what you’re looking for. Each character in the DTC helps to narrow down the issue to a specific part of the vehicle, so let’s go one by one and see what we can learn.
First Character
The first character in a DTC lets you know what area or system is experiencing a problem. The most common DTCs start with the letter P, which indicates an issue affecting the vehicle’s powertrain. This could originate from the engine, gearbox, fuel system, or any other components involved in propelling the vehicle forward. If the DTC starts with the letter U, it points to an issue with the vehicle’s onboard computers. The letter B is related to the body or interior, and C is reserved for issues with the chassis, including brakes, steering, and suspension.
Second Character
Some DTCs are universal, while others are specific to certain automakers, which is something you can determine by looking at the second character of the DTC. If the second character is a number 0, the DTC is a generic code standardized by the SAE and shared by all vehicles. If the second character is a 1, it means that the code is specific to a certain manufacturer. A 2 or 3 can mean either a generic or a specific code. The numbers 0 and 1 are fairly common, while 2 and 3 are rarely seen, but it’s a helpful bit of shorthand that will come in handy when you research the specific code later on down the line.
Third Character
The third character is where the code starts to get more specific as it points to a particular system within the vehicle. If the third character is a 1, for example, you’re dealing with an issue affecting the fuel or air metering system. A number 2 means something is wrong in the air or fuel injection process, while a 3 signals a problem with the engine ignition system, and a 4 suggests a problem related to emissions. Number 5 has to do with the vehicle speed control system, 6 is related to the vehicle’s computer, and numbers 7 and 8 are both tied to the transmission.
Fourth and Fifth Characters
Finally, there are the fourth and fifth characters, which tell you what the specific issue within the affected system might be. Known as fault index numbers, these usually number 00 to 99. That’s a few too many issues to break down one by one, so instead, let’s use what we’ve learned so far to break down a common DTC.
Breaking the Code
Say you’re on the way to work, and that dreaded Check Engine light pops on. After stopping by your local auto parts store for a free DTC scan or using your own OBD-II reader, you discover you’re dealing with a P0420. The first letter tells us that it has to do with the vehicle’s powertrain, and the second digit means that you’re looking at a universal code common to all vehicles. As you’ll remember, the number 4 in the third character means an emission-related issue, while the number 20 pinpoints the catalytic converter as the culprit. Translating that whole code will tell you that you’re dealing with problematically low oxygen levels in your catalytic converter. Failure to address this code could result in decreased performance, increased emission, and, if not dealt with promptly, a broken catalytic converter.
In order to understand what the DTC means and what sort of fix you’re looking at, you’re going to need to look up the code itself. This can prove a bit tricky, as some codes are universal and others are unique to specific brands, but a quick internet search of the code, along with the make and model of your vehicle, should turn up a treasure trove of info. If you’re looking for a more seamless experience, we’d recommend investing in one of the smartphone-based OBD-II readers we mentioned earlier. Unlike the cheaper OBD-II scanners on the market that do little besides displaying the code itself, many of these Bluetooth-connected apps can explain the DTC in plain English, help you gauge the severity of the issue, and even provide advice and cost estimates on potential fixes. Depending on the app, some features might be locked behind a paywall, but it’s still an improvement over frantically Googling random DTCs.

Deal With That Check Engine Light
At first glance, diagnostic trouble codes might make as much sense as ancient hieroglyphics, but once you take the time to learn the language, they can be a valuable part of your automotive education. Of course, simply knowing what the issue is isn’t going to make it go away, but it can be a useful way of knowing what you’re in for before you roll up to the mechanic. A garage will be all-too-happy to charge you upwards of $100 to diagnose a Check Engine light, but our suggestion would be to take half that fee and invest it in an OBD-II reader.
If you don’t want to take the plunge, most auto parts stores will run complimentary DTC checks and even give you a printout describing the issues and some potential fixes. This approach could save you a lot of time and money, especially when the code ends up stemming from something as simple as a loose gas cap (which is more common than you might think). Hopefully, this guide has shed a little light on the DTC system and given you the confidence to do a bit of the legwork yourself the next time you’re dealing with a Check Engine light.

